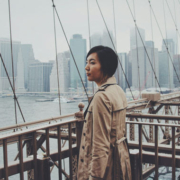
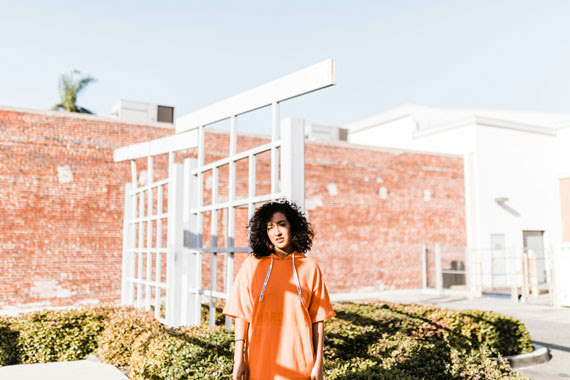
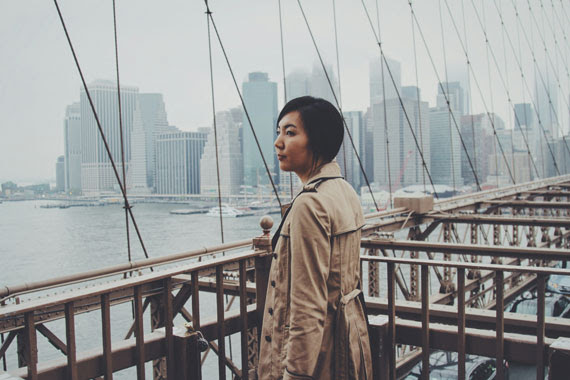
Best Spots for Street Photography in a City

Street photography is an art form that thrives on spontaneity, capturing candid moments of urban life that tell a story or evoke a particular feeling. While every city is unique, offering its own rhythm and character, there are common types of locations within any urban environment where street photographers can find compelling subjects and scenes. Here are some of the best spots in a city for street photography, each offering a window into the heartbeat of urban life.

1. Busy Marketplaces – silent corners

Marketplaces are bustling hubs of activity, color, and culture, making them perfect for street photography. They offer a variety of subjects in a single frame, from vendors and shoppers to a myriad of goods and the vibrant chaos of commerce. The interactions, expressions, and energy in marketplaces provide endless opportunities for dynamic shots.

2. Historic Neighborhoods

Every city has its historic quarters, streets that tell the story of its past. These neighborhoods often feature unique architectural details, old signs, and a sense of timelessness. Capturing life as it unfolds in these areas can create a fascinating contrast between the old and the new, offering a rich context for storytelling through photography.

3. Public Squares and Parks

Public squares and parks are gathering places for people from all walks of life. They serve as stages for a range of human activities — kids playing, couples relaxing, individuals lost in thought, or public performances. The variety of backdrops, from manicured gardens to grand architectural features, can enhance the visual appeal of your photographs.
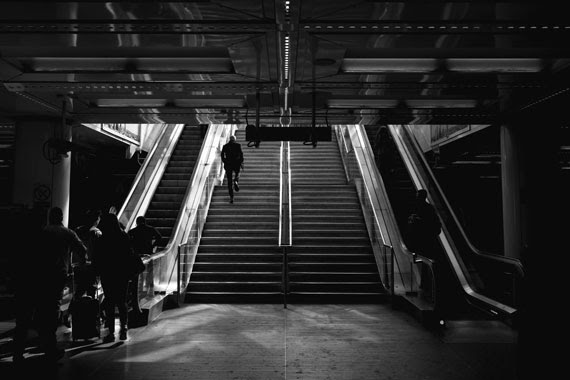
4. Transit Hubs

Stations, bus terminals, and airports are transit hubs where people are often seen in transition, offering a glimpse into the journey aspect of urban life. These locations provide dynamic environments for capturing people in motion, varied interactions, and a mix of emotions, from the joy of greetings to the sadness of farewells.

5. Street Corners and Crosswalks

The intersections of busy streets are prime spots for capturing the flow of city life. Pedestrians, cyclists, cars, and street vendors converge at these points, creating opportunities for photographers to capture movement, interactions, and the organized chaos of urban living.

6. Cafés and Restaurants

Outdoor seating areas of cafés and restaurants offer a more relaxed atmosphere for street photography. They allow you to capture people in a range of activities — dining, conversing, or simply enjoying the street scene. These spots provide a more intimate glimpse into the everyday life and culture of the city.

7. Cultural Institutions and Events

Museums, galleries, theaters, and venues for cultural events are not only architectural landmarks but also gathering spots for diverse crowds. During events, these places offer a mix of excitement, interaction, and the convergence of different cultures, ideal for vibrant and expressive photography.

Respecting Privacy and Ensuring Safety

While street photography is about capturing authentic urban life, it’s paramount to do so with respect for individuals’ privacy and dignity. Always be mindful of people’s comfort levels and avoid taking intrusive photos that could invade their personal space or cause distress. It’s about observing and documenting life, not violating privacy or exploiting moments. Additionally, prioritize your safety and be aware of your surroundings, especially in crowded or less familiar areas. Respect local laws and customs, and if someone indicates they do not wish to be photographed, honor their request without hesitation. By fostering an approach rooted in respect and ethical considerations, you can create compelling imagery that truly honors the essence of street life.

Conclusion

The best spots for street photography in a city are those where life unfolds in its most authentic and vibrant forms. While the locations mentioned above are typical hotspots, the true essence of street photography lies in the unexpected moments that you stumble upon. Always be ready with your camera, for the streets are alive with stories waiting to be captured. Whether you’re a seasoned photographer or new to the field, exploring these urban canvases can be a deeply rewarding experience, full of surprises and profound insights into the human experience.


Direct vs. Diffused Light in Photography

In the world of photography, light plays a pivotal role in capturing the essence and mood of a subject. The interplay of light and shadow not only defines the structure and depth of the image but also evokes certain emotions, making understanding its nuances crucial for photographers. Among the many characteristics of light that photographers must consider, the distinction between direct and diffused light is fundamental.

Advantages of Direct Light:

  1. Enhances Texture and Detail: Direct light accentuates textures and details in the subject, making it ideal for highlighting physical features and creating a sense of depth.
  2. Creates Drama: The strong contrasts and pronounced shadows generated by direct light can add a dramatic effect to your photographs, ideal for certain types of portraiture or dramatic landscapes.
  3. Control and Direction: Photographers can manipulate the direction and intensity of direct light, allowing for creative control over the composition and mood of the image.

Challenges with Direct Light:

  • Harsh Shadows: The intense nature of direct light can create deep, distracting shadows, particularly in portraiture.
  • Limited Latitude for Exposure: Direct light can lead to overexposed highlights and underexposed shadows, making it challenging to capture detail across the image.

What is Diffused Light?

Diffused light, on the other hand, is soft and evenly spread. It occurs when the light source is either naturally soft (like on an overcast day) or has been diffused through materials like a softbox or a sheer curtain. This type of lighting reduces the intensity of the light source and scatters it across a wider area, softening shadows and decreasing contrast.

Advantages of Diffused Light:

  1. Softens Features: Diffused light is flattering for portraiture as it softens skin tones and reduces the appearance of imperfections.
  2. Even Illumination: It provides even lighting, reducing harsh shadows and helping to maintain details in both highlights and shadows.
  3. Enhances Color: By reducing contrast, diffused light can help in capturing vibrant, saturated colors, ideal for nature photography or where color rendition is critical.

Challenges with Diffused Light:

  • Lack of Drama: While it’s excellent for even, soft illumination, diffused light can sometimes result in flat images lacking in depth and drama.
  • Reduced Texture and Detail: The very nature of diffused light that softens features can also diminish texture and fine detail in certain subjects.

Making the Choice

The choice between direct and diffused light should be dictated by the photographer’s artistic intent and the mood they wish to convey. For dramatic, high-contrast images, direct light can be incredibly effective. For softer, more evenly lit scenes, diffused light is preferable.

Understanding and mastering the use of both direct and diffused light can dramatically improve a photographer’s repertoire, allowing for greater creative flexibility and expression. By recognizing the impact of light quality on their subjects, photographers can choose the most appropriate lighting to complement their vision, enhancing the emotional impact and aesthetic appeal of their work.

In essence, both types of lighting have their place in photography, and the best choice depends on the context and the desired outcome of the photograph. Experimentation and experience are key in learning how to use light creatively and effectively to produce compelling images.

Key Aspects of Composition in Flower Photography

Flower photography is an art form that allows us to capture the delicate and ephemeral beauty of flowers. Whether you’re a professional photographer or an enthusiast capturing blooms in your garden, understanding the principles of composition can significantly enhance the impact of your photographs. In this blog post, we’ll explore the most crucial aspects of composition in flower photography to help you create stunning, evocative images.

1. Focus and Clarity

The focal point in flower photography is paramount. It’s essential to decide what part of the flower or scene you want to highlight. This could be the vibrant petals, the intricate patterns of the stamen, or even droplets of dew on the flower’s surface. A clear focus point draws the viewer’s eye and establishes the subject of your photograph. Employing a shallow depth of field can help isolate the subject, ensuring it stands out against a softly blurred background.

2. Lighting

Lighting can make or break a flower photograph. The best flower photos often utilize natural light, which can highlight the translucence of petals or cast fascinating shadows, adding depth and texture. The golden hours—shortly after sunrise or before sunset—offer soft, warm light that can enhance the colors and mood of your floral subjects. Conversely, overcast days provide diffused light that evenly illuminates a flower, minimizing harsh shadows and highlights.

3. Composition Rules

Understanding and applying composition rules can significantly improve your flower photography. The rule of thirds, for instance, involves dividing your image into nine equal segments with two horizontal and two vertical lines. Placing the flower or an interesting part of it at the intersections or along the lines can create a more engaging photo. Meanwhile, the use of leading lines or patterns can guide the viewer’s eye through the image, adding interest and movement.

4. Color and Contrast

Color plays a vital role in conveying the mood of your flower photographs. Warm colors can evoke feelings of passion and energy, while cool colors can impart a sense of calm and tranquility. Utilizing contrasting colors can make your subject pop and add vibrancy to your image. However, it’s essential to balance color contrast to ensure it enhances rather than overwhelms the subject.

5. Background and Context

The background can either complement your flower or distract from it. A cluttered or busy background can detract from the subject, while a simple, unobtrusive backdrop can make it stand out. Sometimes, including contextual elements like other flowers, leaves, or even the environment can add depth and tell a more compelling story. The key is to maintain a balance that supports the subject of your photograph.

6. Perspective and Angle

Changing your perspective or shooting angle can unveil a flower’s character in unique and unexpected ways. Don’t hesitate to experiment with different viewpoints, such as shooting from a low angle to capture the grandeur of a flower reaching towards the sky or getting close to reveal the intricate details of its texture and patterns. Each angle tells a different story and can evoke distinct emotions.

7. Simplicity

Sometimes, less is more in flower photography. A simple composition that emphasizes the flower without unnecessary distractions can be powerful. Simplicity often encourages the viewer to pause and appreciate the beauty and details that might otherwise go unnoticed.

In conclusion, mastering the aspects of composition in flower photography allows you to not only capture the beauty of your floral subject but also convey emotion and story. By focusing on these key elements, you can elevate your flower photographs from mere snapshots to compelling images that resonate with viewers. Remember, the best way to improve is to practice consistently, so don’t hesitate to explore, experiment, and let your creative vision flourish through your lens.

Subframing in Photography Composition

Subframing is a compelling composition technique that allows you to create more intriguing and layered images. By using elements within the scene to create a frame within the frame, photographers can guide the viewer’s attention, add depth, and enhance the storytelling aspect of their images. This blog post will delve into the concept of subframing, discuss its benefits, and provide tips on how to effectively use this technique to elevate your photography.

Understanding Subframing

Subframing involves using components of your scene to create a secondary frame within your image. This could be anything from architectural elements, like windows or doorways, to natural features like tree branches or rocks. By positioning these elements around the edge of your composition, you can isolate your subject in a way that draws the viewer’s eye directly to it.

Benefits of Subframing

  • Focus on the Subject: Subframing naturally draws the viewer’s attention towards the main subject, helping it stand out amidst potentially busy or distracting backgrounds.
  • Added Depth: Using elements in the foreground and background to create a frame adds layers to your photograph, enhancing its three-dimensional feel.
  • Narrative Quality: A frame within a frame can introduce context or suggest a story, adding a narrative element to your image.
  • Aesthetic Appeal: Subframing can add a creative and artistic touch, making images more visually appealing and engaging.

Tips for Effective Subframing

  • Look for Natural Frames: Pay attention to your environment and identify potential frames such as windows, archways, or foliage.
  • Experiment with Depth of Field: Using a shallow depth of field can blur the framing elements, placing greater emphasis on your subject while still benefiting from the subframe.
  • Consider the Light: Lighting can impact how your subframe and subject interact. For instance, backlighting can silhouette your frame, highlighting the subject inside.
  • Play with Perspectives: Changing your angle or perspective can turn ordinary elements into effective frames. Sometimes, getting lower or finding a higher vantage point can reveal framing opportunities.
  • Keep It Simple: While subframing adds complexity to your composition, it’s crucial not to overcomplicate it. Ensure that the framing elements do not overshadow the main subject.
  • Use Editing to Enhance: Post-processing can help refine your subframed shots. Adjusting contrast, sharpness, or vignetting can further draw attention to your framed subject.

Framing vs Subframing:

While both framing and subframing are compositional techniques that involve the use of elements within the scene to enhance the photograph, they serve different purposes and are employed in distinct ways. Framing, in its traditional sense, refers to the use of foreground elements to create a border around the entire photograph, helping to isolate the main subject and draw the viewer’s eye towards it. This technique typically involves using the edges of the scene to enclose the subject, offering a sense of completeness and focus.

Subframing, on the other hand, is a more nuanced approach where the photographer uses elements within the scene—not just at the edges—to create a secondary, often smaller frame within the image. This internal frame leads the viewer’s eye to a particular area or subject, adding an additional layer of context or meaning. Subframing can be more subtle and complex, allowing for richer narratives and a deeper sense of space within the photograph.

In essence, while traditional framing defines the outer boundary of an image, subframing introduces an inner boundary or point of interest that guides the viewer deeper into the scene. This inner frame can intersect with the edges of the photograph or float entirely within the image, offering a unique and compelling way to highlight the focal point and add depth to the composition.

Summary:

Subframing is a powerful compositional tool that can add depth, focus, and narrative to your photographs. By mindfully observing your environment and experimenting with different techniques, you can master subframing and create more impactful and meaningful images. Remember, the best way to improve is to practice, so grab your camera and start exploring the world of subframing.

Whether you’re a seasoned professional or a budding photographer, incorporating subframing into your compositional toolkit can transform your visual storytelling and elevate your photographic work.

Perfecting Focus in Flower Photography

Flower photography is an enchanting pursuit, yet it is fraught with potential mistakes that can detract from the beauty of your final image. Among the myriad aspects to master, focus stands out as a critical element. Achieving sharp, well-defined images requires more than just a steady hand; it necessitates an understanding of focus modes, the selection of the right focus point, and sometimes, the fine-tuning capabilities of manual focus. Let’s delve into these aspects and explore how they can enhance your flower photography or, if overlooked, potentially ruin your shots.

1. Choosing the Right Focus Mode

Digital cameras typically offer various focus modes, each suited to different scenarios. In flower photography, the two most relevant focus modes are Single-Servo AF (AF-S) and Continuous-Servo AF (AF-C). AF-S, ideal for stationary subjects, allows you to lock focus on a static flower. AF-C, on the other hand, is better suited for moving subjects and might not be as useful for static floral shots unless you’re dealing with elements like swaying flowers in a breeze. Selecting the wrong focus mode can result in missed focus or blurry images, especially if the flower moves after locking focus in AF-S mode.

2. Utilizing the Appropriate Focus Point

The focus point you choose can dramatically affect the impact and clarity of your flower photographs. Many photographers default to using the center focus point, but this can lead to mundane compositions. By moving the focus point to the most striking part of the flower, such as the stamen or a vivid petal edge, you can create more compelling images. Modern cameras allow for easy adjustment of focus points, enabling you to be precise about where you want the viewer’s eye to be drawn.

3. Harnessing Manual Focus for Fine-Tuning

While autofocus is incredibly useful, there are times when manual focus (MF) becomes indispensable, especially in macro flower photography where every millimeter counts. Autofocus might struggle with small or intricate subjects, leading to a focus that’s slightly off. By switching to manual focus, you can fine-tune the point of sharpest detail, ensuring that the most important part of your subject is in crystal clear focus. This is particularly beneficial in situations where the camera’s autofocus is deceived by foreground elements or complex patterns.

4. Avoiding Focus Over-reliance and Overlook

Relying solely on your camera’s autofocus without understanding its limitations can be a critical mistake. Autofocus systems, though advanced, are not foolproof and can be confused by complex scenes or low-contrast subjects like some flowers. Additionally, overlooking the need for manual fine-tuning in challenging focusing conditions can result in a lack of sharpness where it matters most.

5. Depth of Field and Focus Relationship

Understanding the relationship between focus and depth of field (DoF) is crucial. A very shallow DoF can make focusing accurately even more critical, as the margin for error is minimal. Conversely, a deep DoF can forgive slight focusing inaccuracies but might detract from the subject by including too much background detail. The aperture setting you choose directly affects DoF, so it’s essential to select it thoughtfully based on your desired focus effect.

In Conclusion

Focusing effectively in flower photography is a nuanced art that involves more than just pointing and shooting. By selecting the appropriate focus mode, carefully choosing and adjusting your focus points, and knowing when to switch to manual focus for fine-tuning, you can avoid common pitfalls that lead to unsatisfactory images. Remember, focus is not just a technical necessity but an artistic tool, guiding the viewer’s eye and emphasizing the beauty of your floral subject. With practice and attention to these details, your flower photographs can achieve a new level of clarity and impact.