Street Photography: Telling a Complete Story

While street photography can often seem like a stream of random and unrelated moments all jumbled together, the reality of the genre is the complete opposite of this.

The magic of street photography is taking these moments and weaving them together to create a feeling, tell a story or show a place—and often all three together. This is an art form within the art form of street photography, and the sky is the limit with what you can create.

So here are some tips to help you do all of this.

Create Collections:

Collections in Lightroom (and similar album systems for other programs) are an extremely important part of the editing process. For any idea or story that I have, I will create a collection, which allows me to keep my related photos in one place without physically moving them on my hard drive.

As I’m going through my work, if I see a photo that could work within one of these collections, I’ll drag it in there. Then I will go through these collections frequently to see what’s working and what’s not. I often delete photos from collections as well.

Grow Your Vision Organically:

The more I do this with collections, the more I find photographs that start to relate to each other in my work. As the collection progresses, it often changes drastically, and photos I loved at first just don’t fit anymore. It’s a fun, organic process that allows me to notice more when I’m out shooting, to find more photos that fit within these ideas.

Over time, this organic process grows more concrete and I can put words to what I’m doing. I notice more subjects that fit within the idea, and will then even be able to go searching for specific types of images to fit that theme.

Use the Star System:

I couldn’t live without the star system when editing my work and creating projects. This allows me to quickly pick out my best photos as well as the photos that I’m not sure about, so I can find them easily later.

Typically, I’ll give my photos either zero stars (which I’ll later delete), three stars (which are photos I’m not sure about) and five stars (which I love, at least initially). But the three-star photos are just as important as the fives. I often go through these folders months later and will find incredible three-star photos that I was not sure of at the moment, but with some time clearly stood out.

Create a Project:

So how do you come up with an idea for a project? There are a bunch of ways!

The first is to do it organically, as I mentioned earlier. Just go out and shoot a lot, go to new areas, revisit favorite places again and just build your archive. This is such an important step to give yourself time to find enough great moments and to also train your eyes.

After a while, you’ll start to notice photos that you relate to most and that relate to each other, and this will begin to spark loose ideas. You’ll start to find more and more moments that fit while you’re out shooting, and the idea and feeling in the work will grow organically until one day it becomes concrete.

The next way is to choose an area and tell the story of it. I typically recommend choosing the area where you live or just a place you frequent, obviously because this will give you the most time to shoot—after all, they’re the places you know the best.

Capture the people, the buildings, the general scenes, interesting details and even nature. Tell a complete story. Try to put your spin on how you feel about the place and what makes it unique (or not unique). Put your feelings into it.

And the final strategy is just to sit down and brainstorm an idea for a project. To help do this, I think doing photographer research is vital. Look through projects, photographers and photo books you love for inspiration to help spark the right idea. Jot them all down on paper and eventually one will stick!

Build a Book Mockup:

After some point, I’ll begin to go through my collections to sequence them, weave together a story and eventually create a mock book through the book module in Lightroom and Blurb. It’s such a fun experience seeing your hard work all bound together.

Quick 12 Steps to Sharper Photos

All of us want to reach the point of crystal clear pin sharp photos. Yet there always seems to be something that takes away the final step to perfect clarity and sharpness. How do we eliminate the factors that reduce the sharpness in our images? By applying these simple steps you will see an immediate improvement.

1. Learn how to hold your camera

Support it with your left hand under the camera or if an SLR, under the lens. Grip the camera firmly but not too tightly with your right hand between your thumb and fingers. Leave your index free to operate the shutter release button. Close your left eye and look through your right eye with your nose flush with the back of the camera. Remember firm but not tightly grasped. Tuck your elbows into your sides so that your arms become one with your body. If necessary lean against a tree, wall or another support for extra stability.

2. Use a tripod

The ultimate form of stability is of course the humble tripod. Using a good quality tripod that is strong and stable will give you the most solid support you’ll need. If you’re using an SLR, turn on the mirror lockup. This will reduce internal vibration when the shutter is depressed.

3. Image stabilization

If you have an image stabilization facility on your lens or camera make sure it is turned on. This is also called the vibration reduction facility on some lenses and camera brands. Sometimes it may be necessary to switch this off as it does induce micro vibrations especially when the camera is mounted on a tripod and you are shooting macro.

4. Focusing properly

Don’t always rely on the camera getting the focus perfect. It may not be focusing exactly where you want it to. If possible change the focus point settings so that you can control where it focuses. As a last resort set your camera or lens to manual focus and do it yourself.

5. Depth of field

This is very important. Large apertures give a very narrow depth of field, i.e. small f-stops. (I’ll be dealing with this in a later article) Use a smaller aperture, larger f-stop, to get more of the image in focus before and beyond the subject.

6. Shutter speed

Make sure that you are using a fast enough shutter speed to help freeze any action or subject movement. If your lens is a 100mm then the slowest shutter speed you should be using is 1/100. The larger the lens the faster the shutter speed needs to be unless you use a tripod.

7. ISO

Using as low an ISO setting as possible, 50-200, will help reduce noise and pixelation. Try not to go beyond ISO 400 unless you are using a high quality camera. Remember the lowest ISO setting will give you the sharpest images.

8. Lenses

The higher the quality of the lens build and glass, the sharper the image. That’s why they cost so much. Inside a high quality lens you’ll find more elements and more technology to help correct any imperfections.

9. Clean your lens

Make sure that your lens is clean and free from any dirt, smudges or fingerprints at both ends. Sometimes this isn’t noticeable and regular cleaning with a high quality lens cleaning kit is essential.

10. Check your eyesight

Get your eyes checked if all else fails. On many SLRs you’ll find a diopter wheel on the viewfinder which allows for adjustment in the same way an optician changes settings when testing your eyes for glasses. This will help you if your eye problems aren’t too severe.

11. Filters

Unless a filter is absolutely critical for creating a perfect image, don’t use it. Keep as little glass between your sensor and the subject as possible, and when you do, make sure the quality is equivalent to your lens quality. It’s pointless spending thousands on a lens and a few bucks on a cheap filter. Your image quality will be degraded.

12. Remote and timed shutter release

Use a remote shutter release if your camera has this facility. If not there is another trick. Use your timed shuttered release. This allows a delay between depressing the shutter release button and the picture being taken. It allows for any vibration caused by pressing the button to subside.

By applying these steps to your photography you will eliminate virtually all elements that cause a lack of sharpness in your images.

Chiaroscuro: Creating Depth with Light and Shadow

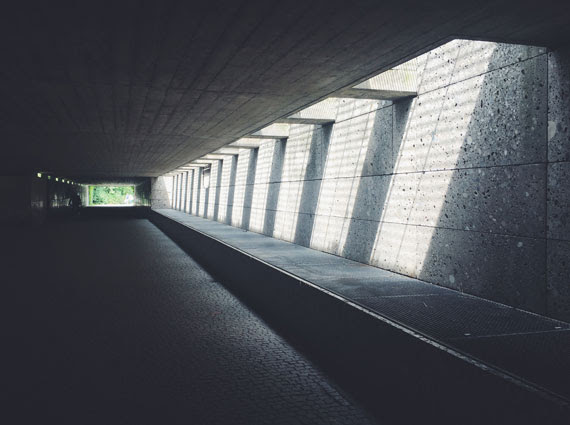
Chiaroscuro is a term that hails from the Italian Renaissance, literally meaning “light-dark.” It refers to the strong contrast between light and dark areas in a composition, which can create a dramatic, three-dimensional effect. This technique, often associated with the works of artists like Caravaggio and Rembrandt, has found a powerful place in photography, where it can add depth, mood, and intrigue to your images.

Understanding Chiaroscuro

At its core, chiaroscuro is about the interplay of light and shadow. It’s not just about having bright highlights and dark shadows; it’s about how these elements work together to shape and define the subject. In photography, chiaroscuro can be used to:

  • Emphasize Form: Light and shadow can highlight the contours and textures of the subject, giving it a sculptural quality.
  • Create Mood: The contrast between light and dark can evoke emotions ranging from mystery and suspense to intimacy and warmth.
  • Direct Attention: By manipulating light and shadow, you can guide the viewer’s eye to the most important parts of the image.

Historical Context

Chiaroscuro has its roots in painting, particularly in the Baroque period, where artists used it to enhance the dramatic impact of their works. In photography, this technique became popular with the advent of film noir, where the play of light and shadow was used to create a sense of tension and drama.

Applying Chiaroscuro in Photography

To effectively use chiaroscuro in your photography, follow these steps:

1. Control Your Lighting

The most crucial element of chiaroscuro is lighting. You need a light source that creates a stark contrast between the illuminated parts of your subject and the shadows. This could be:

  • Natural Light: Use window light or a single lamp to cast shadows and highlights on your subject.
  • Artificial Light: A studio light with a snoot or grid can help direct the light exactly where you want it.

2. Understand Your Shadows

Shadows are just as important as light in chiaroscuro. The shadows should be deep and dark, creating a sense of depth and dimension. Position your light source so that it casts shadows that enhance the contours of your subject.

3. Use Negative Space

Negative space, or the area around and between the subject, plays a significant role in chiaroscuro. It helps to frame the subject and emphasizes the contrast between light and dark. Make sure to leave enough dark space around your subject to create a dramatic effect.

4. Focus on Composition

The placement of your subject within the frame is crucial. Typically, the subject is placed off-center, with the light hitting one side more prominently than the other. This asymmetry can create a more dynamic and engaging composition.

5. Post-Processing Techniques

In post-processing, you can enhance the chiaroscuro effect by adjusting the contrast and shadows. Tools like dodging and burning can help you refine the light and shadow areas to achieve the desired effect.

  • Increase Contrast: Boost the contrast to accentuate the difference between light and dark areas.
  • Selective Lighting: Use tools to brighten or darken specific parts of the image, guiding the viewer’s eye and emphasizing the subject’s form.

Examples of Chiaroscuro in Photography

To better understand chiaroscuro, let’s look at some examples:

  • Portraits: A face partially lit from the side, with the other half falling into shadow, creates a dramatic and intense portrait. The light accentuates the subject’s features, adding depth and character.
  • Still Life: A single light source illuminating a still life setup, such as a bowl of fruit or a vase of flowers, can create a classic and timeless image. The shadows add a sense of volume and texture to the objects.
  • Architecture: Chiaroscuro can be used to highlight the architectural details of a building. The interplay of light and shadow on the structure’s surfaces can create a striking and powerful image.

Practical Tips for Beginners

  • Experiment with Light Sources: Try different light sources and angles to see how they affect your subject. Move the light around to find the most dramatic effect.
  • Practice with Simple Subjects: Start with simple subjects like a single object or a face. This will help you focus on the light and shadow without the distraction of a complex scene.
  • Study Classic Works: Look at the works of artists known for their use of chiaroscuro. Pay attention to how they use light and shadow to create depth and emotion.

Conclusion

Chiaroscuro is a timeless technique that can add a powerful visual impact to your photography. By mastering the interplay of light and shadow, you can create images that are not only visually striking but also rich in mood and emotion. So, grab your camera, experiment with lighting, and see how chiaroscuro can transform your photography.

Swavalamban Art Exhibition @ India International Centre

Swavalamban Art Exhibition Concludes Successfully at India International Centre

‘Swavalamban’ visual art exhibition, organized by Gayatri Luthra and Praketa LUTHRA’s – Moglykids Foundation and supported by SIDBI, concluded successfully on May 31, 2024, at the India International Centre, New Delhi.

Mrs Shama Chona and Gayatri Luthra in the Frame

The exhibition featured a rich diversity of art, photography, and sculpture by artists from NGOs, differently abled centers, old-age homes, and renowned art houses. Focused on the theme of “Inclusion,” the event provided a platform for artists regardless of caste, creed, socio-economic background, or age.

The highlight of the exhibition was the active participation of children from various NGOs who contributed through live art creation, enhancing the interactive atmosphere. The inauguration ceremony was graced by Dr. Shama Chona, Padma Bhushan Awardee, along with Sidbi General Manager – Shri Ram Meena and Deputy General Manager, Shri Naresh Kumar Solanki, underscoring the significance of inclusive art platforms.

Visitors from all walks of life present at IIC for the opening of exhibition.

‘Swavalamban’ aimed to bring everyone onto the same platform, creating opportunities for all. This increases exposure, fosters collaboration, and ensures that every individual, regardless of their background, has the chance to thrive. By transforming youth from job seekers to job creators, it targeted the underprivileged and underserved communities, fostering holistic development through creative endeavors.

Gayatri Luthra said “The joy of sharing the hidden and unnoticed creativity of children from Ngos and other underprivileged communities, brought out the power of inclusion & equality. It is what made this Moglykids exhibition a runaway success”

The opening day of the exhibition also showcased the art of music played and sung by children of many schools.

The exhibition’s success is a testament to the power of inclusion and creativity, with Moglykids Foundation and SIDBI extending heartfelt gratitude to all participants, visitors, and supporters who contributed to this memorable event

Sanaa , ‘This was my first exhibition ever and I’m so excited. And it’s all Thanks to Virender sir of the Delhi photography club who taught me how to use a camera . All my exhibits were sold. Which was really an big encouragement’

Decoding Megapixels: Why Digital Camera Sensors Use Them

In the world of digital photography, the term “megapixels” is one you’re likely to encounter frequently. Whether you’re shopping for a new camera, reading photography blogs, or even just browsing through camera specs online, megapixels are often highlighted as a key feature. But what exactly are megapixels, and why are digital camera sensors measured in them? Let’s delve into this topic to understand the significance of megapixels in digital photography.

Understanding Megapixels

A megapixel is a unit of graphic resolution equivalent to one million pixels. In the context of digital cameras, a pixel is the smallest unit of a digital image or display, often thought of as a tiny dot that makes up part of an image. The term “megapixel” comes from “mega,” meaning million, and “pixel,” which is a blend of “picture” and “element.”

When you see a camera advertised as having 20 megapixels, this means that the camera sensor has 20 million pixels to capture an image. The more pixels a sensor has, the more detailed the image can potentially be, because the image can contain more information.

The Role of Megapixels in Image Quality

The primary reason digital camera sensors are measured in megapixels is due to the direct relationship between megapixels and image resolution. Higher megapixel counts allow for larger image sizes and more detailed photos. Here’s why this is important:

  • Detail and Clarity: More megapixels mean more detail. This is particularly beneficial for printing large photos without losing quality. Higher resolution images can also be cropped more extensively without noticeable loss of detail, giving photographers more flexibility in post-processing.
  • Print Size: If you plan to print your photos, higher megapixels will allow you to produce larger prints. For instance, a 20-megapixel camera can produce high-quality prints up to 16×20 inches or larger.
  • Cropping: With more megapixels, you can crop your images more aggressively while retaining enough detail for a clear and sharp image. This is particularly useful in wildlife and sports photography where you may not always be able to get close to your subject.

The Limitations of Megapixels

While more megapixels can mean better image quality, it’s essential to understand that they are not the sole determinant of a camera’s performance. Here are a few reasons why:

  1. Sensor Size: The physical size of the sensor plays a crucial role in image quality. Larger sensors can capture more light, which is essential for performance in low-light conditions and achieving a shallow depth of field. This is why a 12-megapixel full-frame camera can often produce better images than a 20-megapixel smartphone camera.
  2. Lens Quality: The quality of the lens affects the sharpness and clarity of the image. A high-megapixel sensor with a poor lens will not produce sharp images. Conversely, a lower-megapixel sensor paired with a high-quality lens can produce excellent images.
  3. Processing Power: The camera’s image processor also impacts image quality. Better processors can handle noise reduction, color accuracy, and detail rendering more effectively.

Beyond Megapixels

As technology advances, manufacturers are finding ways to enhance image quality that go beyond simply increasing megapixel counts. Innovations in sensor technology, image processing algorithms, and optical design continue to push the boundaries of what digital cameras can achieve.

For instance, many modern cameras feature advanced technologies such as backside-illuminated (BSI) sensors, which improve low-light performance, and dual-pixel autofocus, which enhances focus speed and accuracy. These advancements contribute significantly to image quality, sometimes even more so than just increasing the number of megapixels.

Summary

Megapixels are an essential aspect of digital camera sensors because they directly influence the resolution and detail of the images captured. However, they are only one part of the equation when it comes to overall image quality. Understanding the interplay between megapixels, sensor size, lens quality, and image processing can help you make more informed decisions when selecting a camera that best suits your needs.

In the end, while a higher megapixel count can offer advantages in certain scenarios, it’s crucial to consider the camera as a whole and how all its components work together to produce the images you envision.