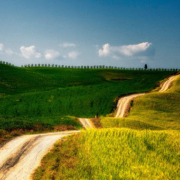
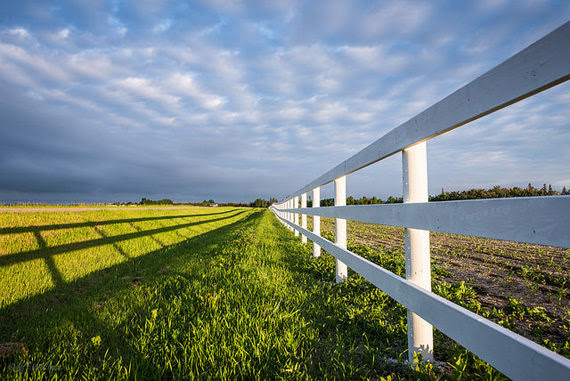
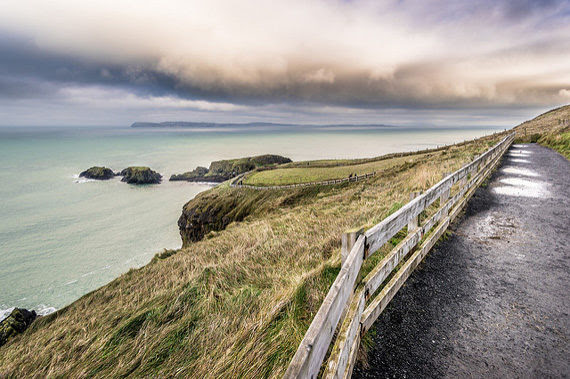
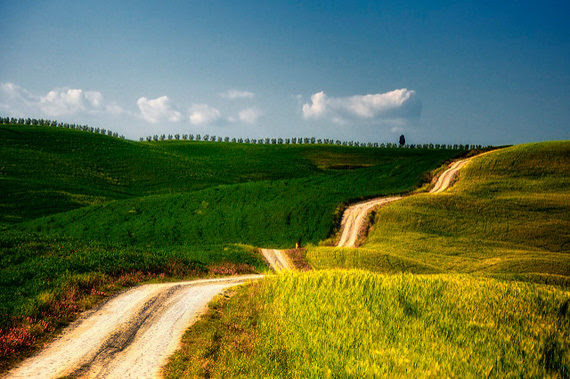
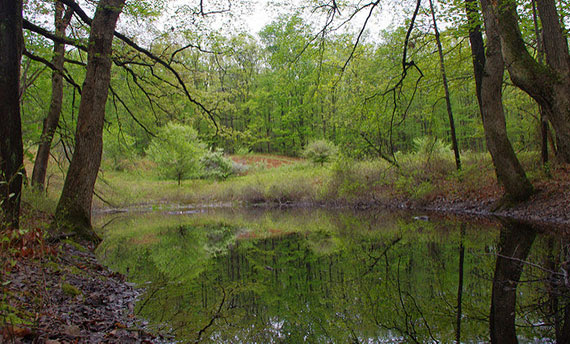
Today’s landscape photo tip involves diagonal lines. In a landscape photo, portrait photo, still life or any other kind of photo, the first major task of the photographer is to draw the viewer’s eye to the most important aspects of the shot and keep it there!
We want our photo to send some sort of message. If not, we shouldn’t be taking the shot. So we want to be certain that our viewer’s attention is focused in the right area. By the way, the message we’re sending could be as simple as wanting them to see an attractive cloud formation or some pretty colors in a rainbow—whatever.
We’re taking the shot because something in that scene attracted us and we want the viewer to see it, too.
This is actually the whole point to the photo composition rules. To make sure the viewer sees what we want them to see in the scene.
First, let’s consider how a person looks at a photo. Obviously it’s not a hard and fast rule. After all, people are individuals. But eye tracking studies have shown that people tend to start off in the lower left of the frame and let their eye travel up toward the upper right. Add to that the tendency of a viewer’s eye to follow natural lines in a photo and you have the genesis of a pretty powerful compositional tool.
In photography, diagonal lines starting at the lower left and traveling toward the upper right are very powerful.
Why does the viewer’s eye typically go from left to right? For many of us, it’s because we’re accustomed to reading from left to right. We tend to look at all text and photos in that way.
Keep this in mind… I haven’t seen any studies to support this, but I suspect that in countries where people read from right to left, the viewer’s eye will travel from right to left. In that case, design your diagonals to lead them into the photo from right to left.
Keep your potential viewers in mind when you’re designing your photography composition.
When you’re trying to determine where to place your diagonals, try not to start or end right in the corner. Photography diagonal lines that split the composition in half are no more interesting than placing the main subject in the bulls eye position.
Your diagonal lines don’t have to be an actual line. It could be a fence drawing a viewer’s eye, the horizon (if you’re shooting at some funky angle)—anything!
Try this: have diagonal lines coming from both right and left and converging at the subect of your photo.
While vertical and horizontal leading lines are nice compositional elements, diagonal lines are more dynamic and will impart more strength and verve to your shot.
Your assignment for today is to get out there with your camera and find ten different ways to add diagonal lines to your photos. This landscape photo tip—while it seems simple—is one of the big photo composition rules. Master it!
https://delhiphotographyclub.com/wp-content/uploads/2023/12/unnamed-83.jpg379570#iamdpchttp://www.delhiphotographyclub.com/wp-content/uploads/2020/03/Copy-of-Celebrate-Freedom-3.png#iamdpc2023-12-14 06:53:262023-12-14 06:56:05Diagonal Lines in Landscape Photography
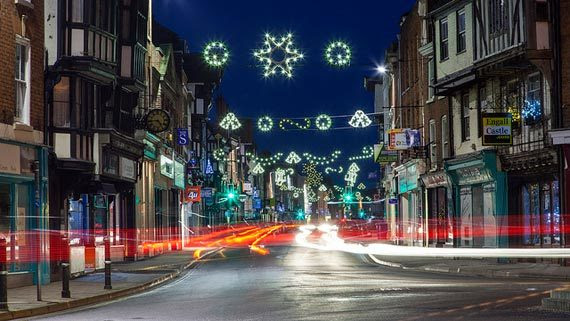
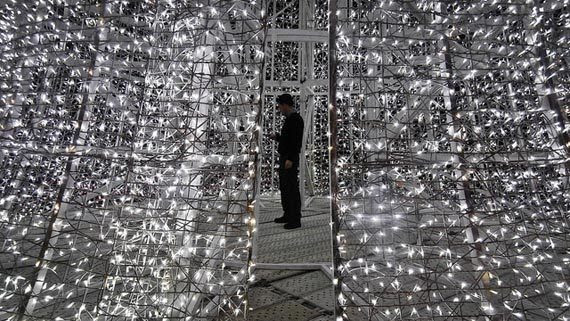
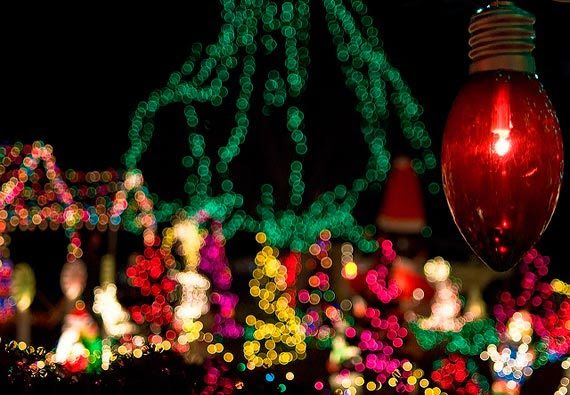
At this time of year, many of the world’s cultures and religions celebrate holidays that involve lights. While the use of lights and candles is often explained in terms of the rites of the particular culture, most scholars agree that the lights came first; the explanations followed. After all, since humans gained control of fire, light has been used to illuminate the darkness – especially, during the depths of winter – rather than curse it.
Christians explain the candles, tree lights, and Yule log in terms of the birth of Christ and the Star of Bethlehem. The impact of these lights – if not the explanation – is so powerful that even modern-day Buddhist and Shinto Japan is ablaze with lights and decorations at “Christmas time.” And, in the same dark days of the winter solstice, Hanukkah is the “Festival of Lights” celebrated by Jews around the world.
Years ago, taking great photographs of holiday lights was difficult because the films of yesteryear weren’t very sensitive. They had difficulty recording an image in the low-light of a candle, for example.
This is no longer the case as technology has solved these problems. Many DSLRs or Mirrorless cameras can be set to ISO 800, 1600 and even higher settings with little noise.
In addition, most photographers today rely on auto-exposure with their point-and-shoots or SLRs. Unlike the light meters of old, which were often “fooled” by low-light situations, today’s meters in auto-exposure cameras are able to give good readings even in low light.
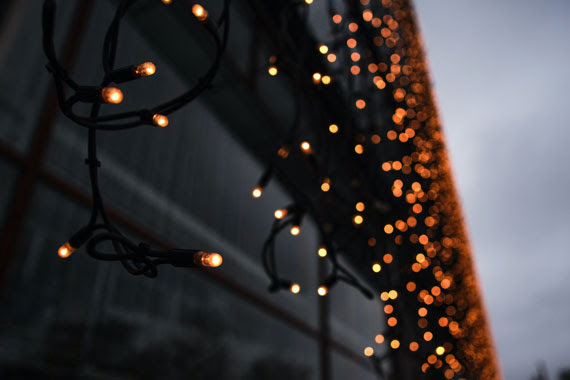
This is an important point because holiday lights usually look their best when shot without added light. In fact, this is Rule One when it comes to getting good pictures of lights: Turn off your flash. Let’s repeat that: For most pictures of holiday lights, turn off your flash!
Note that we said “most.” There are a few occasions when you will want to add light, but usually you won’t. So this brings us to the question: When should you use your flash, and when should you avoid it?
Now, let’s remember one important point if you’re taking a picture without flash: You’re probably going to need a slow shutter speed. This means you may need to mount your camera on a solid unmoving surface to avoid camera-shake. A tripod is best.
When else might you want to use your flash? Let’s say the subject of your picture is your kids under the tree. How are you going to light their faces? On the one hand, you may find that the Christmas-tree lights are sufficient and give a very soft glow to their cherubic expressions. Or maybe it is Christmas morning, and they are lighted by window-light that is streaming into the room. In these cases, you don’t need your flash. But, on the other hand, maybe you don’t have enough light to really see their faces. Then you may have to use your flash. How do you know which way to go?
One approach is to shoot both ways, then select the better image. We think a better way is to plan ahead and meter your subject. Remember that Guideline One of the Three NYI Guidelines for Great Pictures is to decide on your subject before you do anything else. You can learn this at the photography school. In this case, you’ve decided that the subject is the faces of the kids. Guideline Two is to draw attention to your subject. One method of drawing attention is to make sure your subject is well-exposed. So meter the light that falls on their faces from the lighted tree. Get in close and meter just the faces! If there’s enough available light for a well-exposed picture, shoot it. If not, use your flash.
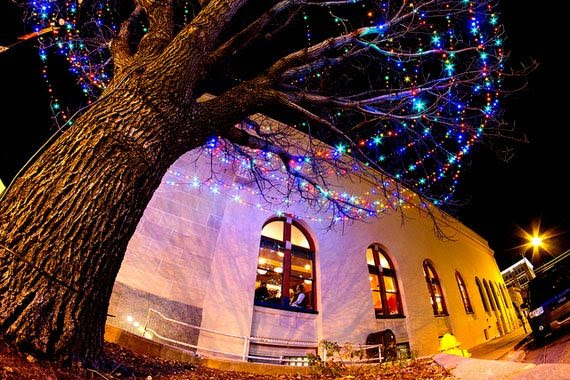
Now let’s move outdoors. Outdoor photo subjects include elaborate lighting and decoration on houses, stores, and streets. Again, if you want to capture the lights themselves, don’t use your flash. One other tip for outdoor lights – you’ll get the best results when you shoot at twilight. That way, you’ll capture some color in the sky, rather than the pitch-black tone that will be recorded on film later at night. But what if you want to take a picture of your friend in front of a brightly lit display?
You want to capture both the bright lights and your friend. If you use flash, you get your friend, but you’re in danger of minimizing the bright lights behind. On the other hand, if you don’t use flash, you get better detail of the lights but your friend is reduced to a silhouette.
There’s an answer. Many of today’s point-and-shoot cameras both film and digital have a funny-looking setting that looks like a person with a star in the background.
This setting tells the camera that you want the flash to fire (which will light your friend in the foreground), but that you also want the lens to stay open long enough to record the lights in the background. In fact, the symbol for this setting on many cameras is sort of a hieroglyph that tries to indicate “person at night in front of lights.” Your solution to getting light on your friend’s face and capturing the light display is to use this setting. The flash exposes the face. The long exposure captures the lights.
But, again, watch out here. The long exposure – typically, one-quarter of a second long – requires that you steady your camera to avoid camera shake. Once again, we advise you to use a tripod.
So, to take great holiday photos in this season of lights, we offer you these four tips we explore in our photography classes:
Turn off your flash unless you have a very good reason to use it.
Use a fast ISO – we suggest ISO 800.
Avoid camera shake.
Use a tripod…or, at least, brace the camera. Trust your camera’s built-in meter.
Some Special Considerations
Digital ISO
Amplifying a digital signal is like turning the volume up on your radio as loud as it will go. At the maximum volume every hiss, pop, and scratch is heard and, depending on the quality of the equipment, quality is diminished. The same thing happens in a digital camera. When the ISO setting is increased, every image artifact and defect is magnified.
To achieve the best image quality, you might try working with a slower ISO setting to start. If you are having trouble getting a good exposure, increase the ISO as needed. You might even try using the Auto ISO setting and see how the camera chooses to handle exposure.
Digital Noise
Regardless of the ISO setting chosen, most inexpensive digital cameras produce “noise” during long exposures. Noise is caused by the small electrical disturbances that are present in every electrical system. In order to capture a weak light signal, such as a subject in low-light, longer exposures are usually needed. The longer a digital camera shutter is open, the more electrical noise is recorded as well.
So, it seems we have a double-edged sword.
Increase the ISO to achieve faster shutter speeds and you will amplify noise and other image problems.
Reduce the ISO and shutter speeds are slower. As a result, you will record inherent noise that might not be seen in a “normal” exposure.
Limited Dynamic Range
To make things worse, digital cameras have a limited dynamic range. Image sensors are only sensitive to a specific range of brightness. Anything outside of that range is recorded as pure white or pure black. This can result in an image without shadow or highlight detail.
Solutions
Here are a few ways to solve these problems. Noise can be reduced with software. In fact some cameras offer in-camera noise reduction features. Proprietary software is used exclusively, yielding uneven results. Test your camera’s capabilities before committing to this feature. There are many noise reduction software products on the market today, some as stand-alone applications and others which are plug-ins that work in conjunction with your favorite image editor. This means you can select a camera with noise reduction or address any problems later in the digital “darkroom.”
Timing is Everything
As we noted earlier in this article, when shooting holiday lights outside, I find that the best exposures can be made at twilight. Twilight is after the sun has set but before the dark of night. This fleeting balance of light and shadow will yield the brilliance of the lights while maintaining details in the shadow. Don’t underestimate shadow detail to help establish your composition. Consult your camera’s manual for details on your white balance options and how to adjust them. In the finished photo the viewer will perceive the twilight photo to be taken at night.
When shooting holiday lights inside, try turning on lights in the room to increase the ambient light, rather than using a flash. Flash can produce a harsh, high-contrast quality that obliterates the brilliance of the light. A carefully positioned incandescent light can increase the ambient light without overpowering your holiday lights.
Shoot Two Exposures
One way to extend the tonal range of a digital image is by making two exposures of a scene. Shooting in Manual mode, make one exposure configured to capture the best highlight detail. Make a second exposure to capture the best shadow detail. Then combine the two exposures in Photoshop as separate Layers. Using the Eraser tool remove poorly exposed areas to reveal detail and take advantage of the best parts of each Layer/exposure. Using this technique you could extend the tonal range well beyond the possibility of any single exposure made with the same camera. Of course this requires a strong tripod to ensure both compositions match perfectly. Consider using a remote control to reduce the possibility of camera movement.
Accomplished photographers may also create two separate images’- one favoring highlights, the other shadows’ – from a single RAW file.
Turn Off Automatic White Balance
In many photographic situations white balance is a godsend. By automatically neutralizing extreme color casts, believable digital color is rendered without breaking a sweat. It is important to remember, not all photos require white balance. Tone down the rich, saturated colors of a sunset and you’re left with nothing. Attempt to white balance a fireworks display and you end up with dull lifeless, de-saturated bursts and streaks of light. Holiday lights should be treated similarly. By turning off the auto white balance feature you are sure to capture the exaggerated colors the holidays have to offer.
You could try turning off white balance altogether or even experiment with any of the other manual settings to find a color balance that suits your visual needs. Either way is a better bet than giving the decision to the camera.
Test, Test, Test
The immediate feedback of digital photography begs you to test your exposures to determine what works best. Take advantage of the metadata that most digital cameras embed inside every digital picture you make. Metadata can include camera make and model, exposure, flash, white balance and other important information that can help you to determine what works and what doesn’t work. This means you don’t even have to take notes! To access your digital image metadata, open a file in Adobe Photoshop.
Choose File > File Info. The File Info dialog box appears. Select the Camera Data option on the left side of the screen. The Camera Data screen reveals shutter speed, aperture, ISO settings, lens focal length, flash settings and even the metering modes. Holiday lights are usually around for more than a couple of days each year, take advantage of this by shooting early in the season and then re-shooting if you have too.
About the Author: Chuck DeLaney has been a professional photographer for over 30 years. Since 1998 he has been the director of the NYIP, America’s oldest and largest photography school. DeLaney has taught photography classes in colleges, community programs and institutional settings. In addition to teaching, he has written two books about photography and written hundreds of magazine and Web articles also.
https://delhiphotographyclub.com/wp-content/uploads/2023/12/unnamed-76.jpg382570#iamdpchttp://www.delhiphotographyclub.com/wp-content/uploads/2020/03/Copy-of-Celebrate-Freedom-3.png#iamdpc2023-12-13 06:52:552023-12-13 06:53:0410- Pro Tips for Christmas Light Photography
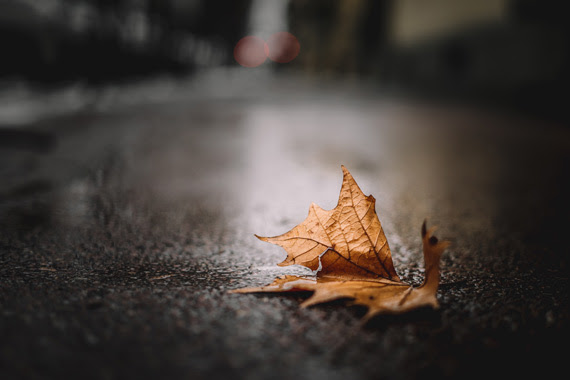
One of the best photography tips I can share is to think less about the technical aspects and more about the impact your photo has on the people who view it. While it’s important to understand the elements of exposure, those techniques won’t guarantee an emotional connection with your subject. Here are five ways to help you capture the moment that connects with your viewers.
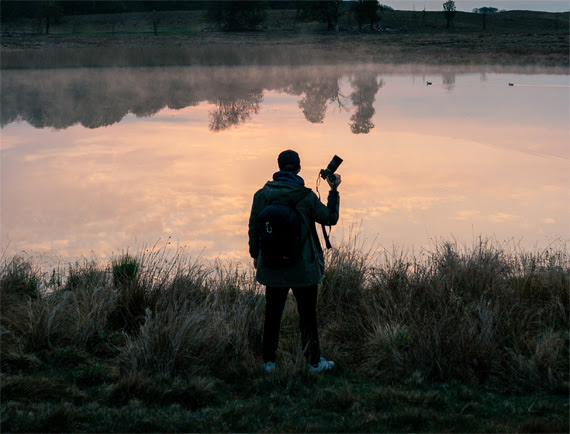
1. Patience
What makes a photograph art instead of a snapshot? Patience! Just because you want a photograph right now doesn’t mean the subject is ready for your right now. You may have to wait for a sunrise or sunset. You may have to wait for a bird to land on a post in the water. You may have to wait for the perfect wave to crash. Maybe—just maybe—you have to wait for all of these elements to coincide to get a shot that no other photographer will get because they weren’t patient enough to let things happen. Maybe they weren’t patient enough to see what happened next. The world will unfold on its own schedule, so pick a good spot, be patient, and be ready to capture the moment.
2. Timing
Some photographers enjoy shooting rapid-fire to get an action shot—spray and pray—and hope they have something good when the action is over. That isn’t control, though. It’s trusting your fate to luck.
It doesn’t matter if you’re shooting wildlife, sports, or a model in a studio. There’s a concept known as the peak of action, and that’s the shot you want to capture. You may get it with spray and pray, or you may not. Rather than firing off a blast of shots, think about your subject. Put yourself in the subject’s position. Look for patterns, rhythms, or any clues that will help you predict when and where your subject will be at the optimum moment to capture the peak of action.
A big part of timing is knowing your subject. You need to know the optimum time for that subject to arrive in just the right place.
3. Intimacy
Your photos need to show a connection. Sometimes that means creating a connection between the subject and the view. In other cases, it means showing a connection with your subject and something important. That connection could be between people, such as a husband and wife or a mother and child. The connection could also be with a pet or a possession.
Imagine a body builder working with weights. You see that she’s strong. She’s intent. She’s focused. The story is about her, but the weights show a relationship that helps define her as the subject. She has a relationship with the weights she’s lifting. She needs them in order to be the woman she wants to be. Intimacy helps the viewer understand her story.
4. Light
Photographers know that light is both your enemy and your friend. Without it, there’s no photo. If you have too much light, there’s still no photo. That’s because an evenly lit photo is little more than a dull snapshot. Nothing stands out. Nothing is special because you see everything. There’s no mystery.
Shadows are crucial because they provide a sense of depth and dimension. Their sense of darkness give shape, form and a sense of importance to the part of the photo in the light.
There’s an old adage, “If you want to make something more interesting, don’t light all of it.”
5. Story
If you want to improve your photos, then they need to tell a story. A photo needs to say something to the viewer. It needs to draw them in and make them wonder. It needs to pique their interest. People look at images that are interesting. What makes them interesting? The photo communicates something to them.
Does your photo make you wonder about something in it?
Why is the girl in the water? Where is this relaxing scene? What is the surfer thinking before he enters the water? I wish I had her dedication. Why does this dangerous beast look so content?
There are stories for any emotion. If you can feel an emotion, then there’s a story to go with it. That’s what you need to capture and share with your viewers.
https://delhiphotographyclub.com/wp-content/uploads/2023/12/unnamed-72.jpg570570#iamdpchttp://www.delhiphotographyclub.com/wp-content/uploads/2020/03/Copy-of-Celebrate-Freedom-3.png#iamdpc2023-12-11 10:16:252023-12-16 08:14:165 Photography Tips for Viewers to Connect With Your Photos
Depth of field (DOF) is one of the most important factors in determining the look and feel of a photograph. It’s also the most overlooked for photographers moving from a point-and-shoot camera to a DSLR camera. With a DSLR, you have a huge amount of control over depth of field, and you should know how to utilize that control.
What is Depth of Field?
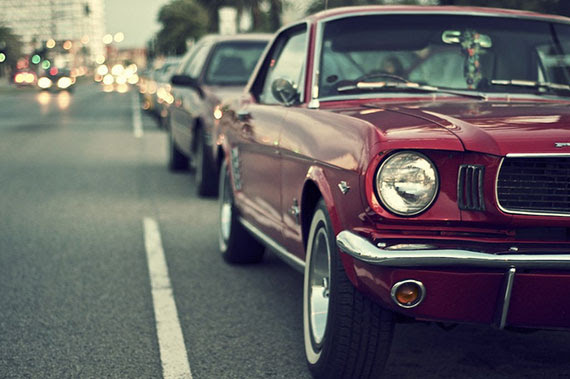
Depth of field refers to the distance (depth) from the focus point that a photo will be sharp, while the rest becomes blurry. A large, or wide, depth of field results in much of the photo in focus.
A small, or narrow, depth of field results in much more of the photo out of focus.
Neither approach is better or right, and which depth of field to use is up to you. You may have different reasons for choosing a certain depth of field, including artistic effect, bringing attention to a subject, or crisp representation of a scene.
There are four main factors that control depth of field: lens aperture, lens focal length, subject distance, and sensor size. Your sensor is pretty well set, so you won’t have much luck changing that. Your focal length and distance to the subject are usually determined by your choice of composition. So the lens aperture is your primary control over depth of field.
Before I get to the tips, let’s get a few things straight:
BIG APERTURE = SMALL F-NUMBER = SMALL DEPTH OF FIELD SMALL APERTURE = BIG F-NUMBER = BIG DEPTH OF FIELD
Aperture Control
Large apertures (small f-numbers) cause a narrow DOF, while small apertures (large f-numbers) cause a wide DOF. To bring attention to a subject by blurring a background (selective focus), shoot with f-numbers like f/2.8, f/4, or f/5.6. To bring the whole scene into focus, shoot with f-numbers like f/16 or f/22.
Avoid Excess DOF
If you want to bring an entire scene into focus and keep it sharp, use a small aperture. But be careful not to go too small. Lens sharpness starts to deteriorate at the smallest apertures. Use enough to get what you want, and no more. You may have to experiment a bit to get a feel for how your camera and lenses work at different apertures.
Focus Point
The DOF extends behind and in front of the point of focus. It usually extends further behind than in front, though. So keep this in mind when choosing your focus point; you’ll want to focus about a third of the way into the scene rather than halfway.
Use a Tripod
As you stop down the lens for greater depth of field, you’re also letting less light into the camera. To compensate for this and maintain correct exposure, you’ll need to either use longer shutter speeds or a higher ISO. The ISO can only be increased so much before noise artifacts become an issue, so you’ll most likely want to lengthen your shutter speed. If your shutter speed is too long, you’ll need a tripod (or some type of stabilization) to deal with this.
DOF Preview
When looking through the viewfinder of a DSLR camera, you’re seeing the world through the lens. You can easily see your resulting composition and point of focus, but the depth of field you’re witnessing is a little false. You’re seeing the resulting depth of field for the largest aperture of the lens, no matter what f-number you’ve chosen. Most newer cameras have a feature called DOF Preview that allows you to stop the lens down to the chosen aperture so you can see the true depth of field.
Focal Length
As I mentioned, your focal length is usually determined by your choice of composition, but you should know how it affects your depth of field. Longer focal lengths (200mm) have less depth of field than shorter focal lengths (35mm). Just keep this in mind when you’re trying to achieve a certain depth of field—you may need to alter your focal length in addition to your aperture.
So there are your basic tips for controlling your depth of field when taking photographs. The best way to learn how to control DOF is to set your camera to aperture priority mode and go take some pictures. Photograph the same subject many different times while altering the aperture, point of focus, and focal length (if you have multiple lenses or a zoom lens). Either write down the settings you used for each picture or use software to view your camera’s settings while you look through the pictures on your computer. You’ll begin to see how these different factors affect your photos.
https://delhiphotographyclub.com/wp-content/uploads/2023/11/unnamed-70.jpg380570#iamdpchttp://www.delhiphotographyclub.com/wp-content/uploads/2020/03/Copy-of-Celebrate-Freedom-3.png#iamdpc2023-11-08 11:44:552023-12-06 12:10:426 Tips for Controlling Depth of Field
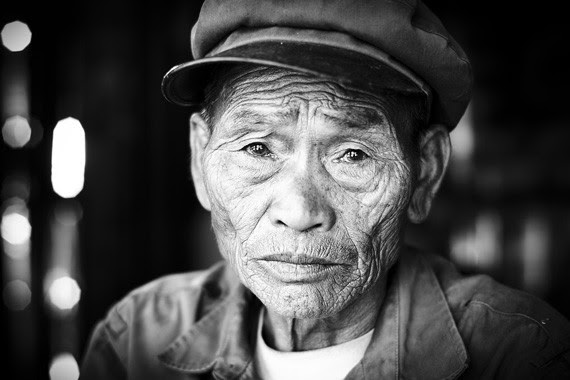
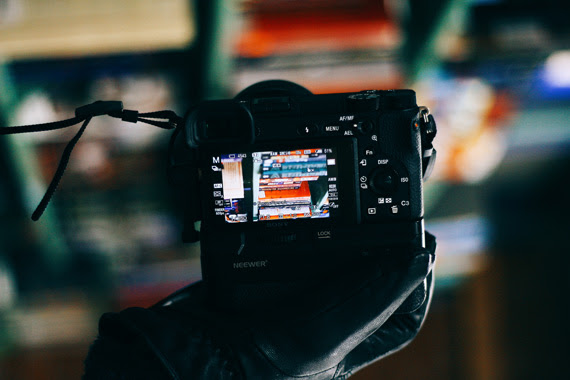
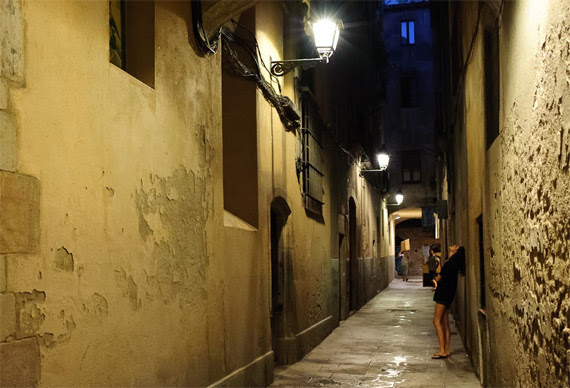
Taking pictures at night gives an image a completely different feel because it captures different stories of daily life—sometimes more dramatic than the ones captured during the day. There is also a whole new cast of characters at night that make taking pictures on the streets after dark an even more adventurous experience in street photography.
Just by decreasing the available light, we increase the element of mystery in the image. Don’t get me wrong, it could still be an average image. Just because it was taken at night the picture won’t magically become a great photograph, but it might become a little bit more interesting. It may make the viewer ask just a few more questions. And depending on where you are, it may even add an element of danger.
“You don’t have to go looking for pictures. The material is generous. You go out and the pictures are staring at you.” –Lee Friedlander
Here are a few tips for taking street photos at night:
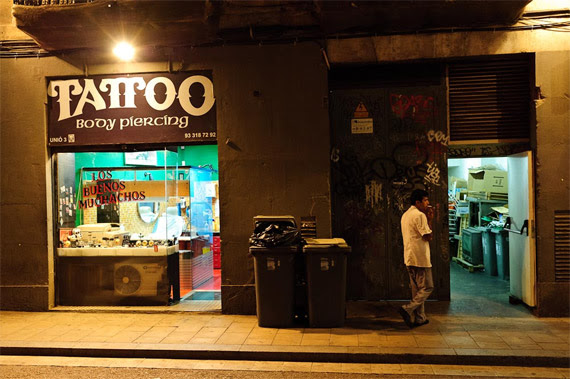
1. Don’t use flash
I think this is key for several reasons. First, the ugly artificial light that results from the flash is just too harsh and unnatural. It also calls way too much attention to the photographer, and the idea in street photography is to blend in, not stand out like a lighthouse. Also, people expect the flash to go off after you take a picture at night; when they don’t see the bright light coming from the camera that was pointed at them, they think that you didn’t take a photo and they probably won’t question you. I never use flash when I shoot at night (or day or ever, for that matter). It might take some practice but in a short time you won’t miss it.
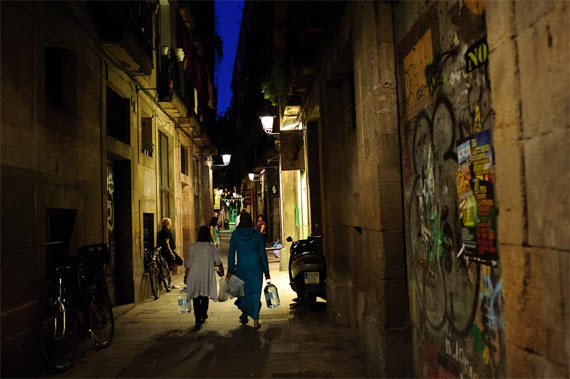
2. Increase the ISO
More than a suggestion, this is a necessity. Unless you increase the ISO, the shutter speed might become too slow and the whole picture will be way too blurry to even see what’s going on. As I wrote before, a little bit of motion blur is fantastic and makes for great street photography shots. But if the photo’s too blurry it loses the effect and is just confusing.
High ISO will also give the image some “noise” and it will look grainy, which is a great look for street photography. Make grain and blur your friends, not your enemies.
“New images surround us everywhere. They are invisible only because of sterile routine convention and fear.” –Lisette Model
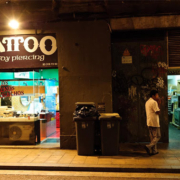
3. Use available light to your advantage
Find a bright corner or a storefront window and position yourself in a way that it will light your subject’s face. Or maybe you want the light to their backs to make them silhouettes. Either way is fine, the choice is yours. It’s all a matter of moving around the light. Find what works and wait for an interesting subject to walk by. Try pointing the camera into the inside of storefronts or brightly lit buses; the light may be just enough to capture great scenes of people unaware that you are capturing the scene.
4. Use fast lenses
Fast lenses, with maximum apertures such as f/2.8 or f/1.4 are great for low light situations. The same thing applies to full frame cameras. Any lens or camera is fine but full frame cameras or fast lenses make things easier because they have a better sensitivity to light. Use what you have and practice and look at the results before you invest your paycheck in a more expensive camera or lens.
“Anything that excites me for any reason, I will photograph; not searching for unusual subject matter, but making the commonplace unusual” –Edward Weston
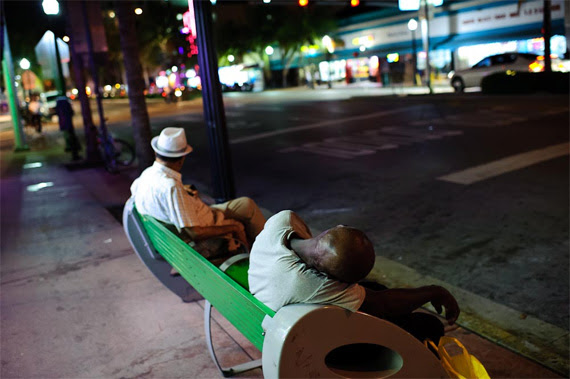
5. Avoid isolated areas
It’s not necessary to go to a dangerous area to get interesting pictures. Any crowded area will do, especially if you are just starting.
Taking pictures on the streets at night is not the usual thing to do, but if you want to give your street photography a little extra excitement consider going out for a walk after the sunlight has been replaced by street lamps.
https://delhiphotographyclub.com/wp-content/uploads/2023/11/unnamed-66.jpg379570#iamdpchttp://www.delhiphotographyclub.com/wp-content/uploads/2020/03/Copy-of-Celebrate-Freedom-3.png#iamdpc2023-11-06 11:58:082023-11-08 08:54:43Street Photography Tips at Night- upgrade your photos.