10 Tips for Better Photos of Your Children- Must Read

Professional photography is a fantastic way to celebrate important moments in your life. It also allows all of the family members to be in the image as well. Finally, it creates true custom works of art. However, those images will account for a tiny fraction of the photographs that will take place in your life.

The majority of images are the everyday photographs families make themselves to capture moments and save them for the future. These are the images that tell the story of our lives. Here are some tips to quickly improve the images you take every day. Have fun experimenting with them and try a few of them each time you are out.

1 – Know Your Camera

One of the most common questions I get is “What camera should I buy for myself?” while the answer sometimes changes for specific situations, the best answer I can have is: “The one you will always have with you.” The moments we want to capture and save for ever are often not planned. They are spur of the moment and usually are fleeting; they disappear as quickly as they appear. Having a great camera that is too bulky for everyday use means it will be sitting at home when the action is taking place right now. Most of us have a very good camera built into our newest smartphones. The best thing you can do is learn how to use the camera you have right now. Learn how to turn it on and keep it a mode that is the best for spur of the moment shooting. Learn what the buttons do and why you would choose one mode over another. If reading the manual and practicing isn’t your style, invest a little bit of money in a video or attend a local photography workshop.

The goal is to become like a quick draw artist from the old west. Be able to get your camera out, into a shooting mode and ready to start firing images in just a few seconds. It only takes a little familiarity and a little practice with your camera to be able to do this. That way, when Johnny starts to pull a face at the clown on the street, or Jenny climbs into the flower bed, you can freeze that priceless moment and add it to the storybook.

2 – Get Down to Their Level

Adults see children from the same angle. We are looking down at them all the time. If you want to quickly change the impact of an image of child, get down low to their level. This accomplishes a few things. First, it allows us to see the world from their perspective. We get a new angle on the world and that is refreshing. Secondly, it puts them visually on the same level as our world, and that raises the impact of the image. Also, psychologically, it changes how they feel about the moment. When we get down on their level, they feel more equal, and that makes them feel happy. It can actually improve their expression in the image.

3 – Get Much Closer

A famous photographer, Robert Capa, once said, “If your images aren’t good enough, you aren’t close enough.” This is something you can prove to yourself with just a little experimentation. When we take a posed image of people, we tend to capture a lot of the image around the person. Next time you have the opportunity, take the picture you were going to take, but then start to move in (either with your feet or with zoom if you have it) and gradually get closer and closer, taking an image each time you get closer. Go until you think you are too close, and then keep going!

You’ll be surprised with how much character you can get in an image when you combine number 2 above, getting down to their level, with getting very close. Try getting so tight that you are cutting a bit of the head at the top and don’t have much below the chin at the bottom. You’ll be surprised with how nice those images look. Combine that with number 4 below, new composition, and you will be entering a whole new world of amazing images.

4 – Try New Compositions

One of the things we most often do is place the person or the person’s face dead center of the frame. This is called a bullseye composition. Another way to increase the quality of your images is to move off the bullseye. One concept photographers are taught regarding composition is called the rule of thirds. We divide our viewfinder into thirds, both horizontally and vertically. This creates a small grid with 4 points where the thirds interact with each other. If we place our subjects, or important parts of the subject such as the eyes, on these intersecting points, we get a stronger impact from our images. Many cameras have an option to turn on a grid in the viewfinder. This grid is usually the rule of thirds so it makes it very easy for you to change your composition while looking through the viewfinder. One tip, if you do use the rule of thirds for your composition with people, make sure people are looking towards the center of the image, and not off the edge.

5 – Be Very Patient

Being a professional photographer working with children, one of the first lessons we learn is that children are going to do what they are going to do. If we try and make them do otherwise, they react very strongly! If you are after a specific image, and a child is involved, you just have to be patient. If you force them to make the image when they are not ready, they will get upset. Even if they don’t cry or throw a tantrum, their unhappiness will be visible in the image and the results will not be what you were after. That only gives us a few other choices. We can find ways to encourage them to participate on their terms. We can get them excited about the image we are about to make or, if it is a really important image for you to capture, you can provide a reward for them doing what you would like them to do. The last thing we can do is wait until they are ready. No matter what, rushing or forcing them will give substandard results. If the particular image is not critical, then see our next tip about candids.

6 – Take Candid Images

The opposite of posed photographs are candid images. The goal with candid photographs is to capture our children doing exactly what they do, the way they do it. In a candid, the viewer of the image becomes an observer of a particular moment.

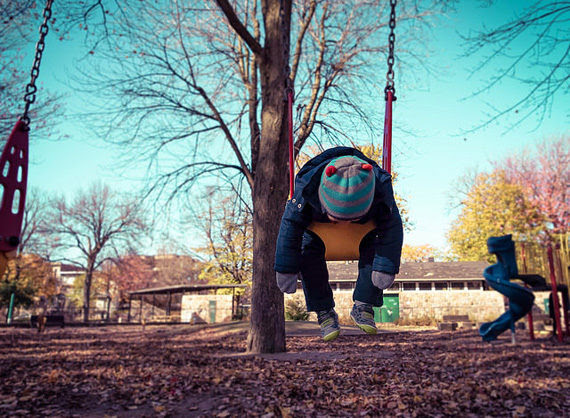
These actually are the best images for telling a story of our life. Posed images that show a location help to tell where were at a particular moment. Candid images show life as it is happening. We can have an image of Johnny sitting on the wall around the playground and get a sense of where Johnny was that day. But we don’t know what he did while he was at the playground, or whether he was enjoying it. Instead, if we have pictures of Johnny coming down the slide with his arms up in the air and a giant smile on, then we know where he was, what he was doing and that he was having a great time doing it. That image captures the full moment to look back on, and why it was a good moment. Follow your children around with camera in hand doing what they like to do, and you will not just capture a moment in time, but you will capture the joy and happiness that made that moment really special for both your child and you. Then when you look back at those images, you will be filled with the warmth of happy memories because you can feel that moment as an emotion, rather than a memory.

7 – Tell a Story

A great next step to taking a candid moment is to take a series of candid moments that tell a story of the event. Next time you take them for ice cream, have the camera in hand. Take a picture of Jenny getting here cone from the man behind the counter. Then another as she proudly shows you her cone held high like the Statue of Liberty holding up her torch. A few images of the joy they have while eating the cones. Another of the aftermath with faces all covered in ice cream and a few sprinkles. Now you have a series of images that tell a whole story. When you go back looking through your photo albums, you can experience the memory again as it unfolded. You can laugh at the smeared faces, or sniffle at the pout after the ice cream hit the floor. The stories are worth saving too.

8 – Show the Environment

Earlier, we talked about getting closer for strong impact, but don’t forget to vary things up in your albums. Take a few images that include the environment. This can be done either with posed or with candid images. Using the rule of thirds from before, if we place the subject on one of the lines, we still have almost two-thirds of environment that we can show. This can be a great part of creating your story telling series of images. In our ice cream visit from before, we can include the interior of the shop in some of the images to help show the environment that the story took place in.

9 – Capture the Memories

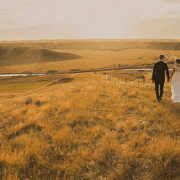
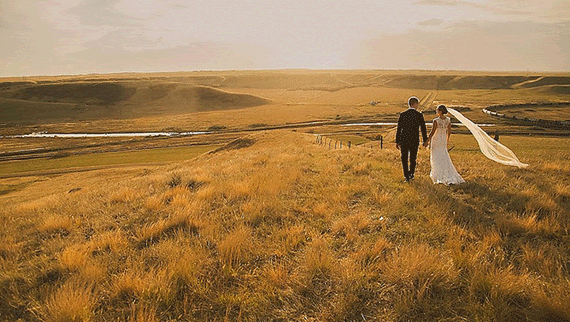
Professional photographers are there to celebrate the family milestones from an artistic perspective, and to show the growth of a family throughout its history. From engagement and wedding, to maternity and newborn, from 1st birthday to senior portraits, we are there to celebrate your milestones. You should focus on the memories. Linda McCartney said it best: “If you see something that moves you, and then snap it, you keep a moment.” If something makes you laugh, take a picture. If it makes you proud of your child, take a picture. Even when it makes you sad, take a picture. What you are really trying to do is capture the emotion of the moment. Then you can relive the whole moment again and again. If it moves you, capture it forever.

10 – Learn more about Photography

Learning more about photography can open a whole new world of possibilities up for you. Once you begin to understand the fundamentals of photography, you will find that you can use most of them to your advantage using any type of camera. By learning more about photography we can know how to blur out the backgrounds, or know how to freeze our children as they race around (or allow some motion blur for effect!). The more we know, the more we can do in general, and the more control we have over the finished image. Just like learning how your camera works, there are lots of ways to learn more about photography. You can get books from the library or the bookstore, learn about them online, attend a course or a local workshop, watch a video and so much more.

About the Author:
Matthew Davies is a professional portrait photographer based in Boulder, CO and runs Davies Creative Photography – a boutique portrait studio specializing in child and family photography. In addition, he teaches a series of affordable workshops on photography for all skill levels. He also has a special program for mothers about how to take better pictures of their children and is available to present at mommy groups in the area.

What a First Time Wedding Photographer Needs to Know

The news that you are photographing your first wedding often leads to emotions ranging from excitement to apprehension, and in some cases, fear. Assuming you have experience with your equipment and have developed the necessary skills to take great photographs, the wedding event has a greater likelihood of being a successful one if you follow some key steps.

This article provides an overview of important steps to follow before, during, and after the event. As with any important job, the keys are preparation, focus, and follow-through.

Before the Wedding

Proper preparation before the event is the best way for a photographer to have a successful outcome. I spent several weeks before my first wedding visiting other photographers’ web sites. I read books on wedding photography, and I researched photography blogs and forums. It is amazing how much information is available for little or no charge. These tips and photographs can inspire you and get you thinking about what you want to accomplish and how you are going to make it happen.

It is important that you have a standard written agreement that is signed by the bride- and groom-to-be and the photographer. There is no excuse for not having this document in place. It should describe the deliverables and the fees associated with the service and products. It should also include a model release so you can use the photos for promotional purposes. It is highly recommended that you contact an attorney and draft a standard agreement that protects you.

At the time of signing the agreement, there are two other opportunities to enhance the process. First, get to know the bride and groom. Spend some time chatting so you will know their story and they will know you. When the wedding day comes, they should feel comfortable with you so their true personalities will shine. If possible, include a no cost or low cost engagement shoot so everyone can gain even more of a comfort level. It is a good opportunity to give them some posing tips that they can use on their wedding day.

It is also imperative to know the schedule. When you are meeting with the bride and groom, go over the agenda for the time you are expected to be at the wedding. Get to know their expectations. Let them know when you expect them to devote time to photographs with you in charge. This is a good time to talk about a wedding coordinator. If they will designate a friend or family member that will help the you identify important family members during the wedding day, it can be a tremendous help.

Another important component of preparation is checking your equipment. Check it thoroughly at least four or five days before a shoot. A check prior to my first wedding revealed a faulty auto-focus mechanism on one of my camera bodies, and I had to borrow a second camera for the shoot, but I was ready.

A proper equipment check also requires making sure you have backups of everything. You need two camera bodies and two flash units at a minimum. If you do not have them, you can rent them. On my first senior photo shoot, the wind blew my tripod and camera to the concrete surface. You never know when something will drop or just fail.

Check your batteries and memory card supplies, and bring more than you think you will need. It is not uncommon to take 2,000 to 3,000 images at a wedding. If you are using flash, you will burn through batteries very fast at that rate. For memory cards, it is better to have several smaller cards than just one or two big ones. If a card fails, you minimize your loss by using multiple cards.

Visit the venue(s) prior to the wedding day in order to scope out lighting and shot locations. Do you need to gel your flash for proper white balance? I often find that if I take a few test shots with and without flash, and perform a custom white balance check with my camera, that there are competing colors from the various light sources. For indoor venues, I often have to gel the flash to match the color of the venue’s lighting. This will save you much time and aggravation later in the process.

To prepare yourself physically for a tiring day, have a light meal before you go. It is a good idea to bring granola, energy or candy bars, or other portable snacks. Bring water, too, just in case.

If you are prone to headaches, have a pain reliever with your in your pocket or bag.

Part of blending into the event is dressing appropriately. Talk to the bride and groom about their expectations before the event. In all cases, wear comfortable shoes.

Be insured. If someone trips over your equipment, are you covered?

The Ceremony

When you arrive, begin by taking outdoor venue shots. Here in southeast Michigan, you never know if the weather will turn on you later, and the same is true in many locations. Get some key building and landscape elements without people, just to have them.

Calibrate your camera’s white balance as soon as you walk indoors; do it for all of your cameras. Also, turn camera sounds off; you don’t want your camera to make noise during the ceremony.

Bring a fast lens; the faster the better. Indoor lighting at churches and reception halls is notoriously poor and dim. Be prepared with a fast lens (f /2.8 minimum – f/1.8 preferred). If you don’t have one, rent it.

If you are in a place of worship, have a clear understanding of where you can go and what locations are off-limits. Also, flash is usually not permitted in places of worship, but you can ask.

Consider bringing an assistant. Let them carry equipment, help set up shots, hold off-camera flash, and more. If you are working a 6-8 hour event, be prepared for the physical impact it will have on you. Having an assistant will ease the burden on you and should result in better photographs.

If you have a break from the bride and groom, start shooting the very young and very old early. They can get tired fast, and some may leave early.

If you have a camera bag, lock it down or have your assistant carry it. If you are on your own, consider using a cable lock for your camera bag and hide it out of sight. It serves as a deterrent from theft. You may feel comfortable with the bride and groom, but you never know about their friends and family or the staff at the venue.

Never reformat memory cards at the event. Backup when you can, but do not reformat. Check everything on your computer and complete backups before reformatting.

Take shots of the bride and groom as soon after the ceremony (or before) as possible. After people start drinking and celebrating, it will get harder to assemble people and have them look their best.

Most of the time, the photographer’s role should be to blend in and be discreet. Disappear in the background and try to capture people when they are relaxed, happy, emotional, etc.

If the wedding and reception are indoors, make sure to take shots of the bride and groom outside. Try to get away during the reception and get some outside shots–even if it is nighttime.

Take a group shot of everyone. This is a great way to have everyone in attendance in one photo. It makes for a great enlargement and an opportunity for sales to others in attendance at the wedding.

After the Event

After the event is over, I believe it is important to process the images as fast as possible. There is something to be said capturing taking the energy of the day and carrying forward. Posting images quickly to a web site will make everyone happy.

Keep in contact with the bride and groom and schedule a time to meet with them to go over the images and discuss ordering details. It is as important to provide a high level of customer service after the event and before it. If you establish a relationship with the couple, they will think of you for family portraits and portraits of their children in years to come.

Finally, take notes about what went right and what went wrong. This may help you do an even better job next time around.

Travel Photography Tips and Techniques – Really simple and easy for all

With travel photography you want to convey not only the scenes you have seen but also the feelings and emotions associated with the locations. The unexpected is always around the corner when you travel and with some careful preparation and a keen photographic eye you can produce some memorable results.

Good travel photography starts at home or the office before you leave for the airport and weeks in advance of your trip. Here’s how capture great travel images.

1. Research before you leave

Purchase the best travel guide you can afford and find out everything about the locations you will be visiting. Find out about the natural beauty, tourist sites, and the culture. Look at the images in the guides and see what the important areas are and what you need to record.

Learn about local transportation and distances as well as timing to reach the areas you want to visit. Learn about the culture and find out what you can photograph and what is taboo, what the dress codes are and any local laws or rules. Buy a phrase book and learn some of the key phrases to communicate when photographing. You will be amazed at how this will open doors for you.

2. Prepare a checklist

Essential for any photographer is a checklist of everything you will need for the trip, photographically as well as you normal travel needs. Check that all your gear is covered by insurance and that it is up to date. Take proof that you purchased your equipment at home and not abroad so you don’t get landed with customs duty on your return.

3. Avoid cliches

Don’t return with all of the images that are in the guide books which everyone has seen. Use new angles and try get to viewpoints that are not traditionally used for photos. Leave the tourist path and get away from the bus. If you can afford it, hire a private guide to take you off the beaten track.

4. Photograph local life

Local life in foreign countries is rich with sights and scenes that are brand new to you. You’ll often find that you will experience your photography much more by getting to know the local folk and seeing just what their daily life is like. By capturing the essence of their lives and homes you will experience the journey and capture memories that are unique and far more interesting.

5. Make yourself the subject

As the photographer you probably find that in all aspects of your life there are few images of you in front of the camera. So go out of your way to include yourself in photos while touring. Ask a travel companion, a guide or another tourist to take photos of you experiencing the local life. With digital you can see immediately the results of their work and whether you’ll need to reshoot it.

6. Take portraits

By respecting the local culture and as I mentioned learning a few of the most important phrases most locals will allow you to shoot their portraits. When photographing them close-ups are great and reveal character and the beauty of people you aren’t familiar with. But, this is the time to photograph portraits of people within their environments so shoot fewer head and shoulders and more with some of the background. Use wide angle lenses more often for great shots.

7. Shoot candids

With a longer lens and the ability to stay in the background and keep your distance you are able to photography people without them knowing. Unposed photos have people behaving totally naturally in their environments without the pressure to pose. The key here is to remain unobserved. Reveal yourself only once you have your shots. Look for opportunities that will reflect the local culture and people naturally.

8. Look for detail

By getting in closer and photographing the traditional clothes and jewelry you will see details in the color and styles. Look for details in the architecture, transport and local costumes that reveal something more than a traditional shot. A macro or telephoto is great for this type of shot.

9. Tell a story

By shooting a series of shots at a location you will be able to tell a story of the life of the local people. How they dress, work, have fun and where they live and relax. Select a theme or shoot at a market and try to think about the end result and how you will tell friends and family about your trip in just pictures. Maybe shoot a day in the life of a local you have befriended from morning till bedtime.

10. Take lots of photos

Work out how many images you think you should shoot and then double it. And then double it again. You can never take too many images. This may be the only opportunity for you to see this country and rather edit later than lose the memories by shooting too little. Not every picture will be perfect but it will be a memory. You are not just looking to create perfect photos but also great memories. Digital film is inexpensive so take lots of memory cards with you.

Travel is often a once in a lifetime opportunity for many people so go well prepared and come back with memories that will last a lifetime. Happy shooting!

About the Author:
Wayne Turner has been teaching photography for 25 years. Passionate about photography, radio and video. He is a Radio CCFm producer and presenter in Cape Town.

The Essential Shots Every Event Photographer Needs to Master

Event photography is a thrilling yet challenging domain. It’s about encapsulating the essence, emotions, and narrative of an event in a set of photos. For those who are venturing into the realm of event photography, knowing which shots are crucial and how to execute them can significantly up the game. Here’s a look at the essential shots every event photographer should master:


1. Candid Shots

Candid photography is the art of capturing spontaneous moments without the subjects being aware of the camera. These unposed shots often reflect the true essence and emotions of the moment.

Tips:

  • Stay Invisible: Blend with the crowd and avoid drawing attention to yourself to capture natural reactions.
  • Anticipate Moments: Keep an eye on the interactions and expressions, and have your camera ready to capture the fleeting moments.

2. Group Shots

Group shots are quintessential in events as they commemorate the gathering of families, friends, or colleagues.

Tips:

  • Organize Your Subjects: Direct your group with a friendly, but firm approach to get an organized shot quickly.
  • Use a Tripod: To ensure everyone is in focus, especially in large group photos, use a tripod to keep the camera steady.

3. Detail Shots

Every event has unique details that tell its story – the decor, food, venue setup, and other intricate elements.

Tips:

  • Arrive Early: Reach the venue before the guests to capture the details undisturbed.
  • Use a Macro Lens: For close-up shots of details, a macro lens can provide sharp and clear images.

4. Portraits

Portraits are personal and can be either posed or candid. They are a way to highlight the attendees and their connections to the event.

Tips:

  • Engage with Your Subject: Make your subject feel comfortable, talk to them, and perhaps share a laugh to get natural expressions.
  • Use a Shallow Depth of Field: A shallow depth of field helps in focusing on the subject and blurring the background, making the portrait more engaging.

5. Mastering Low Light Photography

Events often stretch into the evening hours, with dim lighting conditions. Mastering low light photography is crucial to ensure the quality of photos isn’t compromised.

Tips:

  • Use a Fast Lens: Lenses with wide apertures (like f/1.4 or f/1.8) allow more light into the camera sensor, aiding in low light conditions.
  • Increase ISO Sensitively: While higher ISO settings allow for brighter images in low light, they also introduce noise. Balance is key.
  • Steady Your Camera: Use a tripod or monopod to stabilize your camera, reducing the chances of blurred images due to camera shake.

6. On-Camera Flash Photography

On-camera flash can be a lifesaver in poorly lit environments, helping to illuminate the subject and surroundings adequately.

Tips:

  • Bounce the Flash: Instead of pointing the flash directly at the subjects, bounce it off a ceiling or wall for a softer, more flattering light.
  • Use Diffusers: Diffusers soften the light from the flash, reducing harsh shadows and highlights.

Conclusion

Mastering these shots requires practice, the right equipment, and a keen eye for storytelling through visuals. As an event photographer, evolving your skills to capture these essential shots will not only satisfy your clients but also provide a rewarding creative outlet. Each event is a new canvas with endless possibilities to capture enduring memories and tell compelling stories through your lens.