Night Photography Tricks: The Fun, the Difficult, and the Magical
Night photography is enchanting, taking us into a world where light dances mysteriously against the vast canvas of the dark. Whether you’re a seasoned photographer or someone just starting out, venturing into the realm of night photography can introduce you to a host of challenges. But with challenges come opportunities for mesmerizing shots that truly stand out. Here are some of the most fun and difficult night photography tricks you can try.
Night Photo captured by Brad West
1. Star Trails
- The Fun: Capturing the movement of stars as the Earth rotates can result in ethereal images.
- The Challenge: This requires a clear night, a sturdy tripod, and patience. You need long exposures or multiple shorter exposures that are later combined in post-processing.
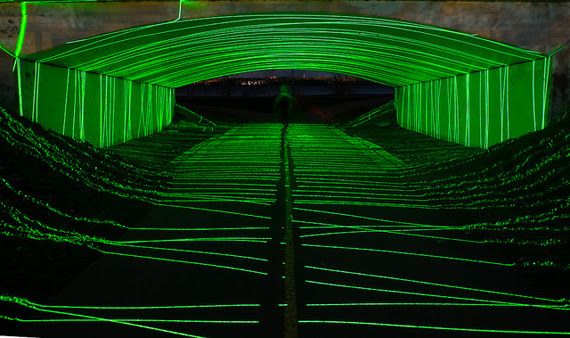
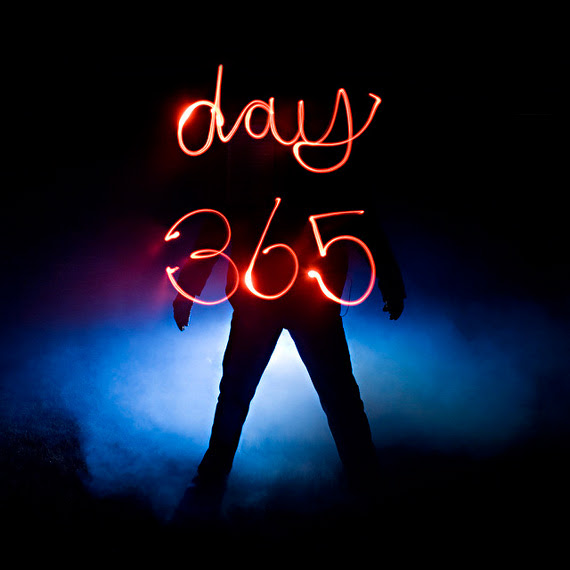
2. Light Painting
- The Fun: Use flashlights, glow sticks, or any light source to “paint” in the dark while the shutter remains open.
- The Challenge: Mastering this technique requires understanding the behavior of light, controlling the light sources, and sometimes even choreographing movements.
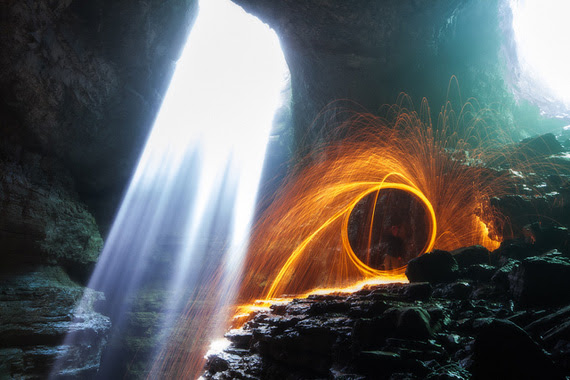
3. Steel Wool Spinning
- The Fun: Create a cascade of sparks that look like a shower of meteors.
- The Challenge: Safety first! You’ll be setting steel wool on fire and spinning it, so ensure you’re in a safe, open space, and have a fire extinguisher or water source nearby.
4. Capturing Bioluminescence
- The Fun: Natural light shows caused by living organisms, like plankton, in the water.
- The Challenge: Bioluminescence is unpredictable and can be faint, so getting a crisp shot without noise can be tough.
5. Bokeh Shapes
- The Fun: Transform city lights or distant lights into unique shapes like hearts, stars, or any design you craft.
- The Challenge: You’ll need to create a custom bokeh filter for your lens or buy one. The real challenge is achieving the right focus and distance for a clear bokeh effect.
6. Time-Lapse Photography
- The Fun: Compressing hours into seconds, this method showcases the motion of stars, clouds, and cityscapes.
- The Challenge: Requires patience, a consistent setting on the camera, and post-processing skills to stitch together the images or video frames.
7. Moonlit Landscapes
- The Fun: Harness the power of the moon to light your landscapes, turning nighttime scenes into dreamy, day-like images.
- The Challenge: The brightness of the moon can vary, and if it’s too bright, it may overpower the stars. Balancing the moonlight with other elements can be tricky.
8. Neon and Sign Reflections
- The Fun: After a rain shower, city streets can turn into mirrors, reflecting neon signs and street lights.
- The Challenge: Finding the right angle and ensuring the reflections are vivid and sharp, not muddled.
9. Silhouettes and Shadows
- The Fun: Using sparse light sources, like streetlights or moonlight, to cast dramatic shadows or silhouettes.
- The Challenge: Getting the right contrast and ensuring the silhouette or shadow retains its shape and detail.
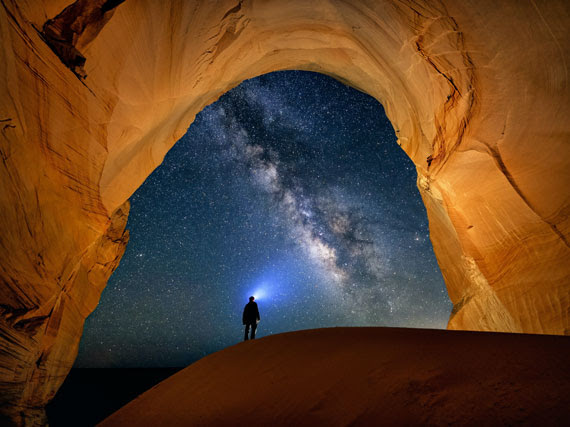
10. Astro Self-Portraits
- The Fun: Place yourself in the vast expanse of a starry sky or under the arch of the Milky Way.
- The Challenge: Balancing the light on yourself, often using a dim light source, while keeping the stars or Milky Way prominent.
Remember, the real fun in night photography is in the experimentation. Challenges will arise, but they’re merely stepping stones towards getting that magical shot. So grab your gear, head out under the cloak of darkness, and let the night be your muse.