The Importance of a Focal Point

A focal point is the part of an image that draws the eye of a viewer to the most important part of the image or the area that you want to highlight. How you do this will make or break the final image. If you don’t know how to create this point then you will not achieve much in your photography.
The professionals have all worked this one out and if you are attempting to create similar images then learn this point well. It frustrates the eye of a viewer if there is no focal point, as the eye is not drawn to any one particular part of the photo. The focal point only occupies a small part of the scene but will make or break the whole image. The simplest form of this is an isolated object seen from a distance on a plain background.

So how is this achieved successfully? Let’s take a look at a few pointers.

1. Placing the Focal Point

Fundamental to photography this rule needs to be learnt well and executed to perfection. If you know where to place your focal point then you will shoot great images every time. A focal point needs to be off centred and never in the middle of an image. The rule of thirds places it at a point that is very pleasing to the eye as discovered by the ancient Greeks. This golden rule will bring you success every time. Imagine a noughts and crosses or tic-tac-toe grid. Two lines across the image and two lines down the image—vertically and horizontally placed. Equally spaced, they cut the image up into thirds. Where these lines intersect are your focal points. The horizontal lines are where you place your horizons. The human eye loves to view subjects placed at these intersections. Take a magazine or travel book and take a look at how many times this rule is used effectively and see how your eye is drawn to them.

2. Selective Focus

This is an incredibly effective way to focus attention on your subject of focal point. You need to know how aperture and depth of field works in order to use it properly. But, basically it’s very simple. Your settings (e.g. f/2.8, f/4, f/5.6 and so on) change the size of your aperture all the way up to f/32. You only need to be concerned with the lower apertures for this effect. If your lens goes to f/1.2, brilliant, but most lenses won’t take you below f/4 or f/2.8, as they get more expensive the wider the aperture. Depth of field is the area of focus in front of and behind your subject. With the aperture wide open at f/2.8 you will have very little in focus which makes it so effective with selective focusing. Everything not on the same focal plane as the subject will be out of focus and thereby excluded from the viewer’s attention. The longer your lens, the less depth of field you will have and the more you will be able to selectively focus.
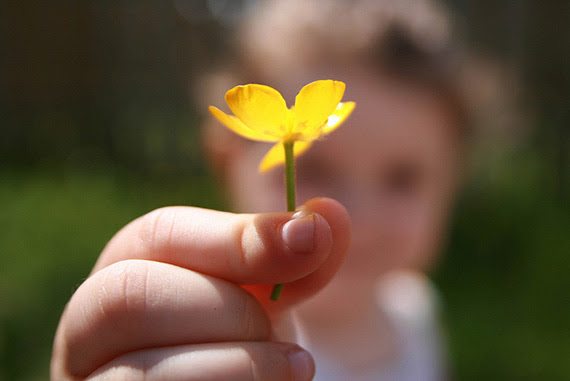
It’s a great way of drawing attention when used in conjunction with the rule of thirds.

3. Exposure

By underexposing parts of the image (i.e. making them darker), the areas that are light will stand out. If you are able to able to use this effectively the light parts will stand out as focal points and whatever you place here will become the point of focus in the photo. This really works well if you have a subject that is lighter than the underexposed, darker areas. Key to the process is knowing what the final image will look like in mind’s eye.

4. Light Source

This really pushes your photographic eye to the limits and if you see the opportunity and go for it, will result in a stunning photo. How this works is that when you see a shaft of light or a ray of sunlight entering a window or coming through the clouds, use it to place your subject. A patch of late afternoon sun in dimming light will create an area that is much lighter than the surroundings.
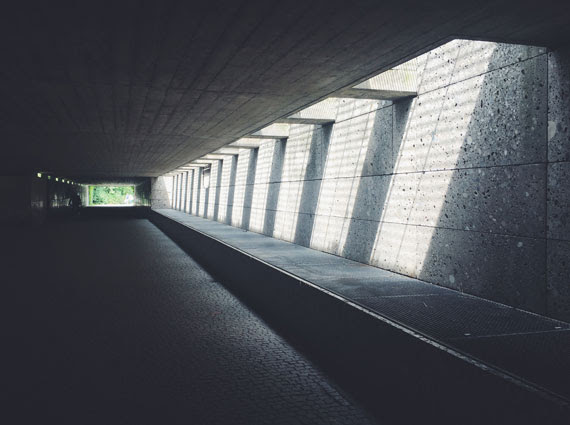
When you shoot an image and take the metering off this area, the surrounding environment will appear darker. The image now has a focal point that draws the eye in to the image. This will also work at night where a solitary window is lit and the surrounding area is dark. Experiment with this technique and you will soon be creating dramatically lit photos.

5. Eyes

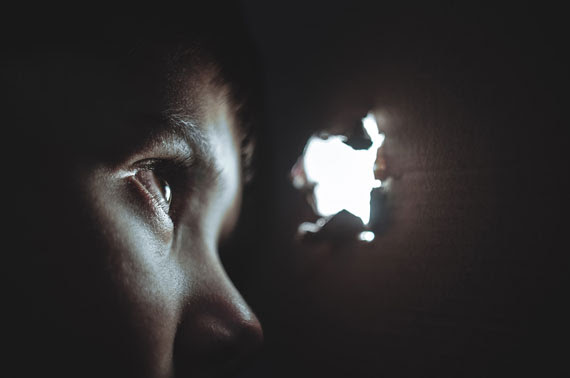
By placing a person’s eyes on a two thirds intersection a viewers eyes are immediately drawn to that area. When the subject is looking down on something else like a child or an object your eye will be naturally drawn to the point where the subjects eyes are focused. Whenever you shoot a person eyes they will automatically become the focal point so if they are the focal point then you have a problem and they will compete for attention.
6. Two Focal Points

Sometimes you will have two focal points and there will be competition, but, you can offset this by using size. One of the focal points must be considerably larger which will draw the eye but immediately your focus will move to the smaller focal point. If they are the same size the viewer’s eyes will dart between them. So be very careful when using a double focal point.

A focal point is essential to any great image and you need to be able to create this in every image. An image lacking this will appear flat and without impact. As you learn digital photography it will become easier and easier to place it in the right position. Happy shooting!

Action Photography: Quick Tips You Should Use

Getting great photographs of the world in motion is a difficult task. More than any other kind of photography, action photography demands lightning-quick reflexes, a solid foundation in composition and other photo elements, and a little bit of luck. That being said, anyone can learn to take great action shots if they’re willing to commit a little time to understanding the methods to the madness. Here are some techniques to get you started taking action photos:

Know Your Subject Matter

Due to the short amount of time you have to shoot, it’s important that you understand the subject you’re photographing. For example, with basketball, if you’re not near the basket, you won’t get a good picture of the next dunk. Before you start shooting a particular subject in action, take time to understand your subject so you can anticipate the action before it happens.

Get the Subject in Action

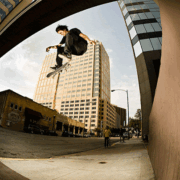
You want to always try to get the subject at the time when the action is at its maximum impact. For example if you’re photographing snowboarders jumping off a ramp, know what type of shot you want. Do you want the launch, the landing, or the highest part in the jump? Action photography can be captivating if you compose the picture to include the most interesting part of the action. So, always be thinking of the best way to compose your picture.

Focus in Advance

Many professional photographers focus their cameras on an empty space where they expect something to happen. This is an easy thing to do if you know the activity you’re shooting, and it will save you valuable time when someone is flying through the air in your frame and you have milliseconds to react.

Pan with the Subject

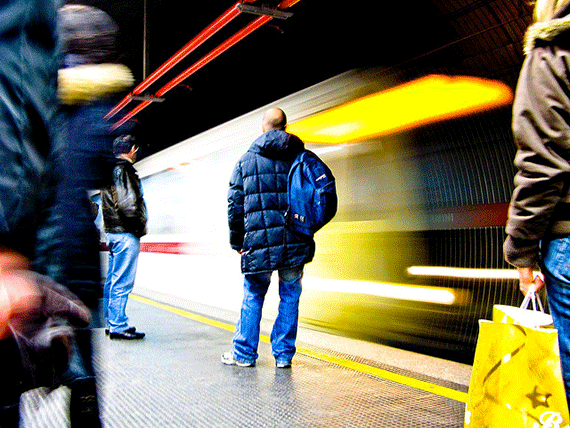
It is important in action photography that you convey motion in the final print. While some subjects will have obvious motion, such as a basketball player frozen mid-dunk, others may require a bit of work on your part. Panning is when you move your camera to keep up with the subject as they pass in front of you. This will give you the end result of the subject being clearly in focus but the background being blurred by the motion of the camera.

Using the Right ISO and Using a Flash

High ISO is usually best for action photography. The high light sensitivity will let you use faster shutter speeds in more varied light situations and help you to freeze actions perfectly. For ultra fast movements, a flash can also be helpful; however, most built-in camera flashes won’t work well beyond 10 feet.

Frame the Image for Action

Try not to simply stop the action of a subject in your photograph. While freezing an action in progress is a good goal for an action shot, allow the viewer room to follow the action to a possible conclusion. For example if you have someone jumping down some stairs, position the subject near the top of the picture and have some stairs below so it’s easier to understand the outcome of the action.

Digital Makes it Easier

Action photography takes an enormous amount of patience and practice. Thanks to digital cameras and their near-endless supply of photographs, you can practice your action shots without taking a huge hit on your wallet. And even better, many modern cameras have continuous shooting modes that allow you to shoot 10-50 images in rapid succession, so you can have more opportunities for the perfect shot.

Anytime your shooting action photography, safety needs to come first so you can avoid injuring yourself or the subject in motion. Never position yourself where you run the risk of getting hit by vehicles or athletes, and make sure that the people you are shooting are aware of where you’ll be during the activity. Beyond that, the more you shoot, the better you’ll get!

Street Photography Tips at Night- upgrade your photos.

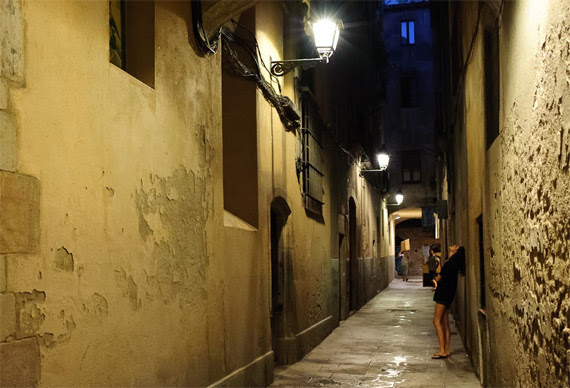
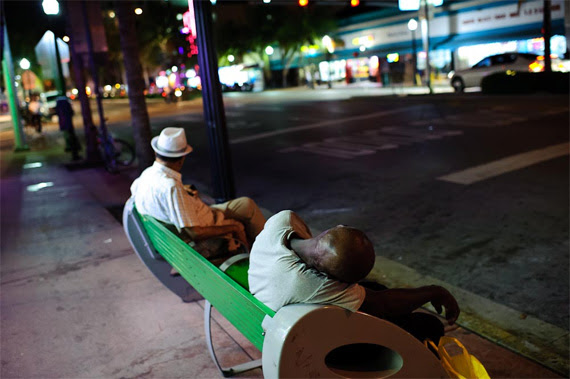
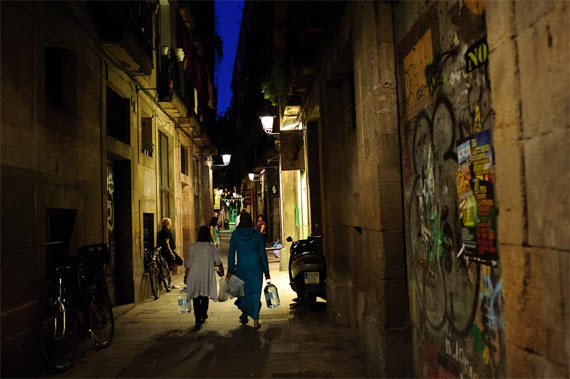
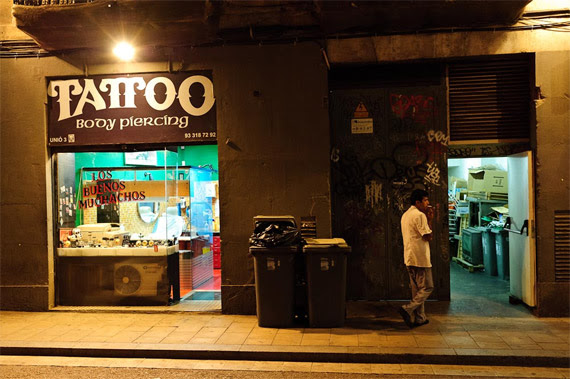
Taking pictures at night gives an image a completely different feel because it captures different stories of daily life—sometimes more dramatic than the ones captured during the day. There is also a whole new cast of characters at night that make taking pictures on the streets after dark an even more adventurous experience in street photography.

Just by decreasing the available light, we increase the element of mystery in the image. Don’t get me wrong, it could still be an average image. Just because it was taken at night the picture won’t magically become a great photograph, but it might become a little bit more interesting. It may make the viewer ask just a few more questions. And depending on where you are, it may even add an element of danger.

“You don’t have to go looking for pictures. The material is generous. You go out and the pictures are staring at you.” –Lee Friedlander

Here are a few tips for taking street photos at night:

1. Don’t use flash

I think this is key for several reasons. First, the ugly artificial light that results from the flash is just too harsh and unnatural. It also calls way too much attention to the photographer, and the idea in street photography is to blend in, not stand out like a lighthouse. Also, people expect the flash to go off after you take a picture at night; when they don’t see the bright light coming from the camera that was pointed at them, they think that you didn’t take a photo and they probably won’t question you. I never use flash when I shoot at night (or day or ever, for that matter). It might take some practice but in a short time you won’t miss it.

2. Increase the ISO

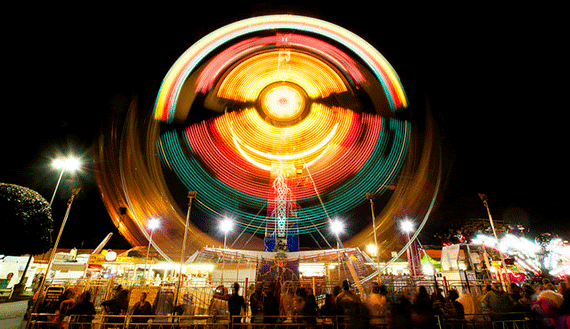
More than a suggestion, this is a necessity. Unless you increase the ISO, the shutter speed might become too slow and the whole picture will be way too blurry to even see what’s going on. As I wrote before, a little bit of motion blur is fantastic and makes for great street photography shots. But if the photo’s too blurry it loses the effect and is just confusing.

High ISO will also give the image some “noise” and it will look grainy, which is a great look for street photography. Make grain and blur your friends, not your enemies.

“New images surround us everywhere. They are invisible only because of sterile routine convention and fear.” –Lisette Model

3. Use available light to your advantage

Find a bright corner or a storefront window and position yourself in a way that it will light your subject’s face. Or maybe you want the light to their backs to make them silhouettes. Either way is fine, the choice is yours. It’s all a matter of moving around the light. Find what works and wait for an interesting subject to walk by. Try pointing the camera into the inside of storefronts or brightly lit buses; the light may be just enough to capture great scenes of people unaware that you are capturing the scene.

4. Use fast lenses

Fast lenses, with maximum apertures such as f/2.8 or f/1.4 are great for low light situations. The same thing applies to full frame cameras. Any lens or camera is fine but full frame cameras or fast lenses make things easier because they have a better sensitivity to light. Use what you have and practice and look at the results before you invest your paycheck in a more expensive camera or lens.

“Anything that excites me for any reason, I will photograph; not searching for unusual subject matter, but making the commonplace unusual” –Edward Weston

5. Avoid isolated areas

It’s not necessary to go to a dangerous area to get interesting pictures. Any crowded area will do, especially if you are just starting.

Taking pictures on the streets at night is not the usual thing to do, but if you want to give your street photography a little extra excitement consider going out for a walk after the sunlight has been replaced by street lamps.

Do you follow the Process of Taking a Photo?

We divide the process into 4 steps: Camera Settings, Observation, Anticipation, and Experience.

Camera Settings

One of the best ways to be efficient in travel and street photography is to be fast; especially in Southeast Asia, where things are so busy. Mastering camera settings is the first step to becoming fast. This is the reason I advise my students to use aperture priority mode when shooting (at least during the day) and to always adjust their settings when entering a new light situation (a brighter or darker area).

Once this is done, it becomes something less to worry about when a photo opportunity presents itself. The photographer’s reaction will also be faster if they can find all buttons and functions instinctively, as the camera becomes an extension of the body. Knowing what aperture to use depending on the depth of field desired and the distance of the subject, finding the ISO button while looking through the viewfinder, etc. All these little things will help the photographer win seconds, which are vital and will make light work of a spontaneous shot.

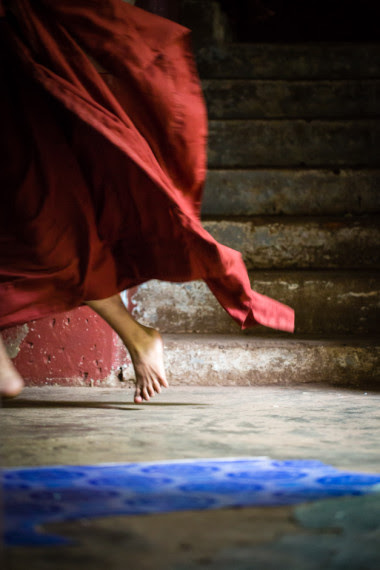
The need to be very fast and know camera settings was essential to capture this ephemeral moment. (Photo by Etienne Bossot)

Observation

Every good travel or street photographer (not to mention photojournalist) is a great observer.

Being aware of their surroundings, the photographer will use a shorter time to make important decisions, such as how to use the natural light, or which foreground and background to use. This is necessary, mostly when composing an image involves the subject itself at the very end.

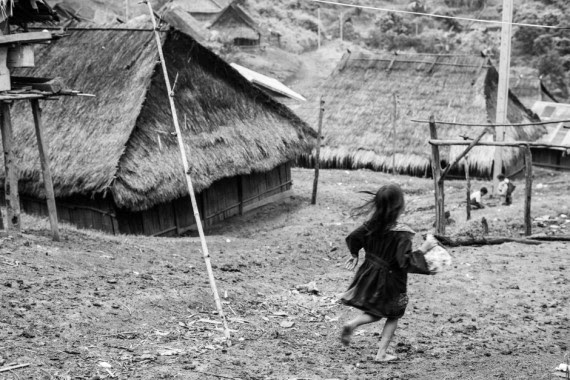
Observing and seeing this girl running down allowed me to pick up the proper background. (Photo by Etienne Bossot)

Anticipation

Once you’ve got camera settings and observation skills primed, anticipation is the next skill to master. Moving ahead in preparation of the photo concept, anticipating where a potential subject is going to be and where the light is going to move is key to shooting a great photo. This requires being physically fit enough to be able to move quickly, sometimes over holes, puddles, trees, walls, rivers, highways, magma, etc.

Being comfortable with camera settings will help win seconds, which are vital for the photographer. I often find that my students are missing great photo opportunities because they feel rushed. Mostly when traveling to exotic locations where everything is new, beautiful, and photogenic, they are often overwhelmed by all the great potential photos to be shot and rush to shoot as many things as possible. What happens then? The brain stops working. The result is a lack of discipline in creating composition, and as is very often the case, the use of the wrong camera settings (leading to a slow shutter speed and blurry photos).

Once the camera settings are prepared, the environment understood, and the photograph concept set up in the mind, it frees you up to think of the details and techniques that will make a great composition.

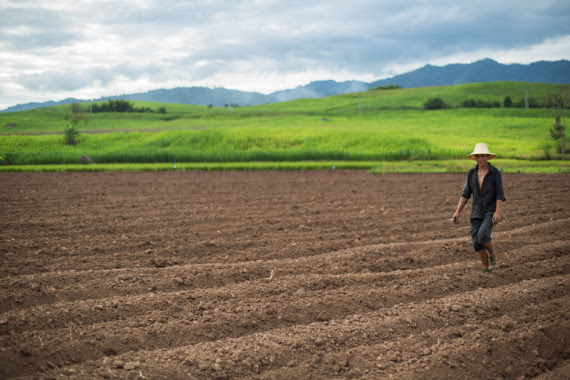
Man in a field that has just been plowed. When seeing that man from far away, I ran in order to have him right in front of the lush green background. (Photo by Etienne Bossot)

Experience

We tend to compose images using a few of the photography techniques we have learned, but mostly it’s an unconscious act of applying what we know that makes a good photo. For this we are using, as Michael Freeman mentions in his book, a “repertoire” of photos we have previously seen or taken and that we know work for us.

Using lines as diagonals, applying the rule of thirds, having our subject framed a certain way, etc. This is very important in order to be fast and make decisions; it also increases the risk of taking the same photo “template” over and over again.

Thus the need of extra time, gained by preparation, observation, anticipation and applying our experience, to adjust the composition and create something new, special, different, and reach another level of creativity.

Everything was ready and patiently prepared. Then the subject arrived… Click.

What a First Time Wedding Photographer Needs to Know

The news that you are photographing your first wedding often leads to emotions ranging from excitement to apprehension, and in some cases, fear. Assuming you have experience with your equipment and have developed the necessary skills to take great photographs, the wedding event has a greater likelihood of being a successful one if you follow some key steps.

This article provides an overview of important steps to follow before, during, and after the event. As with any important job, the keys are preparation, focus, and follow-through.

Before the Wedding

Proper preparation before the event is the best way for a photographer to have a successful outcome. I spent several weeks before my first wedding visiting other photographers’ web sites. I read books on wedding photography, and I researched photography blogs and forums. It is amazing how much information is available for little or no charge. These tips and photographs can inspire you and get you thinking about what you want to accomplish and how you are going to make it happen.

It is important that you have a standard written agreement that is signed by the bride- and groom-to-be and the photographer. There is no excuse for not having this document in place. It should describe the deliverables and the fees associated with the service and products. It should also include a model release so you can use the photos for promotional purposes. It is highly recommended that you contact an attorney and draft a standard agreement that protects you.

At the time of signing the agreement, there are two other opportunities to enhance the process. First, get to know the bride and groom. Spend some time chatting so you will know their story and they will know you. When the wedding day comes, they should feel comfortable with you so their true personalities will shine. If possible, include a no cost or low cost engagement shoot so everyone can gain even more of a comfort level. It is a good opportunity to give them some posing tips that they can use on their wedding day.

It is also imperative to know the schedule. When you are meeting with the bride and groom, go over the agenda for the time you are expected to be at the wedding. Get to know their expectations. Let them know when you expect them to devote time to photographs with you in charge. This is a good time to talk about a wedding coordinator. If they will designate a friend or family member that will help the you identify important family members during the wedding day, it can be a tremendous help.

Another important component of preparation is checking your equipment. Check it thoroughly at least four or five days before a shoot. A check prior to my first wedding revealed a faulty auto-focus mechanism on one of my camera bodies, and I had to borrow a second camera for the shoot, but I was ready.

A proper equipment check also requires making sure you have backups of everything. You need two camera bodies and two flash units at a minimum. If you do not have them, you can rent them. On my first senior photo shoot, the wind blew my tripod and camera to the concrete surface. You never know when something will drop or just fail.

Check your batteries and memory card supplies, and bring more than you think you will need. It is not uncommon to take 2,000 to 3,000 images at a wedding. If you are using flash, you will burn through batteries very fast at that rate. For memory cards, it is better to have several smaller cards than just one or two big ones. If a card fails, you minimize your loss by using multiple cards.

Visit the venue(s) prior to the wedding day in order to scope out lighting and shot locations. Do you need to gel your flash for proper white balance? I often find that if I take a few test shots with and without flash, and perform a custom white balance check with my camera, that there are competing colors from the various light sources. For indoor venues, I often have to gel the flash to match the color of the venue’s lighting. This will save you much time and aggravation later in the process.

To prepare yourself physically for a tiring day, have a light meal before you go. It is a good idea to bring granola, energy or candy bars, or other portable snacks. Bring water, too, just in case.

If you are prone to headaches, have a pain reliever with your in your pocket or bag.

Part of blending into the event is dressing appropriately. Talk to the bride and groom about their expectations before the event. In all cases, wear comfortable shoes.

Be insured. If someone trips over your equipment, are you covered?

The Ceremony

When you arrive, begin by taking outdoor venue shots. Here in southeast Michigan, you never know if the weather will turn on you later, and the same is true in many locations. Get some key building and landscape elements without people, just to have them.

Calibrate your camera’s white balance as soon as you walk indoors; do it for all of your cameras. Also, turn camera sounds off; you don’t want your camera to make noise during the ceremony.

Bring a fast lens; the faster the better. Indoor lighting at churches and reception halls is notoriously poor and dim. Be prepared with a fast lens (f /2.8 minimum – f/1.8 preferred). If you don’t have one, rent it.

If you are in a place of worship, have a clear understanding of where you can go and what locations are off-limits. Also, flash is usually not permitted in places of worship, but you can ask.

Consider bringing an assistant. Let them carry equipment, help set up shots, hold off-camera flash, and more. If you are working a 6-8 hour event, be prepared for the physical impact it will have on you. Having an assistant will ease the burden on you and should result in better photographs.

If you have a break from the bride and groom, start shooting the very young and very old early. They can get tired fast, and some may leave early.

If you have a camera bag, lock it down or have your assistant carry it. If you are on your own, consider using a cable lock for your camera bag and hide it out of sight. It serves as a deterrent from theft. You may feel comfortable with the bride and groom, but you never know about their friends and family or the staff at the venue.

Never reformat memory cards at the event. Backup when you can, but do not reformat. Check everything on your computer and complete backups before reformatting.

Take shots of the bride and groom as soon after the ceremony (or before) as possible. After people start drinking and celebrating, it will get harder to assemble people and have them look their best.

Most of the time, the photographer’s role should be to blend in and be discreet. Disappear in the background and try to capture people when they are relaxed, happy, emotional, etc.

If the wedding and reception are indoors, make sure to take shots of the bride and groom outside. Try to get away during the reception and get some outside shots–even if it is nighttime.

Take a group shot of everyone. This is a great way to have everyone in attendance in one photo. It makes for a great enlargement and an opportunity for sales to others in attendance at the wedding.

After the Event

After the event is over, I believe it is important to process the images as fast as possible. There is something to be said capturing taking the energy of the day and carrying forward. Posting images quickly to a web site will make everyone happy.

Keep in contact with the bride and groom and schedule a time to meet with them to go over the images and discuss ordering details. It is as important to provide a high level of customer service after the event and before it. If you establish a relationship with the couple, they will think of you for family portraits and portraits of their children in years to come.

Finally, take notes about what went right and what went wrong. This may help you do an even better job next time around.