Common Threads : A Photographic Passage by Vinod Thomas

Common Threads – A Photographic Passage Opens at India Habitat Centre, Bringing Together Art, Climate Consciousness and Social Purpose

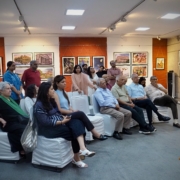
New Delhi, 8 May 2026: Common Threads – A Photographic Passage, a photography exhibition by noted photographer, development economist, and policy thinker Vinod Thomas, opened at the iconic India Habitat Centre on 8 May 2026, presenting a powerful collection of over 60 photographic works that explore the interconnected narratives of nature, culture, history, and humanity. The exhibition, which combines artistic expression with environmental reflection and social commitment, drew distinguished guests, art enthusiasts, policymakers, environmental advocates, and members of the photography community.

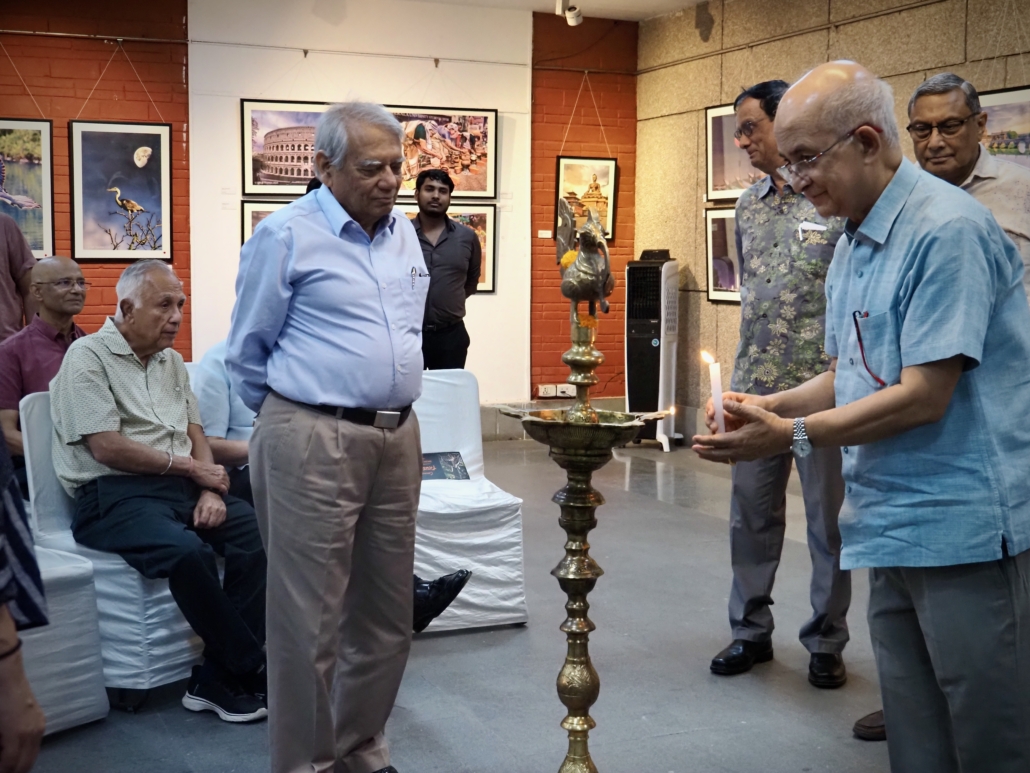
The exhibition was inaugurated with a ceremonial lamp lighting attended by an eminent gathering of dignitaries including Rajat Nag, former Managing Director of the Asian Development Bank; Rakesh Mohan, former Deputy Governor of the Reserve Bank of India; Bharati Chaturvedi, Founder and Director of Chintan; Supdipto Mandal, Chairman of the Centre for Development Studies; alongside photographer Vinod Thomas himself.

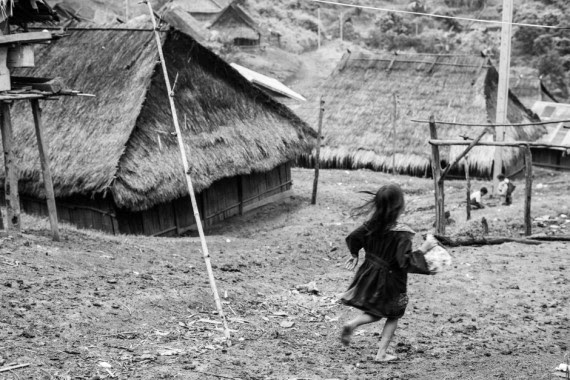
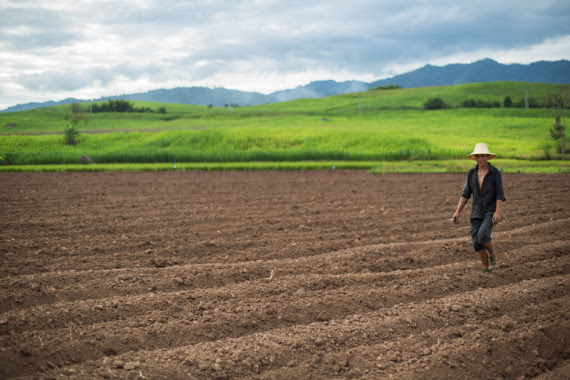
Curated by Virendra Shekhawat, Founder of the Delhi Photography Club, Common Threads presents an immersive visual journey across six evocative themes — Birds & Habitats, Culture & Tradition, Monuments & History, People & Values, and Sun & Moon. Through landscapes, wildlife imagery, portraits, heritage sites, and moments of everyday life, the exhibition reflects on the invisible yet enduring connections that bind humanity to the natural world and to each other.

At its core, the exhibition offers a thoughtful meditation on coexistence and continuity. From delicate ecosystems and vanishing habitats to enduring cultural traditions and historical monuments, the photographs invite viewers to reflect on the fragility and resilience of the world around them. The exhibition not only celebrates beauty and diversity but also raises deeper questions about environmental stewardship and collective responsibility in a rapidly changing world.

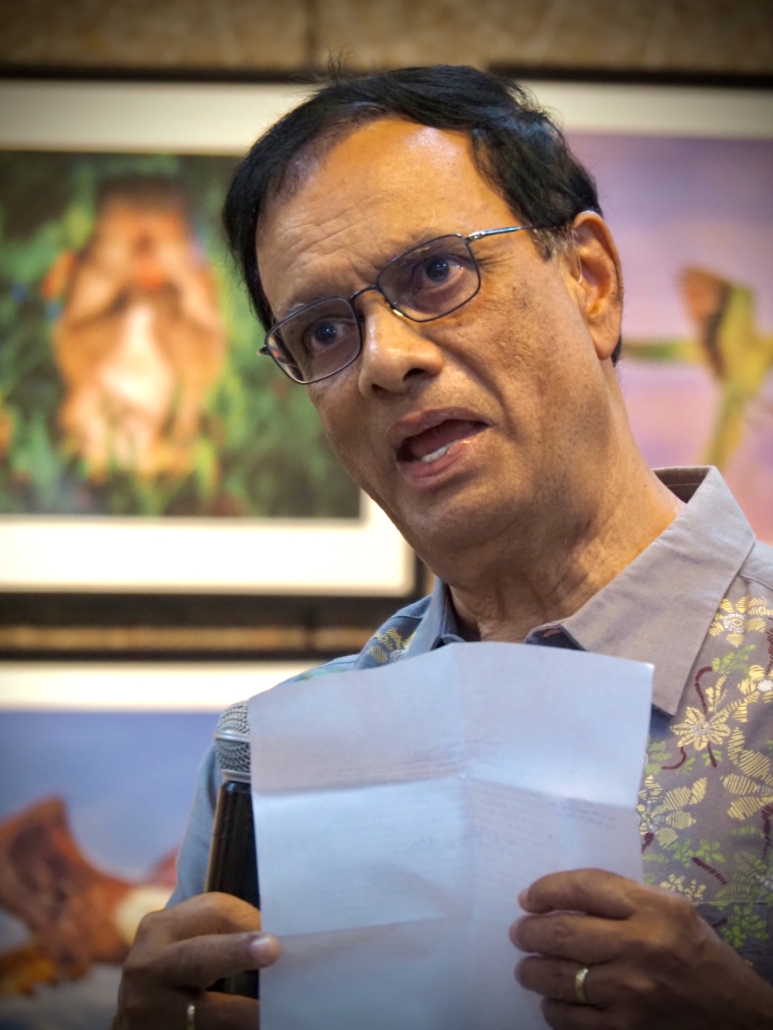
Speaking at the opening, Vinod Thomas strongly emphasized the urgent need for greater activism and public engagement in addressing climate change. Reflecting on the environmental crises confronting the world, he underscored the importance of moving beyond awareness towards meaningful action and collective responsibility. He highlighted how photography can transcend aesthetics to become a powerful medium for reflection, empathy, and advocacy, helping people connect emotionally with urgent environmental concerns.

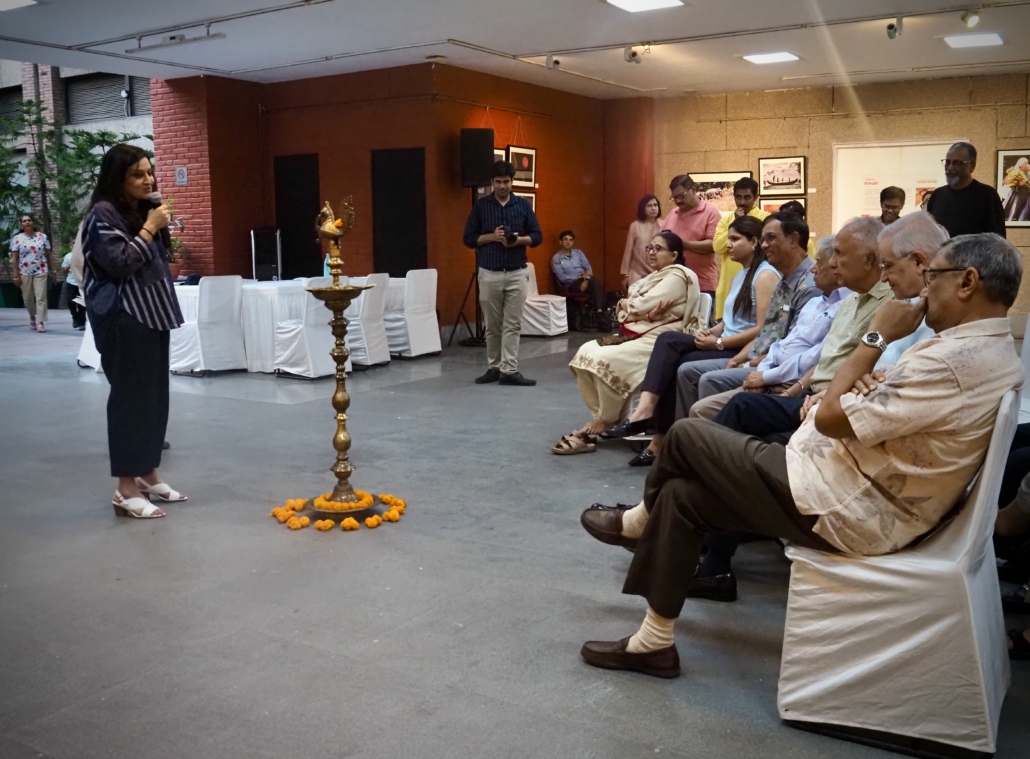
Echoing these concerns, Bharati Chaturvedi spoke passionately about climate justice, sustainability, and the growing need for citizen participation in addressing waste, urban environmental degradation, and ecological inequities. Through the work of Chintan, she emphasized the importance of community-led solutions in creating more sustainable and equitable cities.

The evening also carried an emotional moment as Vinod Thomas paid tribute to legendary Indian photographer Raghu Rai, reflecting on his recent passing and his immense contribution to photography and visual storytelling. He specifically recalled Raghu Rai’s iconic image from the Bhopal Gas Tragedy, describing it as one of the most powerful photographs ever made — an image that not only documented immense human suffering but also served as a timeless reminder of environmental negligence and the moral responsibility of societies and institutions.

Adding a strong social dimension to the exhibition, all proceeds from the sale of photographs will be donated toChintan to support its environmental and community initiatives, reinforcing the exhibition’s larger message of conservation, social responsibility, and collective action.

The exhibition is on display till 9 May 2026 at the Open Palm Court of the India Habitat Centre, offering visitors, photography enthusiasts, environmentalists, and the wider public an opportunity to experience a visual narrative that bridges art, heritage, climate consciousness, and humanity. Common Threads – A Photographic Passage stands as more than a photography exhibition — it is an invitation to pause, reflect, and rediscover the common threads that connect humanity, heritage, and the planet we collectively share.

Chiaroscuro: Creating Depth with Light and Shadow

Chiaroscuro is a term that hails from the Italian Renaissance, literally meaning “light-dark.” It refers to the strong contrast between light and dark areas in a composition, which can create a dramatic, three-dimensional effect. This technique, often associated with the works of artists like Caravaggio and Rembrandt, has found a powerful place in photography, where it can add depth, mood, and intrigue to your images.

Understanding Chiaroscuro

At its core, chiaroscuro is about the interplay of light and shadow. It’s not just about having bright highlights and dark shadows; it’s about how these elements work together to shape and define the subject. In photography, chiaroscuro can be used to:

  • Emphasize Form: Light and shadow can highlight the contours and textures of the subject, giving it a sculptural quality.
  • Create Mood: The contrast between light and dark can evoke emotions ranging from mystery and suspense to intimacy and warmth.
  • Direct Attention: By manipulating light and shadow, you can guide the viewer’s eye to the most important parts of the image.

Historical Context

Chiaroscuro has its roots in painting, particularly in the Baroque period, where artists used it to enhance the dramatic impact of their works. In photography, this technique became popular with the advent of film noir, where the play of light and shadow was used to create a sense of tension and drama.

Applying Chiaroscuro in Photography

To effectively use chiaroscuro in your photography, follow these steps:

1. Control Your Lighting

The most crucial element of chiaroscuro is lighting. You need a light source that creates a stark contrast between the illuminated parts of your subject and the shadows. This could be:

  • Natural Light: Use window light or a single lamp to cast shadows and highlights on your subject.
  • Artificial Light: A studio light with a snoot or grid can help direct the light exactly where you want it.

2. Understand Your Shadows

Shadows are just as important as light in chiaroscuro. The shadows should be deep and dark, creating a sense of depth and dimension. Position your light source so that it casts shadows that enhance the contours of your subject.

3. Use Negative Space

Negative space, or the area around and between the subject, plays a significant role in chiaroscuro. It helps to frame the subject and emphasizes the contrast between light and dark. Make sure to leave enough dark space around your subject to create a dramatic effect.

4. Focus on Composition

The placement of your subject within the frame is crucial. Typically, the subject is placed off-center, with the light hitting one side more prominently than the other. This asymmetry can create a more dynamic and engaging composition.

5. Post-Processing Techniques

In post-processing, you can enhance the chiaroscuro effect by adjusting the contrast and shadows. Tools like dodging and burning can help you refine the light and shadow areas to achieve the desired effect.

  • Increase Contrast: Boost the contrast to accentuate the difference between light and dark areas.
  • Selective Lighting: Use tools to brighten or darken specific parts of the image, guiding the viewer’s eye and emphasizing the subject’s form.

Examples of Chiaroscuro in Photography

To better understand chiaroscuro, let’s look at some examples:

  • Portraits: A face partially lit from the side, with the other half falling into shadow, creates a dramatic and intense portrait. The light accentuates the subject’s features, adding depth and character.
  • Still Life: A single light source illuminating a still life setup, such as a bowl of fruit or a vase of flowers, can create a classic and timeless image. The shadows add a sense of volume and texture to the objects.
  • Architecture: Chiaroscuro can be used to highlight the architectural details of a building. The interplay of light and shadow on the structure’s surfaces can create a striking and powerful image.

Practical Tips for Beginners

  • Experiment with Light Sources: Try different light sources and angles to see how they affect your subject. Move the light around to find the most dramatic effect.
  • Practice with Simple Subjects: Start with simple subjects like a single object or a face. This will help you focus on the light and shadow without the distraction of a complex scene.
  • Study Classic Works: Look at the works of artists known for their use of chiaroscuro. Pay attention to how they use light and shadow to create depth and emotion.

Conclusion

Chiaroscuro is a timeless technique that can add a powerful visual impact to your photography. By mastering the interplay of light and shadow, you can create images that are not only visually striking but also rich in mood and emotion. So, grab your camera, experiment with lighting, and see how chiaroscuro can transform your photography.

Using Color to Create Strong Photo Compositions

Color is one of the most obvious elements of composition. Everyone knows that intense colors make people take notice of your images. Ever wonder why there are so many sunset and flower shots? Color is the reason.

Color has a couple of functions in photographs. First, color grabs the attention of the viewer. Perhaps, because this function of color is so palpable, many photographers miss the more sophisticated, and in some cases far more powerful, function of color: color sets the mood of an image. Since color is such an important compositional ingredient, the experienced photographer will want to use color to its fullest extend — incorporating both functions of color into images.

Grabbing the Viewer’s Attention

Utilizing color to grab attention is often rather straight forward. Generally, what is required is a saturated or intense color. This type of color tends to grab the viewer’s attention and focus it on the area of color. Furthermore, the color tends to keep the viewer’s attention for an extended period of time. When the viewer’s eyes do wander, the color tends to bring the attention back.

There are a couple of primary ways to use color to grab a viewer’s attention. The first way is to use very saturated, bold colors. An example of this approach would be a dramatic sunset. The second way of using color to grab a viewer’s attention is to use a mix of contrasting colors. An example of this approach would be an image of fall colors where there is a combination of red, orange, and yellow leaves.

Mood

Setting the mood through the use of color tends to be a more subtle application of color than when color is used to grab the attention. However, that does not mean that it is any less powerful.

Different colors elicit different moods. Since there are a huge number of colors, it is not possible to cover all of the colors and their impacts on viewers’ moods in an article such as this one. Instead, a few colors will be reviewed in an effort to convey how colors affect viewers’ feelings.

Blue

Blue tends to bring forth feelings of calm or cold depending on how the color is used. This is a reflection of how we perceive the color in nature: the deep calm ocean is blue, peaceful cloudless skies are blue, and large amounts of ice have a blue tint. Therefore, a photographer that wishes to create a feeling of calm in an image should include blue objects in the image such as a peaceful blue stream or a blue lake.

Green

Green often communicates a feeling of lushness and freshness. Again, our feelings about this color are tied up with how we frequently experience that color in nature. We tend to associate green with spring and new growth. Green is frequently used in landscape photography. Green meadows, plants, and fields can be used to convey the mood of a flourishing scene.

Yellow, Orange, and Red

The last colors to be evaluated are the warm tones: yellow, orange, and red. These colors are associated with feelings of warmth and comfort (again the colors are tied to how we experience them in nature). Sunsets are a perfect example of how these warm colors create a comfortable feeling. Photographers that wish to take advantage of these colors can include, in their photographs, objects such as flowers, plants, food, and rocks that contain these colors.

Light

So far, we have looked at using color to create mood in photographs by means of including objects, with the appropriate colors, in an image. However, there is another way to use color to create mood in an image – the use of light. Early morning and evening provide a photographer with colored light which can be used to powerful effect in images. Before sunrise and about twenty minutes after sunset, everything is bathed in a soft blue light. This light can be used to create a calm mood such as an early morning shot of a beach bathed in the cool, blue light.

Just after sunrise and before sunset, the light is often very warm with red, orange, or yellow hues. This light can be used to create feelings of comfort such as a beautiful mountain peak bathed in a soft, warm, golden light.

Summary

When properly utilized, color can be one of the most effective methods of conveying mood in an image.

Do you follow the Process of Taking a Photo?

We divide the process into 4 steps: Camera Settings, Observation, Anticipation, and Experience.

Camera Settings

One of the best ways to be efficient in travel and street photography is to be fast; especially in Southeast Asia, where things are so busy. Mastering camera settings is the first step to becoming fast. This is the reason I advise my students to use aperture priority mode when shooting (at least during the day) and to always adjust their settings when entering a new light situation (a brighter or darker area).

Once this is done, it becomes something less to worry about when a photo opportunity presents itself. The photographer’s reaction will also be faster if they can find all buttons and functions instinctively, as the camera becomes an extension of the body. Knowing what aperture to use depending on the depth of field desired and the distance of the subject, finding the ISO button while looking through the viewfinder, etc. All these little things will help the photographer win seconds, which are vital and will make light work of a spontaneous shot.

The need to be very fast and know camera settings was essential to capture this ephemeral moment. (Photo by Etienne Bossot)

Observation

Every good travel or street photographer (not to mention photojournalist) is a great observer.

Being aware of their surroundings, the photographer will use a shorter time to make important decisions, such as how to use the natural light, or which foreground and background to use. This is necessary, mostly when composing an image involves the subject itself at the very end.

Observing and seeing this girl running down allowed me to pick up the proper background. (Photo by Etienne Bossot)

Anticipation

Once you’ve got camera settings and observation skills primed, anticipation is the next skill to master. Moving ahead in preparation of the photo concept, anticipating where a potential subject is going to be and where the light is going to move is key to shooting a great photo. This requires being physically fit enough to be able to move quickly, sometimes over holes, puddles, trees, walls, rivers, highways, magma, etc.

Being comfortable with camera settings will help win seconds, which are vital for the photographer. I often find that my students are missing great photo opportunities because they feel rushed. Mostly when traveling to exotic locations where everything is new, beautiful, and photogenic, they are often overwhelmed by all the great potential photos to be shot and rush to shoot as many things as possible. What happens then? The brain stops working. The result is a lack of discipline in creating composition, and as is very often the case, the use of the wrong camera settings (leading to a slow shutter speed and blurry photos).

Once the camera settings are prepared, the environment understood, and the photograph concept set up in the mind, it frees you up to think of the details and techniques that will make a great composition.

Man in a field that has just been plowed. When seeing that man from far away, I ran in order to have him right in front of the lush green background. (Photo by Etienne Bossot)

Experience

We tend to compose images using a few of the photography techniques we have learned, but mostly it’s an unconscious act of applying what we know that makes a good photo. For this we are using, as Michael Freeman mentions in his book, a “repertoire” of photos we have previously seen or taken and that we know work for us.

Using lines as diagonals, applying the rule of thirds, having our subject framed a certain way, etc. This is very important in order to be fast and make decisions; it also increases the risk of taking the same photo “template” over and over again.

Thus the need of extra time, gained by preparation, observation, anticipation and applying our experience, to adjust the composition and create something new, special, different, and reach another level of creativity.

Everything was ready and patiently prepared. Then the subject arrived… Click.

The Essential Shots Every Event Photographer Needs to Master

Event photography is a thrilling yet challenging domain. It’s about encapsulating the essence, emotions, and narrative of an event in a set of photos. For those who are venturing into the realm of event photography, knowing which shots are crucial and how to execute them can significantly up the game. Here’s a look at the essential shots every event photographer should master:


1. Candid Shots

Candid photography is the art of capturing spontaneous moments without the subjects being aware of the camera. These unposed shots often reflect the true essence and emotions of the moment.

Tips:

  • Stay Invisible: Blend with the crowd and avoid drawing attention to yourself to capture natural reactions.
  • Anticipate Moments: Keep an eye on the interactions and expressions, and have your camera ready to capture the fleeting moments.

2. Group Shots

Group shots are quintessential in events as they commemorate the gathering of families, friends, or colleagues.

Tips:

  • Organize Your Subjects: Direct your group with a friendly, but firm approach to get an organized shot quickly.
  • Use a Tripod: To ensure everyone is in focus, especially in large group photos, use a tripod to keep the camera steady.

3. Detail Shots

Every event has unique details that tell its story – the decor, food, venue setup, and other intricate elements.

Tips:

  • Arrive Early: Reach the venue before the guests to capture the details undisturbed.
  • Use a Macro Lens: For close-up shots of details, a macro lens can provide sharp and clear images.

4. Portraits

Portraits are personal and can be either posed or candid. They are a way to highlight the attendees and their connections to the event.

Tips:

  • Engage with Your Subject: Make your subject feel comfortable, talk to them, and perhaps share a laugh to get natural expressions.
  • Use a Shallow Depth of Field: A shallow depth of field helps in focusing on the subject and blurring the background, making the portrait more engaging.

5. Mastering Low Light Photography

Events often stretch into the evening hours, with dim lighting conditions. Mastering low light photography is crucial to ensure the quality of photos isn’t compromised.

Tips:

  • Use a Fast Lens: Lenses with wide apertures (like f/1.4 or f/1.8) allow more light into the camera sensor, aiding in low light conditions.
  • Increase ISO Sensitively: While higher ISO settings allow for brighter images in low light, they also introduce noise. Balance is key.
  • Steady Your Camera: Use a tripod or monopod to stabilize your camera, reducing the chances of blurred images due to camera shake.

6. On-Camera Flash Photography

On-camera flash can be a lifesaver in poorly lit environments, helping to illuminate the subject and surroundings adequately.

Tips:

  • Bounce the Flash: Instead of pointing the flash directly at the subjects, bounce it off a ceiling or wall for a softer, more flattering light.
  • Use Diffusers: Diffusers soften the light from the flash, reducing harsh shadows and highlights.

Conclusion

Mastering these shots requires practice, the right equipment, and a keen eye for storytelling through visuals. As an event photographer, evolving your skills to capture these essential shots will not only satisfy your clients but also provide a rewarding creative outlet. Each event is a new canvas with endless possibilities to capture enduring memories and tell compelling stories through your lens.