
DPC Creative Filmmaking Course 2.5 Months

Shoot • Edit • Create • Grow | By Delhi Photography Club

The Creative Filmmaking Course by Delhi Photography Club is a comprehensive, hands-on 10-week programme designed to transform your Smartphone or DSLR/Mirrorless Camera into a powerful storytelling tool. Over 2.5 months, 20 weekend sessions and 60 learning hours, participants will learn the complete filmmaking process—from generating ideas and developing stories to scripting, pre-production, camera work, lighting, sound, shooting, editing, colour grading, publishing, audience building and AI-powered content creation. The course is designed for aspiring filmmakers, content creators, YouTubers, vloggers, photographers moving into video, entrepreneurs, marketing professionals, students, working professionals and documentary enthusiasts. No prior filmmaking experience is required.

The programme follows a practical learning approach combining classroom sessions, hands-on workshops, live shoots, outdoor assignments, editing labs, mentor reviews and a final film project. With a maximum batch size of 10 participants, the course provides personalised attention and opportunities for individual feedback. Participants will begin with the fundamentals of visual storytelling, understanding different forms of video content, story structure, audience psychology and techniques for creating emotional impact. They will then learn idea generation, research, documentary and social media scripting, voice-over writing, storyboarding, shot planning, location scouting, scheduling and basic production budgeting, culminating in the creation of their own shooting plan.

The camera module focuses on both Smartphone and DSLR/Mirrorless filmmaking, covering camera settings, resolution, frame rates, exposure, focus and white balance, followed by cinematic techniques such as shot sizes, camera angles, camera movements, composition and visual language. Participants will also learn the fundamentals of lighting and sound, including natural and artificial light, three-point lighting, interview lighting, creative lighting, microphones, wireless audio systems, interview recording and noise reduction. Practical workshops will allow participants to apply these techniques through cinematic shooting and professionally lit interview exercises.

A dedicated module on Documentary Filmmaking introduces documentary formats, research, interview techniques, visual storytelling and ethical filmmaking, followed by a real-world field shoot where participants will capture interviews, B-roll and complete visual coverage. The course then moves into Social Media Content Creation, covering Instagram Reels, YouTube Shorts, Facebook and LinkedIn videos, content strategy, personal branding, finding a niche, developing content pillars and building an audience. Participants will create multiple short-form videos as part of their practical assignments.

The Video Editing Masterclass takes participants through the complete editing workflow, including file management, timelines, cutting, transitions, pacing, multi-camera editing, audio synchronisation, motion graphics and professional editing practices. The programme introduces Adobe Premiere Pro and provides an overview of DaVinci Resolve. Participants will then learn professional colour correction and grading, colour theory, cinematic looks, LUTs, export settings, sound enhancement, music selection, voice-over editing, sound effects and basic audio mixing, giving them the skills required to finish their films to a professional standard.

A key component of the programme is AI for Filmmakers and Content Creators. Participants will explore AI-powered tools for script development, research, voice generation, image and video creation, thumbnails, captions, SEO, YouTube optimisation and workflow automation. The course introduces tools and workflows involving ChatGPT, Gemini, Claude, Canva AI, Adobe Firefly and AI video tools, helping creators understand how emerging technology can accelerate their creative and marketing processes without replacing their storytelling vision.

Throughout the course, participants will undertake guided outdoor and practical assignments covering documentary storytelling, street filmmaking, travel content creation, interview production, social media reels and cinematic B-roll. By the end of the programme, every participant will have created a 3–5 minute documentary film, three social media reels, an interview-based video, a cinematic short film, a professional editing portfolio, a content strategy blueprint and a final showreel. The final week is dedicated to project production, editing supervision, troubleshooting, one-on-one mentoring and a final film screening and showcase, where participants receive feedback, portfolio guidance and a roadmap for taking their filmmaking journey forward.

The course also includes bonus learning on creator growth and monetisation, covering YouTube monetisation, brand collaborations, freelancing, client acquisition, pricing and proposals. Participants will also receive an equipment buying guide covering smartphone filmmaking accessories, camera recommendations, audio equipment, lighting kits and editing workstation requirements. Those who successfully complete the programme and submit their final project will receive a Delhi Photography Club Certificate of Completion in Creative Filmmaking.

With 16+ years of experience, Delhi Photography Club brings an industry-oriented and practical approach to filmmaking education. The small batch format, live field assignments, mentor-guided projects, AI-integrated training, portfolio development, personalised feedback, certification and final showcase make the programme suitable for anyone looking to move from simply recording videos to creating meaningful, professional-quality visual stories.

Course Details

Duration: 2.5 Months / 10 Weeks
Schedule: Saturday & Sunday
Sessions: 20 sessions × 3 hours
Total Learning: 60 Hours
Batch Size: Maximum 10 Participants
Course Fee: ₹30,000
Weekend Batches Starting Soon

Call/WhatsApp: 8826712162
Email: hi@delhiphotographyclub.com
Instagram: #iamdpc

Shoot. Edit. Create. Grow.

Join Delhi Photography Club and start your creative filmmaking journey.

Chiaroscuro: Creating Depth with Light and Shadow

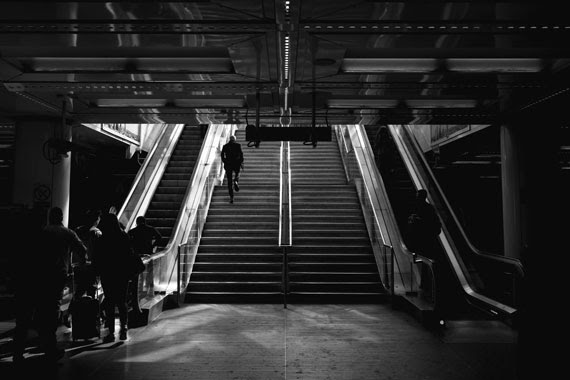
Chiaroscuro is a term that hails from the Italian Renaissance, literally meaning “light-dark.” It refers to the strong contrast between light and dark areas in a composition, which can create a dramatic, three-dimensional effect. This technique, often associated with the works of artists like Caravaggio and Rembrandt, has found a powerful place in photography, where it can add depth, mood, and intrigue to your images.

Understanding Chiaroscuro

At its core, chiaroscuro is about the interplay of light and shadow. It’s not just about having bright highlights and dark shadows; it’s about how these elements work together to shape and define the subject. In photography, chiaroscuro can be used to:

  • Emphasize Form: Light and shadow can highlight the contours and textures of the subject, giving it a sculptural quality.
  • Create Mood: The contrast between light and dark can evoke emotions ranging from mystery and suspense to intimacy and warmth.
  • Direct Attention: By manipulating light and shadow, you can guide the viewer’s eye to the most important parts of the image.

Historical Context

Chiaroscuro has its roots in painting, particularly in the Baroque period, where artists used it to enhance the dramatic impact of their works. In photography, this technique became popular with the advent of film noir, where the play of light and shadow was used to create a sense of tension and drama.

Applying Chiaroscuro in Photography

To effectively use chiaroscuro in your photography, follow these steps:

1. Control Your Lighting

The most crucial element of chiaroscuro is lighting. You need a light source that creates a stark contrast between the illuminated parts of your subject and the shadows. This could be:

  • Natural Light: Use window light or a single lamp to cast shadows and highlights on your subject.
  • Artificial Light: A studio light with a snoot or grid can help direct the light exactly where you want it.

2. Understand Your Shadows

Shadows are just as important as light in chiaroscuro. The shadows should be deep and dark, creating a sense of depth and dimension. Position your light source so that it casts shadows that enhance the contours of your subject.

3. Use Negative Space

Negative space, or the area around and between the subject, plays a significant role in chiaroscuro. It helps to frame the subject and emphasizes the contrast between light and dark. Make sure to leave enough dark space around your subject to create a dramatic effect.

4. Focus on Composition

The placement of your subject within the frame is crucial. Typically, the subject is placed off-center, with the light hitting one side more prominently than the other. This asymmetry can create a more dynamic and engaging composition.

5. Post-Processing Techniques

In post-processing, you can enhance the chiaroscuro effect by adjusting the contrast and shadows. Tools like dodging and burning can help you refine the light and shadow areas to achieve the desired effect.

  • Increase Contrast: Boost the contrast to accentuate the difference between light and dark areas.
  • Selective Lighting: Use tools to brighten or darken specific parts of the image, guiding the viewer’s eye and emphasizing the subject’s form.

Examples of Chiaroscuro in Photography

To better understand chiaroscuro, let’s look at some examples:

  • Portraits: A face partially lit from the side, with the other half falling into shadow, creates a dramatic and intense portrait. The light accentuates the subject’s features, adding depth and character.
  • Still Life: A single light source illuminating a still life setup, such as a bowl of fruit or a vase of flowers, can create a classic and timeless image. The shadows add a sense of volume and texture to the objects.
  • Architecture: Chiaroscuro can be used to highlight the architectural details of a building. The interplay of light and shadow on the structure’s surfaces can create a striking and powerful image.

Practical Tips for Beginners

  • Experiment with Light Sources: Try different light sources and angles to see how they affect your subject. Move the light around to find the most dramatic effect.
  • Practice with Simple Subjects: Start with simple subjects like a single object or a face. This will help you focus on the light and shadow without the distraction of a complex scene.
  • Study Classic Works: Look at the works of artists known for their use of chiaroscuro. Pay attention to how they use light and shadow to create depth and emotion.

Conclusion

Chiaroscuro is a timeless technique that can add a powerful visual impact to your photography. By mastering the interplay of light and shadow, you can create images that are not only visually striking but also rich in mood and emotion. So, grab your camera, experiment with lighting, and see how chiaroscuro can transform your photography.

Swavalamban Art Exhibition @ India International Centre

Swavalamban Art Exhibition Concludes Successfully at India International Centre

‘Swavalamban’ visual art exhibition, organized by Gayatri Luthra and Praketa LUTHRA’s – Moglykids Foundation and supported by SIDBI, concluded successfully on May 31, 2024, at the India International Centre, New Delhi.

Mrs Shama Chona and Gayatri Luthra in the Frame

The exhibition featured a rich diversity of art, photography, and sculpture by artists from NGOs, differently abled centers, old-age homes, and renowned art houses. Focused on the theme of “Inclusion,” the event provided a platform for artists regardless of caste, creed, socio-economic background, or age.

The highlight of the exhibition was the active participation of children from various NGOs who contributed through live art creation, enhancing the interactive atmosphere. The inauguration ceremony was graced by Dr. Shama Chona, Padma Bhushan Awardee, along with Sidbi General Manager – Shri Ram Meena and Deputy General Manager, Shri Naresh Kumar Solanki, underscoring the significance of inclusive art platforms.

Visitors from all walks of life present at IIC for the opening of exhibition.

‘Swavalamban’ aimed to bring everyone onto the same platform, creating opportunities for all. This increases exposure, fosters collaboration, and ensures that every individual, regardless of their background, has the chance to thrive. By transforming youth from job seekers to job creators, it targeted the underprivileged and underserved communities, fostering holistic development through creative endeavors.

Gayatri Luthra said “The joy of sharing the hidden and unnoticed creativity of children from Ngos and other underprivileged communities, brought out the power of inclusion & equality. It is what made this Moglykids exhibition a runaway success”

The opening day of the exhibition also showcased the art of music played and sung by children of many schools.

The exhibition’s success is a testament to the power of inclusion and creativity, with Moglykids Foundation and SIDBI extending heartfelt gratitude to all participants, visitors, and supporters who contributed to this memorable event

Sanaa , ‘This was my first exhibition ever and I’m so excited. And it’s all Thanks to Virender sir of the Delhi photography club who taught me how to use a camera . All my exhibits were sold. Which was really an big encouragement’

Best Spots for Street Photography in a City

Street photography is an art form that thrives on spontaneity, capturing candid moments of urban life that tell a story or evoke a particular feeling. While every city is unique, offering its own rhythm and character, there are common types of locations within any urban environment where street photographers can find compelling subjects and scenes. Here are some of the best spots in a city for street photography, each offering a window into the heartbeat of urban life.

1. Busy Marketplaces – silent corners

Marketplaces are bustling hubs of activity, color, and culture, making them perfect for street photography. They offer a variety of subjects in a single frame, from vendors and shoppers to a myriad of goods and the vibrant chaos of commerce. The interactions, expressions, and energy in marketplaces provide endless opportunities for dynamic shots.

2. Historic Neighborhoods

Every city has its historic quarters, streets that tell the story of its past. These neighborhoods often feature unique architectural details, old signs, and a sense of timelessness. Capturing life as it unfolds in these areas can create a fascinating contrast between the old and the new, offering a rich context for storytelling through photography.

3. Public Squares and Parks

Public squares and parks are gathering places for people from all walks of life. They serve as stages for a range of human activities — kids playing, couples relaxing, individuals lost in thought, or public performances. The variety of backdrops, from manicured gardens to grand architectural features, can enhance the visual appeal of your photographs.

4. Transit Hubs

Stations, bus terminals, and airports are transit hubs where people are often seen in transition, offering a glimpse into the journey aspect of urban life. These locations provide dynamic environments for capturing people in motion, varied interactions, and a mix of emotions, from the joy of greetings to the sadness of farewells.

5. Street Corners and Crosswalks

The intersections of busy streets are prime spots for capturing the flow of city life. Pedestrians, cyclists, cars, and street vendors converge at these points, creating opportunities for photographers to capture movement, interactions, and the organized chaos of urban living.

6. Cafés and Restaurants

Outdoor seating areas of cafés and restaurants offer a more relaxed atmosphere for street photography. They allow you to capture people in a range of activities — dining, conversing, or simply enjoying the street scene. These spots provide a more intimate glimpse into the everyday life and culture of the city.

7. Cultural Institutions and Events

Museums, galleries, theaters, and venues for cultural events are not only architectural landmarks but also gathering spots for diverse crowds. During events, these places offer a mix of excitement, interaction, and the convergence of different cultures, ideal for vibrant and expressive photography.

Respecting Privacy and Ensuring Safety

While street photography is about capturing authentic urban life, it’s paramount to do so with respect for individuals’ privacy and dignity. Always be mindful of people’s comfort levels and avoid taking intrusive photos that could invade their personal space or cause distress. It’s about observing and documenting life, not violating privacy or exploiting moments. Additionally, prioritize your safety and be aware of your surroundings, especially in crowded or less familiar areas. Respect local laws and customs, and if someone indicates they do not wish to be photographed, honor their request without hesitation. By fostering an approach rooted in respect and ethical considerations, you can create compelling imagery that truly honors the essence of street life.

Conclusion

The best spots for street photography in a city are those where life unfolds in its most authentic and vibrant forms. While the locations mentioned above are typical hotspots, the true essence of street photography lies in the unexpected moments that you stumble upon. Always be ready with your camera, for the streets are alive with stories waiting to be captured. Whether you’re a seasoned photographer or new to the field, exploring these urban canvases can be a deeply rewarding experience, full of surprises and profound insights into the human experience.


Demystifying the Plane of Focus in Photography

In the world of photography, achieving sharp, well-defined images is often the holy grail. One crucial concept that can significantly impact the sharpness of your photographs is the “plane of focus.” Whether you’re a seasoned photographer or just starting, understanding this concept can elevate your photography skills. So, let’s dive in!

What is the Plane of Focus?

The plane of focus refers to the specific area within your shot that is in sharp focus. Imagine it as an invisible, flat surface running parallel to your camera’s sensor. When you focus your camera on a subject, you are aligning the plane of focus with your subject, ensuring that it appears sharp in your image.

Depth of Field and Plane of Focus

The plane of focus is intrinsically linked to the concept of depth of field (DoF). DoF defines how much of your image, from front to back, appears sharp. A shallow depth of field means that only a thin slice of your image (the plane of focus) will be sharp, with areas in front of and behind it appearing blurry. Conversely, a deep depth of field expands this sharpness to a larger portion of your scene.

Controlling the Plane of Focus

  1. Aperture: The aperture of your lens controls the depth of field. A wide aperture (small f-number) yields a shallow depth of field, while a narrow aperture (large f-number) increases the DoF, making more of your image appear in focus.
  2. Lens Focal Length: Telephoto lenses have a shallower depth of field compared to wide-angle lenses. Hence, the plane of focus appears narrower with longer lenses.
  3. Focusing Distance: The closer you are to your subject, the shallower the depth of field becomes, narrowing the plane of focus.

Practical Tips for Mastering Plane of Focus

  • Manual Focusing: Sometimes, your camera’s autofocus might not align the plane of focus precisely where you want it. Using manual focus gives you complete control over the focus point.
  • Focus Peaking: Many modern cameras have a focus peaking feature that highlights the edges of the plane of focus, aiding in manual focusing.
  • Tilt-Shift Lenses: These specialized lenses allow you to tilt the plane of focus, enabling it to be non-parallel to the image sensor. This technique can produce striking effects, particularly in architectural and product photography.

The Creative Power of the Plane of Focus

Understanding and controlling the plane of focus not only improves the sharpness of your images but also unleashes creative potential. By deliberately placing your plane of focus, you can direct the viewer’s attention, isolate your subject, or create dreamy, ethereal backgrounds.

Summary:

The plane of focus is a fundamental concept in photography that, when mastered, can significantly enhance the technical and artistic quality of your images. By understanding how to control it through aperture, focal length, and focusing distance, you can take your photography to new heights of clarity and creativity.

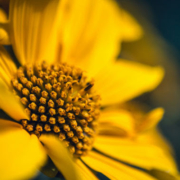
Whether you’re capturing the delicate details of a flower or framing a stunning landscape, remember that where you place your plane of focus can transform an ordinary shot into a compelling visual story.