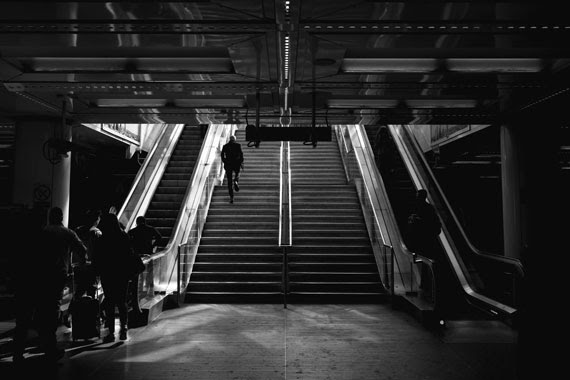
Street Photography: Telling a Complete Story

While street photography can often seem like a stream of random and unrelated moments all jumbled together, the reality of the genre is the complete opposite of this.

The magic of street photography is taking these moments and weaving them together to create a feeling, tell a story or show a place—and often all three together. This is an art form within the art form of street photography, and the sky is the limit with what you can create.

So here are some tips to help you do all of this.

Create Collections:

Collections in Lightroom (and similar album systems for other programs) are an extremely important part of the editing process. For any idea or story that I have, I will create a collection, which allows me to keep my related photos in one place without physically moving them on my hard drive.

As I’m going through my work, if I see a photo that could work within one of these collections, I’ll drag it in there. Then I will go through these collections frequently to see what’s working and what’s not. I often delete photos from collections as well.

Grow Your Vision Organically:

The more I do this with collections, the more I find photographs that start to relate to each other in my work. As the collection progresses, it often changes drastically, and photos I loved at first just don’t fit anymore. It’s a fun, organic process that allows me to notice more when I’m out shooting, to find more photos that fit within these ideas.

Over time, this organic process grows more concrete and I can put words to what I’m doing. I notice more subjects that fit within the idea, and will then even be able to go searching for specific types of images to fit that theme.

Use the Star System:

I couldn’t live without the star system when editing my work and creating projects. This allows me to quickly pick out my best photos as well as the photos that I’m not sure about, so I can find them easily later.

Typically, I’ll give my photos either zero stars (which I’ll later delete), three stars (which are photos I’m not sure about) and five stars (which I love, at least initially). But the three-star photos are just as important as the fives. I often go through these folders months later and will find incredible three-star photos that I was not sure of at the moment, but with some time clearly stood out.

Create a Project:

So how do you come up with an idea for a project? There are a bunch of ways!

The first is to do it organically, as I mentioned earlier. Just go out and shoot a lot, go to new areas, revisit favorite places again and just build your archive. This is such an important step to give yourself time to find enough great moments and to also train your eyes.

After a while, you’ll start to notice photos that you relate to most and that relate to each other, and this will begin to spark loose ideas. You’ll start to find more and more moments that fit while you’re out shooting, and the idea and feeling in the work will grow organically until one day it becomes concrete.

The next way is to choose an area and tell the story of it. I typically recommend choosing the area where you live or just a place you frequent, obviously because this will give you the most time to shoot—after all, they’re the places you know the best.

Capture the people, the buildings, the general scenes, interesting details and even nature. Tell a complete story. Try to put your spin on how you feel about the place and what makes it unique (or not unique). Put your feelings into it.

And the final strategy is just to sit down and brainstorm an idea for a project. To help do this, I think doing photographer research is vital. Look through projects, photographers and photo books you love for inspiration to help spark the right idea. Jot them all down on paper and eventually one will stick!

Build a Book Mockup:

After some point, I’ll begin to go through my collections to sequence them, weave together a story and eventually create a mock book through the book module in Lightroom and Blurb. It’s such a fun experience seeing your hard work all bound together.

The Golden Ratio Applied to Photographic Composition

If you have been using The Rule of Thirds in your photographic compositions, you may have discovered an inherent shortcoming. Composing for the Rule of Thirds involves lining up a subject with one of the recommended intersections or lines. This can sometimes result in the subject being crowded too close to the edge of the frame.

The problem can be minimized, if not eliminated using the Golden Ratio Grid, rather than the standard equally spaced Rule of Thirds grid.

What is the Golden Ratio?

It is worth while taking a look at what the Golden Ratio is before applying it. The concept was discussed as far back as 300BC as being mathematically interesting, and in addition to being called the Golden Ratio it is also referred to as the Golden Mean or Divine Proportion.

In simple terms, it refers to two measurements where the ratio of the sum of both measurements and the largest measurement is the same as the ratio of the largest and the smallest. In other words a + b / a is the same as a / b. This ratio is 1 to 1.618 and is often quoted to be found in nature, architecture, art and music amongst other things.

The mathematics of the Golden Ratio was further explored by a man called Fibonacci to deliver the Fibonacci Sequence of numbers. Start with 0 and 1 then progressively add the previous two numbers together to obtain the next. The sequence would progress as 0, 1, 1, 2, 3, 5, 8, 13, 21, 34, 55, and so on. The interesting thing is that the further the progression advances, the closer to the golden ratio becomes the result of dividing the next to the last number in sequence by the last number in sequence. For example, 55/34 is 1.617647…, and the result of 233/144 is 1.618055…

This sequence is used to generate another composition variation called the Golden Spiral. There are opinions that this spiral can be seen in a Nautilus shell, the seeds on a pine cone, and even the arms of the milky way. Such is the interest in the Golden Ratio that many regard it as the universal constant that all things in life relate to in one way or another.

How Do You Apply the Golden Ratio to Your Photos?

One simple way to apply the Golden Ratio is to apply it to a rule of thirds grid. But, instead of the three columns and rows being of equal width and height, the center column and row is 0.618 the measurement of the other two. If you place a subject at a row/column intersection now, you effectively move the subject further from the edge of the image frame, giving the subject more space.

You can also employ the Golden Spiral to place the main point of interest within the inside of the spiral. The spiral is created from the Fibonacci sequence, which when plotted as a series of Golden Rectangles with a series of arcs drawn within the rectangles, results in the spiral overlay. You can see this graphically represented on my website.  Adobe Lightroom provides composition overlays for the Golden Ratio grid and for the Golden Spiral.

Harnessing Soft Light: Where & When to Find Diffused Lighting

As a photographer, understanding light is as fundamental as understanding your camera. One of the most flattering and universally appealing types of lighting is diffused light. This kind of light is soft, gentle, and does not cast harsh shadows, making it ideal for a variety of photography genres. But where and when can you find the best diffused lighting? Let’s dive into some key tips to help you harness the power of diffused light for your photography.

1. Golden Hour – Dawn and Dusk

Golden hour is that magical time just after sunrise or just before sunset. The sun is low in the sky, and its light is filtered through a greater amount of the Earth’s atmosphere, which scatters the direct sunlight and reduces its intensity. This natural diffusion creates a warm, soft light that is not only less intense but also casts long, gentle shadows. It’s perfect for portrait photography, landscape shots, and even urban scenes where the golden tones can bring a new dimension to your compositions.

2. Overcast Days – Natural Soft Boxes

Cloudy days might seem dull to the untrained eye, but they are actually perfect for diffused lighting. The clouds act like a giant softbox in the sky, scattering and softening the sunlight. This eliminates harsh shadows and provides a clean, even light that is excellent for shooting portraits, macro photography, or any scene where you want subtle details and colors to emerge without the interference of strong shadows.

3. Shaded Areas – Soft Shadows

When the sun is too intense, look for shaded areas under trees, buildings, or other large objects. These spots can provide a sanctuary of diffused light. The key here is to find areas where the sunlight is not directly hitting the subject but is instead filtered through or bounced off other surfaces. This setup is particularly useful for achieving beautifully lit portraits without squinting subjects or harsh facial shadows.

4. Using Windows – Indoor Diffusion

Indoors, windows can serve as excellent sources of diffused light, especially when covered with sheer curtains. The fabric acts to scatter the light, mimicking the effect of a softbox used in studio photography. This method is ideal for product photography, food photography, and portraits. The directional light from a window can also create a dynamic range of light and shadow, adding depth to your indoor shots.

5. The Blue Hour – Twilight Ambience

Following the golden hour, the blue hour provides a brief period where the sky takes on a predominantly blue tone with a cool, soft light. This light is diffused through the absence of the direct sun and offers a unique quality that is excellent for cityscapes, landscapes, and even nighttime portraiture. The softness helps to smooth out imperfections and brings a tranquil and ethereal mood to photographs.

6. Tools to Enhance Diffusion

While natural light provides many opportunities for diffused lighting, sometimes manipulation is necessary to achieve the perfect shot. Tools like diffusers, reflectors, and softboxes can help recreate or enhance the qualities of diffused light. These are particularly useful in harsh lighting conditions or when shooting in direct sunlight.

Summary:

Finding the perfect light can sometimes be a challenge, but with an understanding of where and when to find diffused light, you can significantly improve the quality and aesthetic of your photographs. Whether utilizing the golden tones of the early morning, the soft evenness of an overcast day, or the subtle hues of twilight, mastering diffused lighting can transform your photography. Always be prepared to observe and adapt to your environment to make the most of the light available to you, and don’t hesitate to use tools to create or enhance light diffusion where necessary.

Best Spots for Street Photography in a City

Street photography is an art form that thrives on spontaneity, capturing candid moments of urban life that tell a story or evoke a particular feeling. While every city is unique, offering its own rhythm and character, there are common types of locations within any urban environment where street photographers can find compelling subjects and scenes. Here are some of the best spots in a city for street photography, each offering a window into the heartbeat of urban life.

1. Busy Marketplaces – silent corners

Marketplaces are bustling hubs of activity, color, and culture, making them perfect for street photography. They offer a variety of subjects in a single frame, from vendors and shoppers to a myriad of goods and the vibrant chaos of commerce. The interactions, expressions, and energy in marketplaces provide endless opportunities for dynamic shots.

2. Historic Neighborhoods

Every city has its historic quarters, streets that tell the story of its past. These neighborhoods often feature unique architectural details, old signs, and a sense of timelessness. Capturing life as it unfolds in these areas can create a fascinating contrast between the old and the new, offering a rich context for storytelling through photography.

3. Public Squares and Parks

Public squares and parks are gathering places for people from all walks of life. They serve as stages for a range of human activities — kids playing, couples relaxing, individuals lost in thought, or public performances. The variety of backdrops, from manicured gardens to grand architectural features, can enhance the visual appeal of your photographs.

4. Transit Hubs

Stations, bus terminals, and airports are transit hubs where people are often seen in transition, offering a glimpse into the journey aspect of urban life. These locations provide dynamic environments for capturing people in motion, varied interactions, and a mix of emotions, from the joy of greetings to the sadness of farewells.

5. Street Corners and Crosswalks

The intersections of busy streets are prime spots for capturing the flow of city life. Pedestrians, cyclists, cars, and street vendors converge at these points, creating opportunities for photographers to capture movement, interactions, and the organized chaos of urban living.

6. Cafés and Restaurants

Outdoor seating areas of cafés and restaurants offer a more relaxed atmosphere for street photography. They allow you to capture people in a range of activities — dining, conversing, or simply enjoying the street scene. These spots provide a more intimate glimpse into the everyday life and culture of the city.

7. Cultural Institutions and Events

Museums, galleries, theaters, and venues for cultural events are not only architectural landmarks but also gathering spots for diverse crowds. During events, these places offer a mix of excitement, interaction, and the convergence of different cultures, ideal for vibrant and expressive photography.

Respecting Privacy and Ensuring Safety

While street photography is about capturing authentic urban life, it’s paramount to do so with respect for individuals’ privacy and dignity. Always be mindful of people’s comfort levels and avoid taking intrusive photos that could invade their personal space or cause distress. It’s about observing and documenting life, not violating privacy or exploiting moments. Additionally, prioritize your safety and be aware of your surroundings, especially in crowded or less familiar areas. Respect local laws and customs, and if someone indicates they do not wish to be photographed, honor their request without hesitation. By fostering an approach rooted in respect and ethical considerations, you can create compelling imagery that truly honors the essence of street life.

Conclusion

The best spots for street photography in a city are those where life unfolds in its most authentic and vibrant forms. While the locations mentioned above are typical hotspots, the true essence of street photography lies in the unexpected moments that you stumble upon. Always be ready with your camera, for the streets are alive with stories waiting to be captured. Whether you’re a seasoned photographer or new to the field, exploring these urban canvases can be a deeply rewarding experience, full of surprises and profound insights into the human experience.


DPC Spiti Trip Photo Review Session and Members Meetup

This give us immense pleasure to Invite you all DPC members for the DPC Spiti Trip Photo Review Session and Members Meetup this Saturday .

Spiti Travellers: Please get photos that you want to review and share with us in Pen drive, Selected pictures will also be featured on DPC website and DPC social Media posts .
Date : 23rd April 2022 
Time : 4 pm to 6 pm

Venue: DPC Lounge Shahpur Jat

For more info call
8826712162 or DM if interested!
For any queries:
hi@delhiphotographyclub.com