Creating Depth of Field in your photos

One the most fundamental techniques necessary to really to master creative photography is depth of field. It was always a bit of a mystery to me because of the link to aperture and understanding all those back to front f-numbers. I think it was more of a mental block, though, because it’s actually quite easy to grasp.

Creatively you are able to do more with your photography and as you learn digital photography you will find using depth of field key to great images. You can use it to blur out backgrounds while the subject remains pin sharp or to create an image perfectly in focus from front to back, as in great landscape photos.

1. What is depth of field?

It’s quite simple. It’s the amount of a scene that is in focus in front of your point of focus or behind it. Depth of field is more simply understood as depth of focus: how much of the image is in focus. A lens can only focus at one point which is the sharpest, most in focus point in the photo. But what you can do by using depth of field is to control the perceived zone of focus. This will differ when shooting different subjects or scenes.

Now, there are three main factors that affect depth of field. Firstly, the aperture you are using, secondly the focal length of the lens, and thirdly the focusing distance. All of these will impact the depth of field. Each of these will affect depth of field, so in order to control it effectively it’s necessary to master each one of them.

2. Focal length

When shooting an image using a 28mm wide angle lens at, say, f/5.6 you will see a much greater depth of field as compared to a 400mm at the same aperture. When using different lenses understand what the impact will be so that you can creatively use the resulting depth of field.

3. Aperture

On a lens you have possible apertures ranging from f/1.2 all the way up to f/32, and each of these lens openings will have an effect on depth of field. If shooting on the extremes, like f/32, you’ll find that it results in quite a considerable difference than when you shoot at f/2.8. Then when shooting using the mid-range numbers the depth of field will again be different. An aperture of f/2.8 will have a very shallow depth of field while f/32 will show sharp focus throughout the whole image.

4. Focusing distance

How far you are to the point of focus is another factor to consider. When using any lens, the depth of field will increase the further the focusing distance. If you focus on an object three meters away, and if you focus on something 300 meters in the distance, the depth of field will be greater. So in other words, when the subject is far away from the camera there will be a greater depth of field and more of the image will be in focus.

5. When to use depth of field

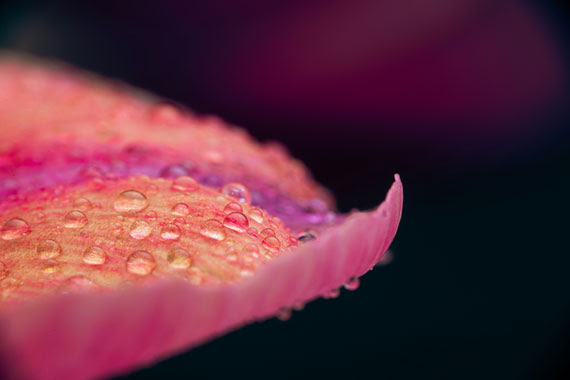
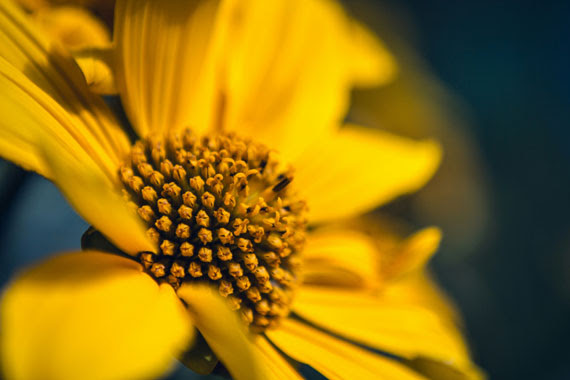
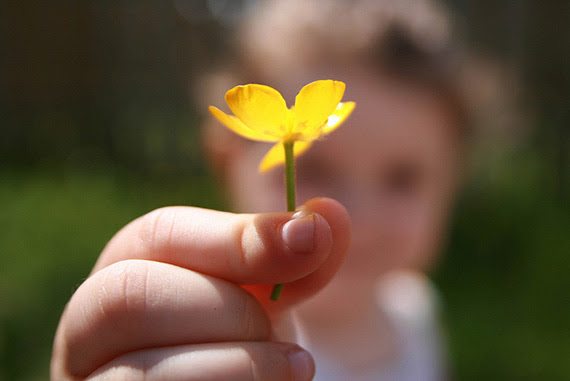
Most of us have taken landscape images where most of the scene is in focus. This is true when you’re shooting scenes of fields and trees and boats on the sea. The way in which this is achieved is by setting your aperture to a higher number, e.g. f/11 and above, which means a smaller aperture opening. Virtually the whole scene from foreground to background is in focus. But this changes when choosing a wider aperture opening or a small f-number on the lens. Here you would only use this setting to shoot something you want to isolate such as a face in a portrait. The background gets blurred out and the face is in crisp focus. You would also use this when shooting close-ups of flowers or animals in a zoo where you don’t want to see the background or the bars or fence in the foreground.

So, as you can see, depth of field is really quite simple. Blurred out backgrounds use a large aperture and landscapes that need to be in focus from foreground all the way through to the background use a small aperture. The key as you learn digital photography is to experiment with all settings and then practice, practice, practice!

The Golden Ratio Applied to Photographic Composition

If you have been using The Rule of Thirds in your photographic compositions, you may have discovered an inherent shortcoming. Composing for the Rule of Thirds involves lining up a subject with one of the recommended intersections or lines. This can sometimes result in the subject being crowded too close to the edge of the frame.

The problem can be minimized, if not eliminated using the Golden Ratio Grid, rather than the standard equally spaced Rule of Thirds grid.

What is the Golden Ratio?

It is worth while taking a look at what the Golden Ratio is before applying it. The concept was discussed as far back as 300BC as being mathematically interesting, and in addition to being called the Golden Ratio it is also referred to as the Golden Mean or Divine Proportion.

In simple terms, it refers to two measurements where the ratio of the sum of both measurements and the largest measurement is the same as the ratio of the largest and the smallest. In other words a + b / a is the same as a / b. This ratio is 1 to 1.618 and is often quoted to be found in nature, architecture, art and music amongst other things.

The mathematics of the Golden Ratio was further explored by a man called Fibonacci to deliver the Fibonacci Sequence of numbers. Start with 0 and 1 then progressively add the previous two numbers together to obtain the next. The sequence would progress as 0, 1, 1, 2, 3, 5, 8, 13, 21, 34, 55, and so on. The interesting thing is that the further the progression advances, the closer to the golden ratio becomes the result of dividing the next to the last number in sequence by the last number in sequence. For example, 55/34 is 1.617647…, and the result of 233/144 is 1.618055…

This sequence is used to generate another composition variation called the Golden Spiral. There are opinions that this spiral can be seen in a Nautilus shell, the seeds on a pine cone, and even the arms of the milky way. Such is the interest in the Golden Ratio that many regard it as the universal constant that all things in life relate to in one way or another.

How Do You Apply the Golden Ratio to Your Photos?

One simple way to apply the Golden Ratio is to apply it to a rule of thirds grid. But, instead of the three columns and rows being of equal width and height, the center column and row is 0.618 the measurement of the other two. If you place a subject at a row/column intersection now, you effectively move the subject further from the edge of the image frame, giving the subject more space.

You can also employ the Golden Spiral to place the main point of interest within the inside of the spiral. The spiral is created from the Fibonacci sequence, which when plotted as a series of Golden Rectangles with a series of arcs drawn within the rectangles, results in the spiral overlay. You can see this graphically represented on my website.  Adobe Lightroom provides composition overlays for the Golden Ratio grid and for the Golden Spiral.

Travel Photography: How to Capture the Character of a Place

Many different elements go into making up the character of a particular destination or location, whether it be a far flung exotic city or your home town. It is the travel photographer’s job to cover these elements in order to present that character to the viewer. This article looks into what goes into bringing the character of a place to the audience.

Essential Elements

There are many separate “parts” that make a location what it is, but these generally boil down to landscape, people, and culture. Let’s look at these in a little more depth.

Landscape

Every city, mountain range, or coastal area has its own unique look and feel. This might be created by architecture exclusive to that part of the world, such as Gaudi’s designs that are so prominent in Barcelona. Or well known landmarks (Eiffel Tower anyone?) or rough seas and steep cliffs like those so characteristic of the northern coasts of Scotland and Ireland. What does it look like in the morning? At night? The location might take on several personalities through the day, so it is essential to capture as many of these as you can to give a broader picture.

People

Possibly the most influential factor in the character of a location is the people who live there. The way they look and dress, the way they carry themselves, the lifestyle they live, and the customs they observe. Is there a particular piece of clothing that defines them? Or maybe a certain characteristic? For example, if they are known to be happy and smiling people, show them as such. If they are known to be hardworking, try to include some shots of workers.

Culture

This can encompass subjects such as food and drink. Local dishes give an immediate insight into the way of life lived by people of a particular place. Freshly caught seafood may be a specialty of the area, or it may be famous for a particular dessert or drink. Culture can also be shown in the festivals and events held in the particular region. This might be an annual parade where locals dress in the traditional costumes of their ancestors or a huge street party that captures the energy and vibrancy of a population.

Putting It All Together

To put these elements in photographic terms, I like to think of the process as zooming in on a subject. Starting with the landscape element described above, you essentially form an overview—or wide angle view—of the subject, capturing surroundings. Distinctive buildings and landmarks give a feel and sometimes instant recognition to the location.

Zoom in to form a collective portrait of the people, their way of life, and daily activities. It is a good idea to use both posed portraits and candid shots to show personalities as well as customs and way of life.

Finally zoom in further to capture details such as local food and dishes and detailed studies of buildings. Text such as in shop signs shows languages spoken. Also, look for any products that are traditional or well known in the area. For example, leather goods from Morocco or electronics from Japan.

Travel photography is, in a sense, a very broad specialization. Possibly not a specialization at all. A travel photographer needs to be a landscape photographer, portrait photographer, still life photographer, and nature photographer—often all in the space of a single shooting session. Learn to cover all these elements within the broader subject, and you are well on your way to becoming a more accomplished photographer.

The Relationship Between Color and Light in Photography

Understanding the relationship between color and light is fundamental to mastering photography. Light is the medium through which we perceive color, and the interplay between the two can dramatically affect the mood, tone, and composition of a photograph. In this post, we’ll delve into the science behind color and light, how they interact, and how photographers can harness this relationship to create stunning images.

The Science of Color and Light

At its core, color is the result of light interacting with objects and our eyes. Light is composed of electromagnetic waves, which vary in wavelength. When light strikes an object, it can be absorbed, reflected, or transmitted. The specific wavelengths that are reflected determine the color we perceive. For instance, an apple appears red because it reflects red wavelengths and absorbs others.

White light, like sunlight, contains all visible wavelengths. When it passes through a prism or raindrop, it disperses into a spectrum of colors, revealing the full range of visible light from red to violet. This phenomenon is known as dispersion and is a key concept in understanding color.

Color Temperature and Photography

Color temperature refers to the hue of light emitted by a light source and is measured in Kelvin (K). Different light sources have different color temperatures, which can dramatically alter the appearance of a photograph.

  • Warm light (around 2000K-3000K) appears more orange or yellow and is typical of sunrise, sunset, and tungsten bulbs.
  • Cool light (above 5000K) appears more blue and is common in midday sunlight and overcast conditions.
    Photographers use color temperature to set the white balance in their cameras, ensuring that colors appear natural and consistent regardless of the lighting conditions.

The Role of Light in Photography

Light is the essence of photography. The word “photography” itself means “drawing with light.” Here are a few ways light influences photography:

  • Exposure: The amount of light that reaches the camera sensor determines the exposure of an image. Proper exposure ensures that details are visible in both the highlights and shadows.
  • Contrast: Light creates contrast by casting shadows and highlights, adding depth and dimension to a photograph.
  • Mood: The quality and direction of light can set the mood of a photograph. Soft, diffused light creates a gentle, flattering effect, while harsh, direct light can evoke drama and intensity.
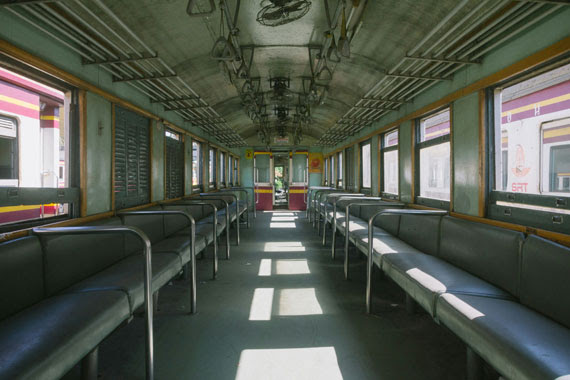
  • Color Casts: Different light sources can introduce color casts to a photo. For example, fluorescent lighting can produce a greenish tint, while incandescent lighting can add a warm, orange hue.

Using Color and Light Creatively

Photographers can manipulate color and light to enhance their images and convey specific emotions or messages. Here are a few techniques:

  • Golden Hour: The period shortly after sunrise and before sunset, known as the golden hour, provides soft, warm light that is ideal for capturing portraits and landscapes.
  • Blue Hour: The time just before sunrise and after sunset, called the blue hour, offers cool, twilight hues that can create a serene and mystical atmosphere.
  • Color Filters: Using color filters or gels can alter the color balance of a scene, adding creative effects or correcting unwanted color casts.
  • Artificial Lighting: Studio lights, flash, and continuous lighting allow photographers to control the intensity, direction, and color of light, providing endless creative possibilities.

Summary:

The relationship between color and light is a cornerstone of photography. By understanding how light affects color and how different lighting conditions can alter the appearance of a photograph, photographers can make informed decisions about exposure, composition, and mood. Whether you’re shooting in natural light or a controlled studio environment, mastering the interplay of color and light will elevate your photography to new heights.

Using Color to Create Strong Photo Compositions

Color is one of the most obvious elements of composition. Everyone knows that intense colors make people take notice of your images. Ever wonder why there are so many sunset and flower shots? Color is the reason.

Color has a couple of functions in photographs. First, color grabs the attention of the viewer. Perhaps, because this function of color is so palpable, many photographers miss the more sophisticated, and in some cases far more powerful, function of color: color sets the mood of an image. Since color is such an important compositional ingredient, the experienced photographer will want to use color to its fullest extend — incorporating both functions of color into images.

Grabbing the Viewer’s Attention

Utilizing color to grab attention is often rather straight forward. Generally, what is required is a saturated or intense color. This type of color tends to grab the viewer’s attention and focus it on the area of color. Furthermore, the color tends to keep the viewer’s attention for an extended period of time. When the viewer’s eyes do wander, the color tends to bring the attention back.

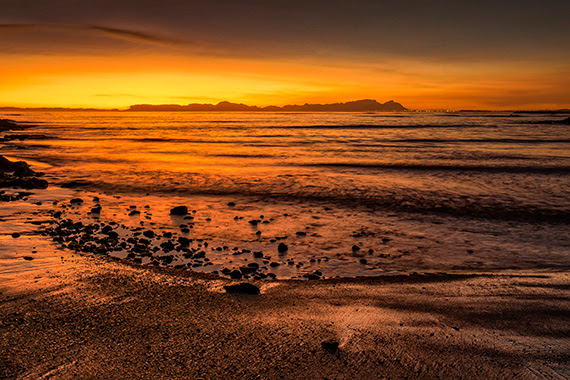
There are a couple of primary ways to use color to grab a viewer’s attention. The first way is to use very saturated, bold colors. An example of this approach would be a dramatic sunset. The second way of using color to grab a viewer’s attention is to use a mix of contrasting colors. An example of this approach would be an image of fall colors where there is a combination of red, orange, and yellow leaves.

Mood

Setting the mood through the use of color tends to be a more subtle application of color than when color is used to grab the attention. However, that does not mean that it is any less powerful.

Different colors elicit different moods. Since there are a huge number of colors, it is not possible to cover all of the colors and their impacts on viewers’ moods in an article such as this one. Instead, a few colors will be reviewed in an effort to convey how colors affect viewers’ feelings.

Blue

Blue tends to bring forth feelings of calm or cold depending on how the color is used. This is a reflection of how we perceive the color in nature: the deep calm ocean is blue, peaceful cloudless skies are blue, and large amounts of ice have a blue tint. Therefore, a photographer that wishes to create a feeling of calm in an image should include blue objects in the image such as a peaceful blue stream or a blue lake.

Green

Green often communicates a feeling of lushness and freshness. Again, our feelings about this color are tied up with how we frequently experience that color in nature. We tend to associate green with spring and new growth. Green is frequently used in landscape photography. Green meadows, plants, and fields can be used to convey the mood of a flourishing scene.

Yellow, Orange, and Red

The last colors to be evaluated are the warm tones: yellow, orange, and red. These colors are associated with feelings of warmth and comfort (again the colors are tied to how we experience them in nature). Sunsets are a perfect example of how these warm colors create a comfortable feeling. Photographers that wish to take advantage of these colors can include, in their photographs, objects such as flowers, plants, food, and rocks that contain these colors.

Light

So far, we have looked at using color to create mood in photographs by means of including objects, with the appropriate colors, in an image. However, there is another way to use color to create mood in an image – the use of light. Early morning and evening provide a photographer with colored light which can be used to powerful effect in images. Before sunrise and about twenty minutes after sunset, everything is bathed in a soft blue light. This light can be used to create a calm mood such as an early morning shot of a beach bathed in the cool, blue light.

Just after sunrise and before sunset, the light is often very warm with red, orange, or yellow hues. This light can be used to create feelings of comfort such as a beautiful mountain peak bathed in a soft, warm, golden light.

Summary

When properly utilized, color can be one of the most effective methods of conveying mood in an image.