Posts

Cityscape Photography Tips

Cityscape photography, often viewed as the urban cousin of landscape photography, captures the man-made wonder of our urban environments. Whether you’re aiming to capture the grandeur of towering skyscrapers, the dance of city lights, or the daily buzz of urban life, the right techniques and tools can make a world of difference.

Understanding Cityscape Photography

At its core, cityscape photography encapsulates the beauty, architecture, and vibrancy of urban landscapes. From the neoclassical edifices of Europe to the cutting-edge skyscrapers of Asia, cityscapes tell stories of progress, history, and human ambition.

Essential Equipment for Cityscape Photography

Lenses:

  • Wide-angle lens (10-24mm): Ideal for capturing sweeping vistas of urban jungles.
  • Telephoto lens (70-200mm): Perfect for zooming in on intricate architectural details or isolating subjects against a vast city backdrop.

Tripod: A sturdy tripod is invaluable. For shots with long exposures, like capturing the streaks of cars or the gentle flow of water, a tripod ensures your camera stays still and your images are crisp.

Helpful Filters:

  • Polarizer: Helps to reduce reflections, particularly useful for buildings with glass facades.
  • Neutral Density (ND) filter: Essential for achieving long exposure effects during bright daylight.

Optimal Camera Settings for Cityscapes

  • Mode: Opt for Manual (M) if you’re familiar with settings or Aperture Priority (Av/A) if you’d like the camera to determine the shutter speed.
  • Aperture: A range of f/8 to f/16 offers a good depth of field, ensuring both foreground and background elements are in focus.
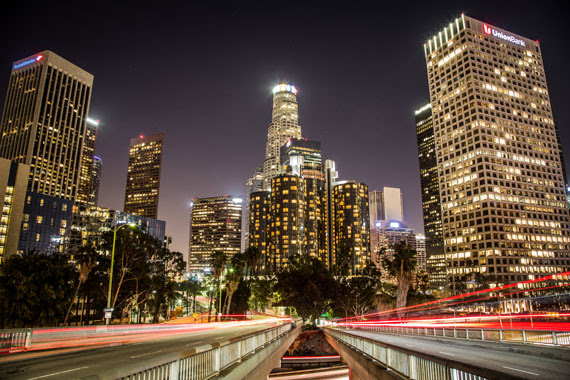
  • Shutter Speed: This will vary based on your desired effect. For capturing light trails, you’ll need longer exposures. To freeze the bustle of the city, opt for faster speeds.
  • ISO: To keep images noise-free, aim for ISO 100-400. Only increase the ISO in situations where light is limited and using a tripod isn’t feasible.

Timing is Everything

  • Blue Hour: This magical time, either before sunrise or after sunset, provides a serene blue tint to the sky, making city lights truly pop.
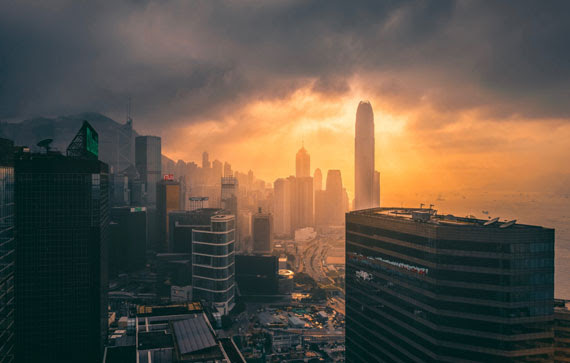
  • Golden Hour: Occurring shortly after sunrise or just before sunset, this time bathes the city in a warm and soft light, perfect for capturing the city’s glow.
  • Night: As cities come alive with lights, shooting at night can showcase the city’s vibrant nocturnal personality.

Pro Tips for Exceptional Cityscapes

  • Bracketing: This involves taking several shots of the same scene at different exposures. Later, these can be blended in post-processing to achieve a balanced and detailed image, also known as High Dynamic Range (HDR) imaging.
  • Focusing in Low Light: When the camera struggles to autofocus in dim settings, switch to manual focus. Using the Live View mode, zoom in on a well-defined part (like a building’s edge) and adjust the focus manually.
  • Depth of Field: If your scene includes a prominent foreground element, like a statue or fountain, consider focus stacking. This technique involves taking multiple shots with different focus points and merging them in post-production to achieve an image that’s sharp from front to back.

Cityscape photography, like all art forms, thrives on experimentation. While these guidelines provide a solid starting point, the true essence and vibe of a city can best be captured when photographers bring their unique perspective and creativity into play. So, head out, explore the urban wilderness, and most importantly, enjoy the process of immortalizing cityscapes. Happy shooting!

10 Common Composition Mistakes in Photography

Are you making any of these common composition mistakes?

1. Subject Is in the Center of the Frame

Sometimes a central subject works, but normally it’s better to shoot it positioned to one side, as explained in the rule of thirds. Most cameras are capable of showing a grid in the viewfinder that can help us split the scene into thirds—horizontally and vertically. The main subject should ideally be positioned where the lines cross each other or in a full third, with the rest of the elements aligned with the grid lines.

Again, we have to mention that the rules of composition are a great aid to consider as a starting point, trying to move from centrally composed images, but keep in mind that sometimes it’s worth trying to break the rules to innovate—to create something more interesting. Let your feelings speak for you.

2. Subject Is Too Small in the Frame

Although our brains are great at focusing on a subject and excluding its surroundings, that almost never happens when you look at an image. When taking a shot, always consider if it would look better if you got closer (or zoomed in with your lens) so the subject fills the frame and clearly dominates the attention.

The more you include in a photograph, the more complex and difficult it is for the viewers to understand and appreciate the idea that is trying to be conveyed.

3. Nothing in the Foreground

It’s always a good idea to have something in the foreground to give the shot depth, draw the viewer’s eye in, and add scale, especially in a landscape or in a still life image. Don’t waste this space telling nothing to the viewer.

Logs, rocks, flowers, tide marks in the sand, or waves, for example, always add a little interest to the foreground. If you’re arranging a still life scene, you should try to put something in the front of the scene.

4. Always Shooting From a Standing Position or Straight On

You must play with perspective! Get down on your knees, move to one side, lay down, or get yourself to a higher point of view. Many of us get so worried about finding a subject that we forget to think about how we’re going to photograph it. If you shoot a subject straight on, you’ll record its appearance, but you may fail to capture any context or atmosphere. Again, experimenting is key!

5. Distracting Background

Always examine your photo’s background. We won’t miss clutter behind the subject, and it’s an easy fix if we move to one side, pick a different angle, change our lens, or use a wider aperture (to blur the background).

Get used to the habit of taking a good look around the scene before framing a shot to find the best background and shooting location.

6. Poor Use of Depth of Field

Depth of field is an important and powerful tool for composition; it determines which elements are in focus (clearly visible) in the image.

Shooting with a small aperture creates lots of depth of field, which is often desirable in landscapes and macros. But if you want your subject to standout from its surroundings, it is usually better to shoot with a bigger aperture (smaller f-number) to restrict depth of field. This is especially true for portraits.

7. Sloping Horizons

A sloping horizon in a landscape or even a portrait can be incredibly distracting, so make sure it’s level.

Many cameras have a built-in electronic level that can be displayed in the viewfinder or on the main screen to guide you, but if not, there are some bubble level accessories you can fit into the camera hot-shoe (normally used for an external flash unit).

Also, many tripods have a level built in if you’re looking into buying one.

8. Blurred Images

Sometimes we’re so worried about getting everything in focus that we set the aperture much too small, which calls in a need for a really slow shutter speed as a consequence.

Remember that aperture and shutter speed are closely linked; they work together to keep a good exposure in balance. The more you close down the aperture (smaller opening, larger f-number) the slower the shutter speed required to keep the exposure balanced. If the shutter speed is too slow, you can either open up your aperture or increase the ISO (or both) until you reach the correct exposure.

9. No Focal Point

The main subject in a photograph should be effectively positioned so that it’s the central point of interest in the composition (i.e. emphasized). We must draw the viewer’s eye exactly to where we want it. Size, color, shape, and contrast with the rest of the elements in the image are ways to isolate and direct attention to the subject.

10. Not Knowing Your Camera Controls and Functions

You MUST read your camera manual. Knowing your camera and all of its buttons and settings is vital. Being able to do that takes practice. You should be able to adjust ISO, shooting mode, focus point, exposure compensation, aperture, and shutter speed without taking the camera away from your eye. Believe us, it will make a difference that you can’t afford to miss!

Focus Stacking