10 Common Composition Mistakes in Photography
Are you making any of these common composition mistakes?
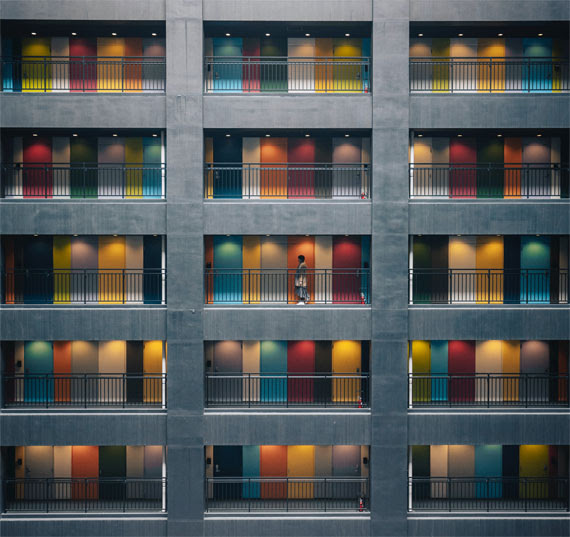
1. Subject Is in the Center of the Frame
Sometimes a central subject works, but normally it’s better to shoot it positioned to one side, as explained in the rule of thirds. Most cameras are capable of showing a grid in the viewfinder that can help us split the scene into thirds—horizontally and vertically. The main subject should ideally be positioned where the lines cross each other or in a full third, with the rest of the elements aligned with the grid lines.
Again, we have to mention that the rules of composition are a great aid to consider as a starting point, trying to move from centrally composed images, but keep in mind that sometimes it’s worth trying to break the rules to innovate—to create something more interesting. Let your feelings speak for you.
2. Subject Is Too Small in the Frame
Although our brains are great at focusing on a subject and excluding its surroundings, that almost never happens when you look at an image. When taking a shot, always consider if it would look better if you got closer (or zoomed in with your lens) so the subject fills the frame and clearly dominates the attention.

The more you include in a photograph, the more complex and difficult it is for the viewers to understand and appreciate the idea that is trying to be conveyed.
3. Nothing in the Foreground
It’s always a good idea to have something in the foreground to give the shot depth, draw the viewer’s eye in, and add scale, especially in a landscape or in a still life image. Don’t waste this space telling nothing to the viewer.
Logs, rocks, flowers, tide marks in the sand, or waves, for example, always add a little interest to the foreground. If you’re arranging a still life scene, you should try to put something in the front of the scene.
4. Always Shooting From a Standing Position or Straight On
You must play with perspective! Get down on your knees, move to one side, lay down, or get yourself to a higher point of view. Many of us get so worried about finding a subject that we forget to think about how we’re going to photograph it. If you shoot a subject straight on, you’ll record its appearance, but you may fail to capture any context or atmosphere. Again, experimenting is key!
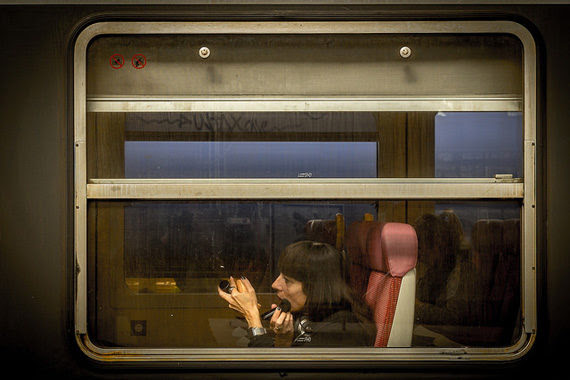
5. Distracting Background
Always examine your photo’s background. We won’t miss clutter behind the subject, and it’s an easy fix if we move to one side, pick a different angle, change our lens, or use a wider aperture (to blur the background).
Get used to the habit of taking a good look around the scene before framing a shot to find the best background and shooting location.
6. Poor Use of Depth of Field
Depth of field is an important and powerful tool for composition; it determines which elements are in focus (clearly visible) in the image.

Shooting with a small aperture creates lots of depth of field, which is often desirable in landscapes and macros. But if you want your subject to standout from its surroundings, it is usually better to shoot with a bigger aperture (smaller f-number) to restrict depth of field. This is especially true for portraits.
7. Sloping Horizons
A sloping horizon in a landscape or even a portrait can be incredibly distracting, so make sure it’s level.
Many cameras have a built-in electronic level that can be displayed in the viewfinder or on the main screen to guide you, but if not, there are some bubble level accessories you can fit into the camera hot-shoe (normally used for an external flash unit).
Also, many tripods have a level built in if you’re looking into buying one.

8. Blurred Images
Sometimes we’re so worried about getting everything in focus that we set the aperture much too small, which calls in a need for a really slow shutter speed as a consequence.
Remember that aperture and shutter speed are closely linked; they work together to keep a good exposure in balance. The more you close down the aperture (smaller opening, larger f-number) the slower the shutter speed required to keep the exposure balanced. If the shutter speed is too slow, you can either open up your aperture or increase the ISO (or both) until you reach the correct exposure.
9. No Focal Point
The main subject in a photograph should be effectively positioned so that it’s the central point of interest in the composition (i.e. emphasized). We must draw the viewer’s eye exactly to where we want it. Size, color, shape, and contrast with the rest of the elements in the image are ways to isolate and direct attention to the subject.
10. Not Knowing Your Camera Controls and Functions
You MUST read your camera manual. Knowing your camera and all of its buttons and settings is vital. Being able to do that takes practice. You should be able to adjust ISO, shooting mode, focus point, exposure compensation, aperture, and shutter speed without taking the camera away from your eye. Believe us, it will make a difference that you can’t afford to miss!