
What Lenses Work Best for Beautiful Background Blur?

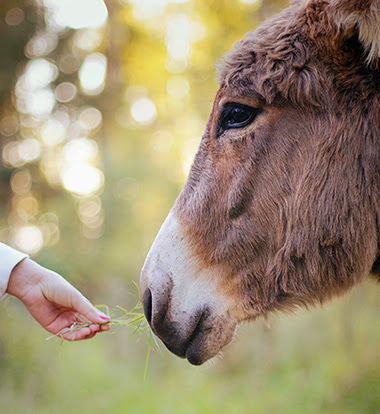
Here is a portrait that uses background blur to make the model pop from the background.
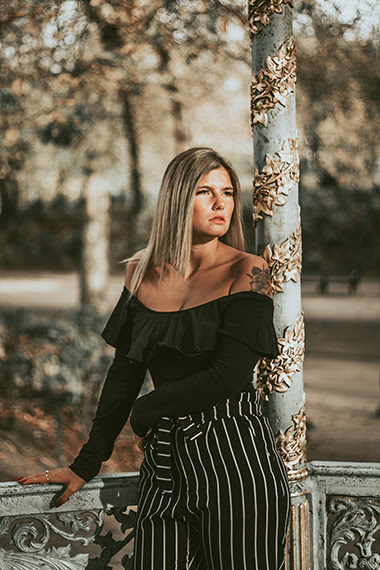
Background blur is an excellent composition tool to set your subject apart from their surrounding areas. It’s another way of saying “minimum depth of field”.

Newer photographers, with entry-level equipment, often find the idea of background blur difficult, because no matter what they do they cannot create the effect.
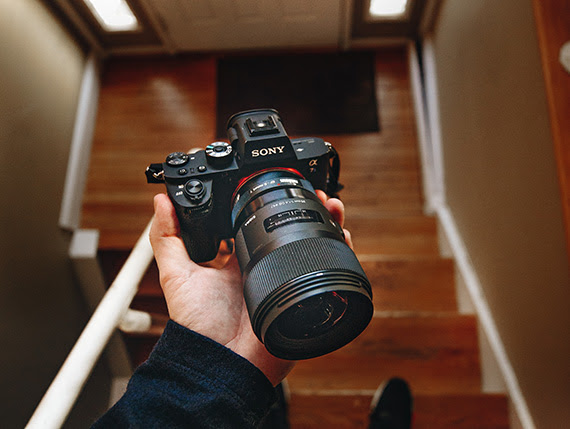
Blurring a background requires several elements of photography to be successful. First and foremost is the lens.

For that reason, in this article, we will concentrate on lens selection to create optimal background blur.

Quick Tip
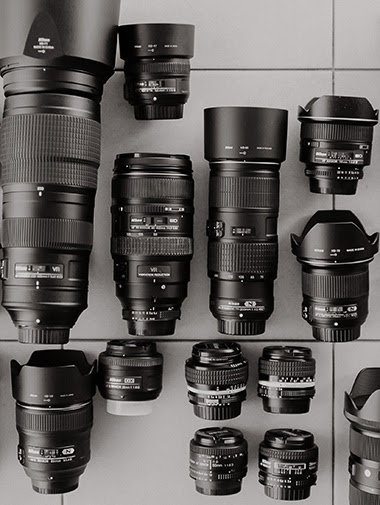
Your first consideration when blurring a background is the focal length of the lens.

The longer the focal length, the more blur will be created at a given f-stop.

For example, at f/2.8, a 200mm lens will create more background blur than a 50mm lens.

Wide-angle lenses will not create a noticeable background blur effect at any f-stop.

Any lens wider than a “normal” field-of-view lens will create a negligible background blur, even when you have set the f-stop to the widest opening.

A normal field of view is between 50 and 55mm for a full-frame sensor and 28-34mm on a camera with an APS-c sensor.

A “normal” lens is one that closely mimics the field of vision for the human eye.
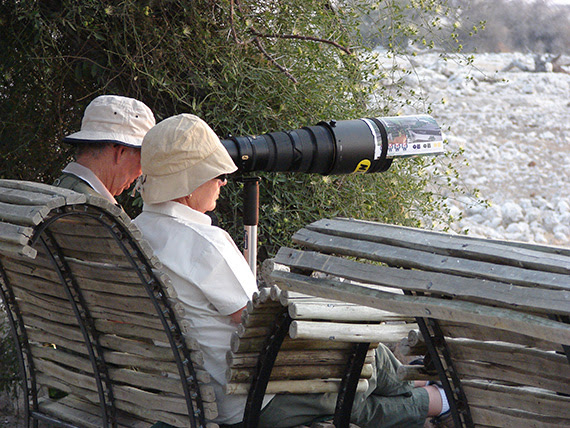
The lens in the image above is most definitely not a “normal” lens. A very long telephoto lens like this would create background blur even at smaller apertures!

What about the relationship between aperture and background blur?

The photographic term “fast lens” refers to the largest aperture available on the lens. A lens with a very wide maximum aperture is a faster lens than a similar lens with a smaller maximum aperture.

This fact of optics is why creating background blur with kit lenses is difficult to impossible. They generally have a smaller maximum aperture.

The lens above has a maximum aperture of f/1.4. This lens would be considered very fast, and it would be extremely efficient at creating background blur.
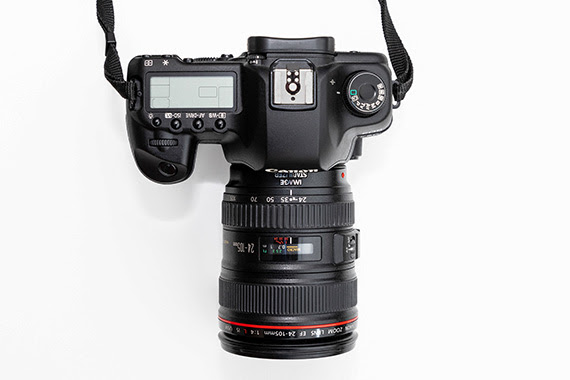
This Canon 24-105mm zoom lens has a maximum aperture of f/4. This lens is not as fast a lens as compared to the previous example, where the maximum aperture was f/1.4.

Some lenses display the aperture scale outside the lens (such as the Nikon 85mm).

Other lenses only display the aperture scale inside the viewfinder, such as Canon 24-105mm zoom lens.

Most lenses have variable apertures. The one exception is mirror lenses. They have a fixed aperture, usually around f/8.

Quick Tip

With a zoom lens (variable focal length), such as the Canon example, the lens will create more background blur at a longer focal length setting versus a shorter focal length setting.

For example, this Canon lens set at the maximum aperture of f/4 will create more background blur at the 105mm focal length setting versus the 24mm focal length setting (where it would create little to no background blur).

Conclusion: When selecting a lens for background blur…

  • A lens with a longer focal length works better than a shorter one.
  • A lens with a wider maximum aperture works better than a lens with a smaller one.
  • A “fast lens” is one that has a large maximum aperture (f/2.8 or larger).
  • Kit lenses, as a general rule, are not very fast and therefore do a poor job of creating background blur.
  • Wide-angle lenses are also a poor choice for creating background blur.
  • A lens focal length starting at a “normal” field of view (matching the human eye) and escalating toward longer focal lengths (telephoto) creates the best background blur.
  • When using a zoom lens (variable focal length), the longest focal length will create a better background blur than the shorter focal lengths at the maximum aperture.
Note: Some zoom lenses have a “variable” maximum aperture. You would want to consider this when choosing a focal length for background blur with a zoom lens.
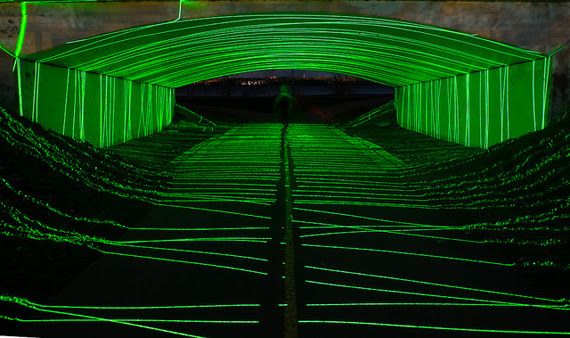

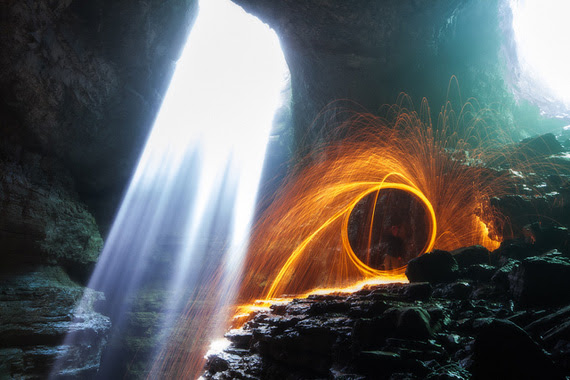
Light Painting Photography Techniques: 7 Useful Tips

Light painting is a fun photography technique where photographers use camera flashes, flashlights, and spotlights to paint light in a scene. It can easily qualify as the best/most fun night photography technique. Although many photographers have attempted it before, only a few have mastered the technique. Below are some very useful tips to consider when you want to perfect your light painting skills.

1. Try out different light sources

This is very important You shouldn’t try painting everything using the same light. To avoid odd and flat pictures, consider using different light sources, otherwise your work will defy the sole purpose of light painting, which is to create unique light impressions on different landscape parts at night.

2. Use dimmable light sources

For the best results, you need to choose dimmable light sources, because light painting relies heavily on light intensity. To get the best results, you must be able to alter light intensity whichever way you like to ensure every part of a photo gets the right amount of light.

3. Take care of the noise

It is important to note that long exposures create more noise. Because of this, take time painting in light, but don’t forget to factor in this small detail; it can be the difference between good and bad lighting photography.

4. Take multiple shots

To get the best light painting photos, you need to take as many shots as possible. Multiple shots help you treat different parts of a photo separately which should be the case in light painting.

5. Use flashlights that don’t have hot spots

Moving your flashlight beam randomly when taking light photos doesn’t make a big difference even if your flashlight has a hot spot (a bright circle located at the center of the beam). The hotspot does, however, make a big difference when you are considering fine details in scenes. If you don’t have money to buy the perfect flashlight, consider taping tissue paper or wax paper over your flashlight lens to eliminate hot spots.

6. Include night photography techniques

Just because you are light painting shouldn’t mean you forget typical night photography techniques. You must consider techniques like mirror lockup, cable release, long exposure noise reduction, etc., to ensure you get the best outcome.

7. Mix ambient light

You should also remember to incorporate ambient light—like street lights or moon light—to add mood to your photos. Using flashlights shouldn’t mean you ignore all other light sources.

Keep these tips in mind next time you head out for a light painting shoot.

The Photographer’s Palette: The Role of Color in Composition

Colors are the silent narrators of the stories that unfold through photography. They can evoke emotions, guide the viewer’s eye, and create a compelling composition. Photographers, both amateurs and professionals, should consider color as an essential tool in their creative arsenal to enhance the visual storytelling experience. In this blog post, we delve into the importance of color in photography composition and how you can use it effectively.

The Role of Color in Photography Composition

Photography is a visual medium that relies heavily on composition, the arrangement of visual elements within a scene. A well-composed photo has a balance of elements that guide the viewer’s eye through the image, creating a visually pleasing and engaging experience.

One of these elements, often overlooked, is color. Colors can have different psychological effects on the viewer. They can stimulate emotions, highlight subjects, create depth, and even convey concepts and ideas. Understanding the role of color in photography can, therefore, elevate your compositions, taking your photos from merely “good” to “outstanding.”

Color Theory and The Color Wheel

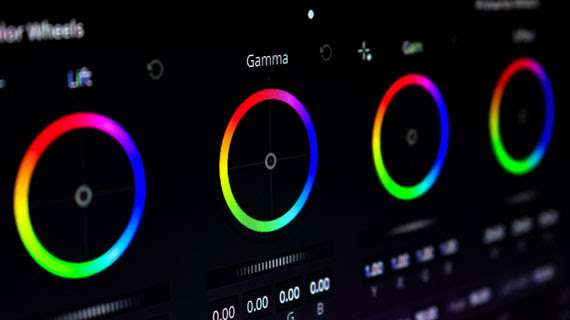
Before diving into the practical aspects, understanding some basics of color theory can be beneficial. Central to color theory is the color wheel, which includes primary colors (red, blue, yellow), secondary colors (green, orange, purple), and tertiary colors – the result of mixing a primary and a secondary color.

Colors opposite each other on the color wheel are complementary colors, and when used together, they create a vibrant contrast. Analogous colors, those close together on the wheel, can establish a sense of harmony and cohesion.

Using Color in Photography Composition

  1. Complementary Colors: Complementary colors can make your subject pop, making the viewer’s eye immediately drawn to it. The stark contrast created by these color pairings can add a dramatic effect to your photographs.
  2. Analogous Colors: Using analogous colors can create a sense of harmony and consistency. These colors work well together and create a calming, peaceful effect. They are excellent for capturing serene landscapes, quiet street scenes, or intimate portraits.
  3. Monochrome: A monochrome color palette doesn’t mean just black and white. It involves using different shades, tints, and tones of a single color. This approach can produce a striking, impactful image by playing with light and shadows.
  4. Color and Mood: Colors can evoke a specific mood. Warm colors (red, orange, yellow) typically stir up feelings of warmth and comfort, while cool colors (blue, green, purple) elicit feelings of calm and relaxation. Use color to enhance the atmosphere or emotion you want to convey in your photograph.
  5. Color as a Leading Line: Color can be used as a leading line to guide the viewer’s eye towards your subject or a specific area in your image. Bright, saturated colors tend to draw attention, so use them strategically.
  6. Color for Depth and Dimension: You can use color to add depth and dimension to your photos. Warm colors appear closer to the viewer, while cool colors seem to recede into the background.

Understanding Color Balance and Post-Processing

In digital photography, understanding color balance is crucial. Cameras interpret colors differently than the human eye, so adjusting the color balance, usually through White Balance settings, can significantly influence the overall mood of your photograph.

In post-processing, tools like Photoshop or Lightroom can help correct color balance, adjust saturation and vibrancy, or apply color grading to further emphasize the mood or narrative you want to express.

Final Thoughts

In the world of photography composition, color is a powerful tool waiting to be fully exploited. Mastering the use of color takes practice and experience, but once you grasp its potential, your photos will never be the same. So, the next time you’re framing a shot, consider not just the subjects and shapes, but the colors and the story they can tell. After all, every hue in your palette is another word in your photographic vocabulary.

Diagonal Leading Lines in Photography

Of all the lines used in photography, diagonals are the most dynamic. You can use them to create a strong impression of movement or you can use them to create a tremendous sense of depth. All images are created with lines—some vertical, horizontal and others converging—but knowing how to place them affects the mood and composition of the final image.

A sense of order is created with vertical and horizontal lines, implying stability and strength. Diagonals are unbalanced and appear to be unstable. What they communicate is dynamic, yet precarious. They always appear to be falling over or not quite secure. This is what lends itself to a dramatic image.

The easiest way to create diagonals is simply by tilting your camera. Slanted views of horizontals and verticals and can easily be created by the photographer. I find that a bit of tilt to my camera adds a little slant to the image and creates a perfect diagonal line.

Try capturing a simple image like a car or skyscraper by tilting the camera forty five degrees and see the effect you create. What happens to the image? The car looks as if it is going fast while skyscraper appears to be reaching for the sky. This effect is created simply by simply turning your camera

When shooting from high up from a bird’s eye view, you can really create some stunning images. Look for lines then tilt the camera. The bird’s eye vantage allows you great leeway, as there is no right way, no up or down; everything is two dimensional. Experiment with patterns and color, and you will arrive at some dramatic compositions.

Don’t be afraid to use crazy angles and change your viewpoint when shooting with diagonals. They will help give you a sense of depth and perspective. They tend to lead the eye to whatever focal point you decide, to a place where they end or disappear into nothing. Diagonals encourage the eye of the viewer to follow, almost like the Judas goat at the abattoir that leads the livestock to the slaughter. A set of footprints, a curved hedge, or river can be used to guide the viewers to the point of focus. But you must lead them to something that has a strong interest otherwise the viewer is left feeling that the image is incomplete.

Then there is the zigzag effect when using diagonals in patterns. The repeated pattern can also be used to drag the eye into the image over a larger area of the frame. These patterns are dynamic and, when used with horizontals and verticals, become even more dramatic.


I have always chosen diagonals as my favorite lines because they are so dynamic and add something to my images. Bottom line though, as you learn digital photography, you need to experiment and practice what you learn in order to master it. Happy shooting!

About the Author:
Wayne Turner has been teaching photography for 25 years and has written three books on photography. He has produced 21 Steps to Perfect Photos; a program of learner-based training using outcomes based education.

Exploring the Depths: The Fascinating World of Underwater Photography

Underwater photography is a captivating and exhilarating genre that allows photographers
to dive into a whole new world of visual possibilities. From vibrant coral reefs teeming
with colorful marine life to mesmerizing seascapes, the underwater realm offers endless
opportunities for creativity and exploration. In this article, we will take a plunge into the

fascinating world of underwater photography and delve into the techniques and
considerations that can help you capture stunning images beneath the waves.

One of the first and most important aspects of underwater photography is having the right
equipment. Investing in a reliable underwater camera housing or a waterproof camera
is essential to protect your gear from water damage. Make sure the housing is suitable
for the depths you plan to explore. Additionally, consider using wide-angle lenses to
capture expansive underwater scenes or macro lenses to capture intricate details of
smaller subjects.

Lighting is a critical factor in underwater photography, as the properties of light change as
you descend into the depths. The colors become less vibrant and red wavelengths are
absorbed more quickly. To counteract this, you can use artificial lighting sources such as
strobes or underwater flashes. These help restore the colors and illuminate your
subjects, bringing them to life in your images. Experiment with different angles and
intensities of light to create stunning visual effects and add depth to your photographs.

Composition plays a vital role in creating captivating underwater images. The same
principles that apply to composition in other genres of photography can be applied
underwater as well. Utilize the rule of thirds, leading lines, and framing techniques to
create visually engaging and balanced compositions. Experiment with angles and
perspectives to add depth and interest to your shots. The buoyancy of water allows you
to move freely, so take advantage of this to find unique viewpoints and capture dynamic
images.

Mastering buoyancy is a skill that can greatly enhance your underwater photography. Being
neutrally buoyant allows you to effortlessly maneuver and position yourself for the best
shots. Practice controlling your buoyancy to achieve the desired position and angle,
enabling you to capture stable and sharp images. This also helps minimize disturbance
to the marine environment and ensures you can navigate safely underwater.

When it comes to subject selection, the underwater world offers an abundance of
captivating options. Vibrant coral reefs, schools of fish, and unique sea creatures are just
a few examples of the diverse marine life you may encounter. Research your diving
location beforehand to identify potential subjects of interest. Exercise patience and
observation to capture elusive moments and behaviors in their natural habitat.

Post-processing is an essential part of underwater photography. Adjustments to color
balance, contrast, and saturation can help bring out the true colors of the underwater

world and correct any color casts caused by the water. Utilize editing tools to remove
backscatter, which are tiny particles suspended in the water that can appear as
unwanted specks in your images. Enhance the overall clarity and sharpness to showcase
the intricate details of your underwater subjects.

Lastly, always prioritize safety when engaging in underwater photography. Follow proper
diving protocols, familiarize yourself with the dive site, and be aware of potential
hazards. Respect marine life and their habitats, and practice responsible diving and
photography techniques. Remember, capturing stunning images is important, but it
should never come at the expense of the environment or your own safety.

In conclusion, underwater photography is a thrilling and rewarding genre that opens up a
whole new world of visual exploration. By having the right equipment, understanding
lighting, mastering composition, practicing buoyancy control, and respecting safety
guidelines, you can capture awe-inspiring images that showcase the captivating beauty
of the underwater realm. So, gear up, dive in, and embark on an extraordinary
photographic adventure beneath the waves.