Posts

Mastering the Art of Scale in Landscape Photography

One of the primary challenges in landscape photography is capturing the vastness and grandeur of a scene in a way that translates well to a two-dimensional image. This is where the concept of ‘scale’ comes into play. Including an element of scale can provide context and a sense of proportion, making your landscapes more compelling and relatable. Here are some techniques to effectively show scale in your landscape photographs:

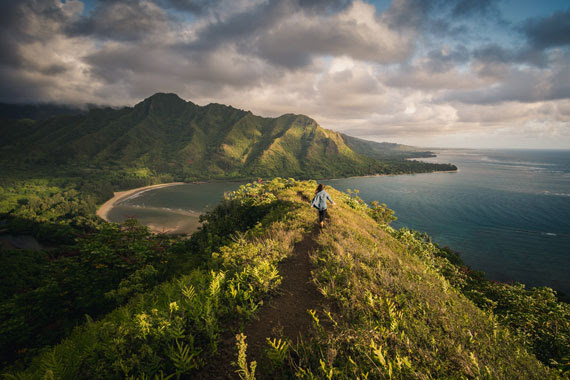
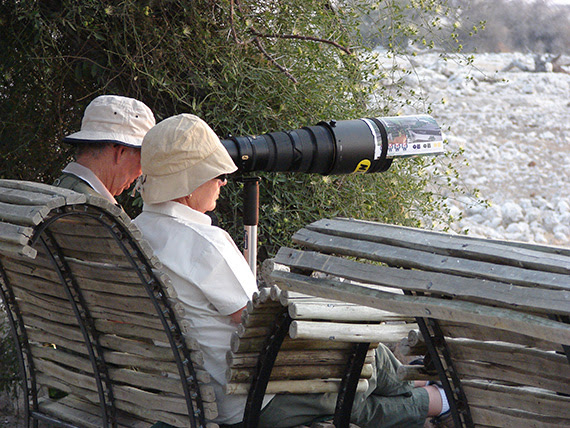
1. Introduce a Human Element

Including a person in your landscape shot is one of the easiest ways to convey scale. The viewer instinctively knows the approximate size of a human, which provides an instant reference. This technique works especially well with grand landscapes such as mountains, canyons, or vast fields.

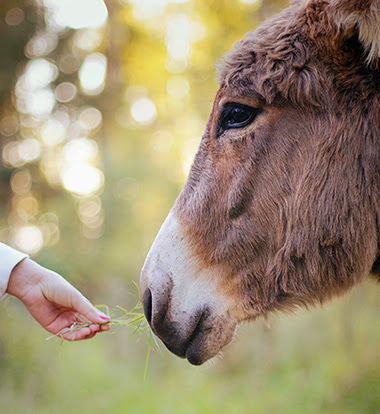
2. Use Familiar Objects

If a human figure isn’t available or doesn’t fit the context, other familiar objects can serve as a reference. This can include things like vehicles, animals, or even buildings. For example, a lone car on a winding road amidst massive mountains can effectively show the enormity of the scene.

3. Layering and Foreground Elements

Introducing layers in your image, especially with a strong foreground element, can provide depth and a sense of scale. A prominent rock, tree, or other subject in the foreground, juxtaposed with the middle and background layers, helps the viewer gauge distances and sizes in the scene.
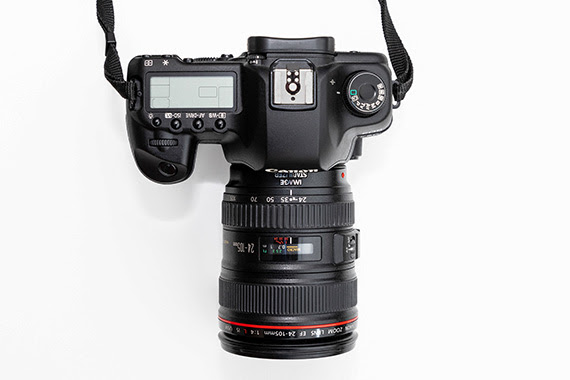
4. Use Wide Lenses

Wide-angle lenses inherently capture more of a scene, making vast landscapes look even vaster. When you pair a wide lens with a strong foreground element, the exaggeration of perspective further amplifies the sense of scale.

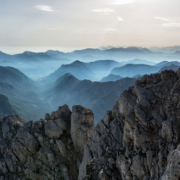
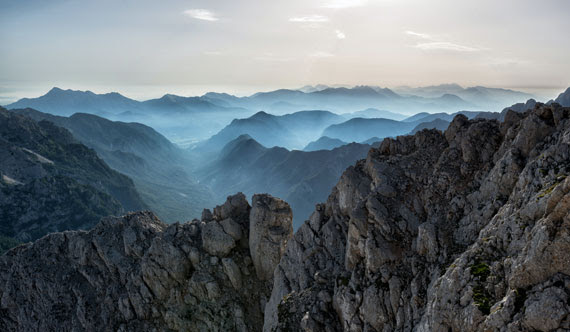
5. Capture Atmospheric Perspective

Atmospheric perspective is the phenomenon where distant objects appear lighter and less saturated due to atmospheric haze. Capturing scenes with evident atmospheric perspective (like layers of mountains fading into the distance) can give a sense of vastness and depth, thus emphasizing scale.

6. Play with Shadows and Light

The play of light and shadow, especially during the golden hours of sunrise and sunset, can add depth and dimension to a scene. Long shadows cast by trees, rocks, or mountains can show the viewer how grand or tall these elements are.

7. Use Leading Lines

Leading lines can guide a viewer’s eye through an image and provide a visual journey that showcases the scale. Rivers, roads, or even patterns in sand dunes can serve as leading lines, drawing the viewer from the foreground to the distant horizon.

8. Drones and Aerial Photography

With the rise of drone photography, there’s a unique opportunity to capture landscapes from a bird’s-eye view. This perspective can reveal patterns and proportions that are hard to grasp from the ground, offering a fresh way to showcase scale.

Conveying scale in landscape photography is all about providing context. By giving the viewer a reference point, be it a person, object, or the play of light and shadow, you can transform a flat image into a story of vastness and grandeur. Next time you’re out with your camera, consider these techniques to infuse a sense of scale into your landscapes, making them more immersive and captivating.

What Lenses Work Best for Beautiful Background Blur?

Here is a portrait that uses background blur to make the model pop from the background.

Background blur is an excellent composition tool to set your subject apart from their surrounding areas. It’s another way of saying “minimum depth of field”.

Newer photographers, with entry-level equipment, often find the idea of background blur difficult, because no matter what they do they cannot create the effect.

Blurring a background requires several elements of photography to be successful. First and foremost is the lens.

For that reason, in this article, we will concentrate on lens selection to create optimal background blur.

Quick Tip

Your first consideration when blurring a background is the focal length of the lens.

The longer the focal length, the more blur will be created at a given f-stop.

For example, at f/2.8, a 200mm lens will create more background blur than a 50mm lens.

Wide-angle lenses will not create a noticeable background blur effect at any f-stop.

Any lens wider than a “normal” field-of-view lens will create a negligible background blur, even when you have set the f-stop to the widest opening.

A normal field of view is between 50 and 55mm for a full-frame sensor and 28-34mm on a camera with an APS-c sensor.

A “normal” lens is one that closely mimics the field of vision for the human eye.

The lens in the image above is most definitely not a “normal” lens. A very long telephoto lens like this would create background blur even at smaller apertures!

What about the relationship between aperture and background blur?

The photographic term “fast lens” refers to the largest aperture available on the lens. A lens with a very wide maximum aperture is a faster lens than a similar lens with a smaller maximum aperture.

This fact of optics is why creating background blur with kit lenses is difficult to impossible. They generally have a smaller maximum aperture.

The lens above has a maximum aperture of f/1.4. This lens would be considered very fast, and it would be extremely efficient at creating background blur.

This Canon 24-105mm zoom lens has a maximum aperture of f/4. This lens is not as fast a lens as compared to the previous example, where the maximum aperture was f/1.4.

Some lenses display the aperture scale outside the lens (such as the Nikon 85mm).

Other lenses only display the aperture scale inside the viewfinder, such as Canon 24-105mm zoom lens.

Most lenses have variable apertures. The one exception is mirror lenses. They have a fixed aperture, usually around f/8.

Quick Tip

With a zoom lens (variable focal length), such as the Canon example, the lens will create more background blur at a longer focal length setting versus a shorter focal length setting.

For example, this Canon lens set at the maximum aperture of f/4 will create more background blur at the 105mm focal length setting versus the 24mm focal length setting (where it would create little to no background blur).

Conclusion: When selecting a lens for background blur…

  • A lens with a longer focal length works better than a shorter one.
  • A lens with a wider maximum aperture works better than a lens with a smaller one.
  • A “fast lens” is one that has a large maximum aperture (f/2.8 or larger).
  • Kit lenses, as a general rule, are not very fast and therefore do a poor job of creating background blur.
  • Wide-angle lenses are also a poor choice for creating background blur.
  • A lens focal length starting at a “normal” field of view (matching the human eye) and escalating toward longer focal lengths (telephoto) creates the best background blur.
  • When using a zoom lens (variable focal length), the longest focal length will create a better background blur than the shorter focal lengths at the maximum aperture.

Note: Some zoom lenses have a “variable” maximum aperture. You would want to consider this when choosing a focal length for background blur with a zoom lens.


Exploring the Depths: The Fascinating World of Underwater Photography

Underwater photography is a captivating and exhilarating genre that allows photographers
to dive into a whole new world of visual possibilities. From vibrant coral reefs teeming
with colorful marine life to mesmerizing seascapes, the underwater realm offers endless
opportunities for creativity and exploration. In this article, we will take a plunge into the

fascinating world of underwater photography and delve into the techniques and
considerations that can help you capture stunning images beneath the waves.

One of the first and most important aspects of underwater photography is having the right
equipment. Investing in a reliable underwater camera housing or a waterproof camera
is essential to protect your gear from water damage. Make sure the housing is suitable
for the depths you plan to explore. Additionally, consider using wide-angle lenses to
capture expansive underwater scenes or macro lenses to capture intricate details of
smaller subjects.

Lighting is a critical factor in underwater photography, as the properties of light change as
you descend into the depths. The colors become less vibrant and red wavelengths are
absorbed more quickly. To counteract this, you can use artificial lighting sources such as
strobes or underwater flashes. These help restore the colors and illuminate your
subjects, bringing them to life in your images. Experiment with different angles and
intensities of light to create stunning visual effects and add depth to your photographs.

Composition plays a vital role in creating captivating underwater images. The same
principles that apply to composition in other genres of photography can be applied
underwater as well. Utilize the rule of thirds, leading lines, and framing techniques to
create visually engaging and balanced compositions. Experiment with angles and
perspectives to add depth and interest to your shots. The buoyancy of water allows you
to move freely, so take advantage of this to find unique viewpoints and capture dynamic
images.

Mastering buoyancy is a skill that can greatly enhance your underwater photography. Being
neutrally buoyant allows you to effortlessly maneuver and position yourself for the best
shots. Practice controlling your buoyancy to achieve the desired position and angle,
enabling you to capture stable and sharp images. This also helps minimize disturbance
to the marine environment and ensures you can navigate safely underwater.

When it comes to subject selection, the underwater world offers an abundance of
captivating options. Vibrant coral reefs, schools of fish, and unique sea creatures are just
a few examples of the diverse marine life you may encounter. Research your diving
location beforehand to identify potential subjects of interest. Exercise patience and
observation to capture elusive moments and behaviors in their natural habitat.

Post-processing is an essential part of underwater photography. Adjustments to color
balance, contrast, and saturation can help bring out the true colors of the underwater

world and correct any color casts caused by the water. Utilize editing tools to remove
backscatter, which are tiny particles suspended in the water that can appear as
unwanted specks in your images. Enhance the overall clarity and sharpness to showcase
the intricate details of your underwater subjects.

Lastly, always prioritize safety when engaging in underwater photography. Follow proper
diving protocols, familiarize yourself with the dive site, and be aware of potential
hazards. Respect marine life and their habitats, and practice responsible diving and
photography techniques. Remember, capturing stunning images is important, but it
should never come at the expense of the environment or your own safety.

In conclusion, underwater photography is a thrilling and rewarding genre that opens up a
whole new world of visual exploration. By having the right equipment, understanding
lighting, mastering composition, practicing buoyancy control, and respecting safety
guidelines, you can capture awe-inspiring images that showcase the captivating beauty
of the underwater realm. So, gear up, dive in, and embark on an extraordinary
photographic adventure beneath the waves.