Harnessing Soft Light: Where & When to Find Diffused Lighting

As a photographer, understanding light is as fundamental as understanding your camera. One of the most flattering and universally appealing types of lighting is diffused light. This kind of light is soft, gentle, and does not cast harsh shadows, making it ideal for a variety of photography genres. But where and when can you find the best diffused lighting? Let’s dive into some key tips to help you harness the power of diffused light for your photography.
1. Golden Hour – Dawn and Dusk

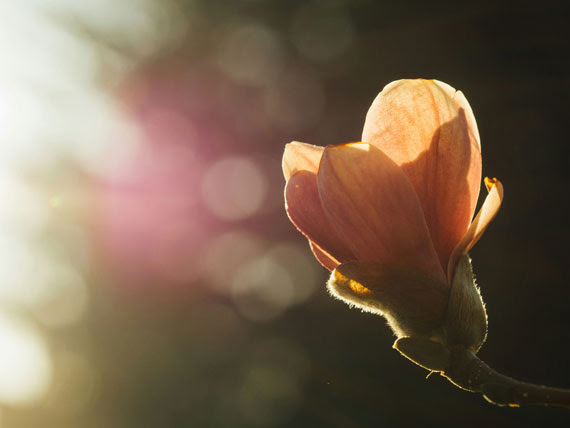
Golden hour is that magical time just after sunrise or just before sunset. The sun is low in the sky, and its light is filtered through a greater amount of the Earth’s atmosphere, which scatters the direct sunlight and reduces its intensity. This natural diffusion creates a warm, soft light that is not only less intense but also casts long, gentle shadows. It’s perfect for portrait photography, landscape shots, and even urban scenes where the golden tones can bring a new dimension to your compositions.

2. Overcast Days – Natural Soft Boxes

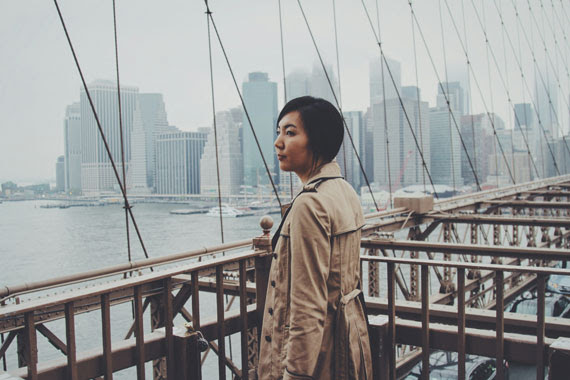
Cloudy days might seem dull to the untrained eye, but they are actually perfect for diffused lighting. The clouds act like a giant softbox in the sky, scattering and softening the sunlight. This eliminates harsh shadows and provides a clean, even light that is excellent for shooting portraits, macro photography, or any scene where you want subtle details and colors to emerge without the interference of strong shadows.

3. Shaded Areas – Soft Shadows

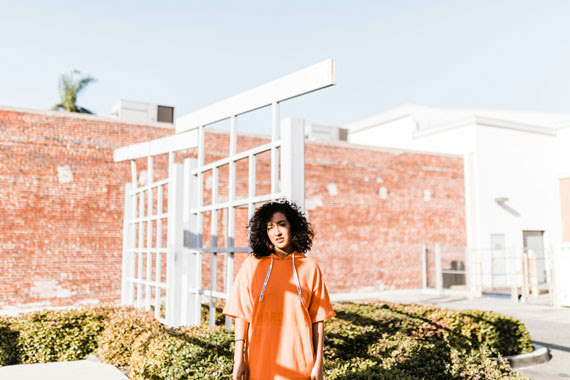
When the sun is too intense, look for shaded areas under trees, buildings, or other large objects. These spots can provide a sanctuary of diffused light. The key here is to find areas where the sunlight is not directly hitting the subject but is instead filtered through or bounced off other surfaces. This setup is particularly useful for achieving beautifully lit portraits without squinting subjects or harsh facial shadows.

4. Using Windows – Indoor Diffusion

Indoors, windows can serve as excellent sources of diffused light, especially when covered with sheer curtains. The fabric acts to scatter the light, mimicking the effect of a softbox used in studio photography. This method is ideal for product photography, food photography, and portraits. The directional light from a window can also create a dynamic range of light and shadow, adding depth to your indoor shots.

5. The Blue Hour – Twilight Ambience

Following the golden hour, the blue hour provides a brief period where the sky takes on a predominantly blue tone with a cool, soft light. This light is diffused through the absence of the direct sun and offers a unique quality that is excellent for cityscapes, landscapes, and even nighttime portraiture. The softness helps to smooth out imperfections and brings a tranquil and ethereal mood to photographs.

6. Tools to Enhance Diffusion

While natural light provides many opportunities for diffused lighting, sometimes manipulation is necessary to achieve the perfect shot. Tools like diffusers, reflectors, and softboxes can help recreate or enhance the qualities of diffused light. These are particularly useful in harsh lighting conditions or when shooting in direct sunlight.

Summary:

Finding the perfect light can sometimes be a challenge, but with an understanding of where and when to find diffused light, you can significantly improve the quality and aesthetic of your photographs. Whether utilizing the golden tones of the early morning, the soft evenness of an overcast day, or the subtle hues of twilight, mastering diffused lighting can transform your photography. Always be prepared to observe and adapt to your environment to make the most of the light available to you, and don’t hesitate to use tools to create or enhance light diffusion where necessary.

How to Fit Photography Practice into a Busy Schedule

In the hustle and bustle of modern life, finding time for hobbies and personal interests like photography can be a challenge. However, with a bit of creativity and planning, it’s possible to carve out time for your passion. Here are some effective strategies to incorporate photography into your busy schedule.

1. Carry Your Camera Everywhere

The best way to ensure you get more photography done is by having your camera accessible at all times. Whether it’s a DSLR, a compact camera, or just your smartphone, having your camera handy means you can capture those unexpected moments of beauty or interest in the midst of your daily routines.

2. Make it a Daily Ritual

Set a daily goal, even if it’s just taking one photo a day. This could be during your morning walk, on your commute to work, or even during lunch. The key is consistency. Over time, this daily habit not only improves your skills but also helps you see the world through a more artistic lens.

3. Utilize Your Lunch Break

Instead of spending your lunch break scrolling through social media, grab your camera and go for a walk nearby. Even a short, focused photography session can be refreshing and creatively fulfilling. This also helps you to explore and photograph your local area more extensively.

4. Join a Photography Group

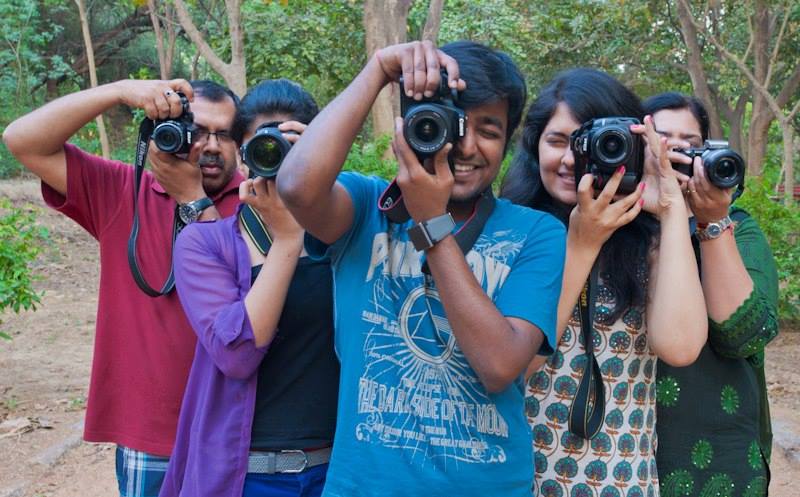
Participating in a photography group can motivate you to practice more regularly. These groups often organize weekly or monthly meet-ups and challenges, which can be a great way to schedule your photography practice. Moreover, being part of a community provides you with immediate feedback and tips to improve your skills.

5. Attend Workshops or Classes

Enrolling in a photography class or workshop can force you to dedicate specific times to your photography. It also adds the benefit of learning from professionals and networking with fellow photography enthusiasts. This structured approach can be particularly effective if you find self-directed practice challenging.

6. Plan Photography Trips

Occasionally, plan for longer photography sessions during weekends or on days off. A half-day or full-day trip dedicated to photography can significantly boost your skills, allowing you to experiment with different techniques and subjects that you don’t usually encounter during your daily routine.

7. Set Project Goals

Create a personal project with clear objectives and timelines. This could be a 365-day photo challenge, a thematic portfolio, or a documentary project. Having a specific goal helps to maintain focus and gives your practice purpose, making it easier to justify and set aside time regularly.

8. Combine Activities

Combine photography with other activities that you do for relaxation or exercise. For example, if you enjoy hiking, bring your camera along to capture landscapes. If urban exploration is your thing, a camera can accompany you on city walks. This way, photography complements your lifestyle rather than competes with it.

9. Use Technology to Your Advantage

Utilize apps and tools that can help streamline your photography practice. Apps like Lightroom Mobile allow you to edit photos on the go, and various online platforms provide tutorials that you can watch during downtime.

10. Reflect and Adjust

Regularly reflect on how well your current schedule is integrating photography. If you find certain strategies aren’t working, adjust them. Flexibility is key to maintaining any hobby alongside a busy life.

Incorporating photography into a packed schedule requires intentional planning, but the rewards are well worth the effort. As you progress, you’ll not only improve your photographic skills but also find that photography enriches your daily experiences, providing a creative outlet that nurtures your overall well-being.

Rembrandt Lighting: Creating Mood & Depth in Portraits

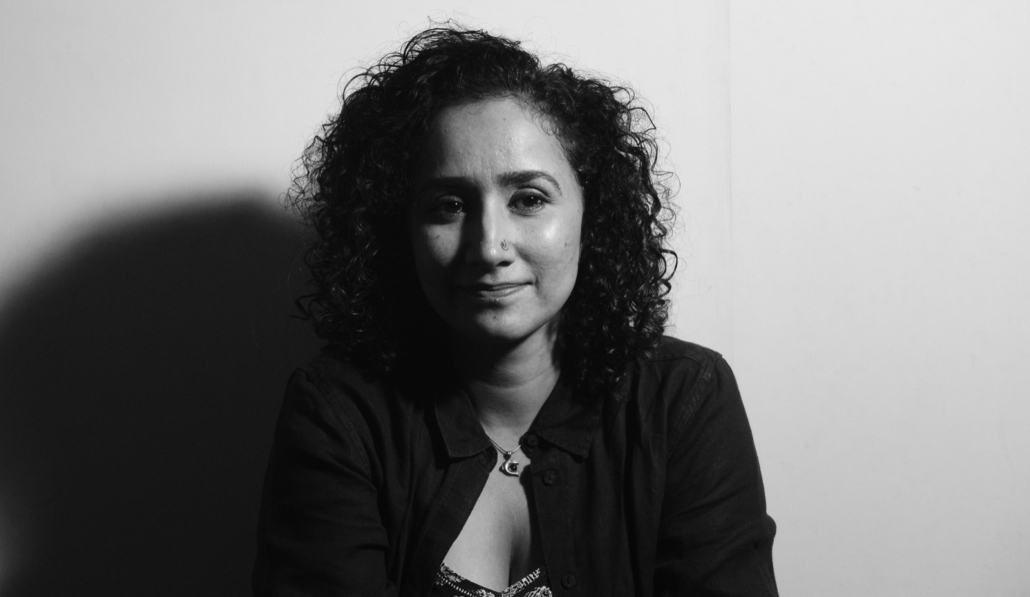
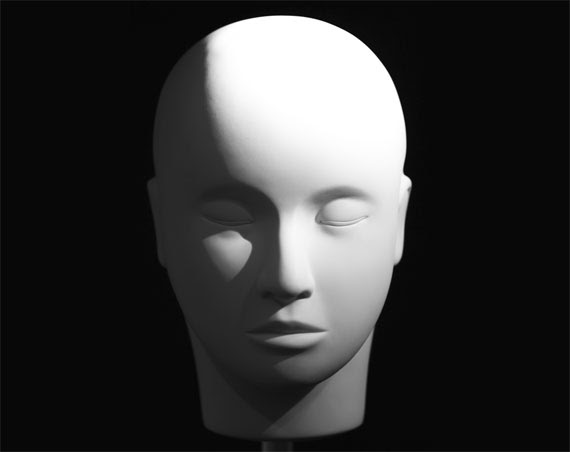
Rembrandt lighting, named after the famous Dutch painter Rembrandt Harmenszoon van Rijn, is a popular lighting technique used in photography and cinematography to create a dramatic effect that draws attention to the subject’s features. This technique is characterized by an illuminated triangle under the eye of the subject, on the less illuminated side of the face. This lighting style emphasizes depth and dimension, making it a favorite among portrait photographers.

Why Use Rembrandt Lighting?

The allure of Rembrandt lighting lies in its ability to add a sense of volume and drama to a portrait. It enhances the facial features and brings a sculptural quality to the photograph. This technique is particularly useful for creating moody and evocative images that convey emotion and character, making it ideal for artistic portraits, actor headshots, and even moody fashion photography.

Setting Up Rembrandt Lighting

To achieve Rembrandt lighting, you’ll need to follow these steps:

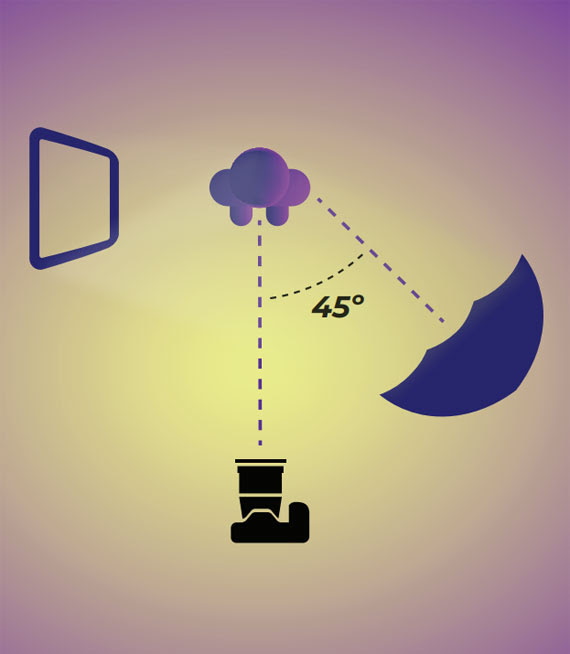
  1. Light Source: Begin with a single light source, such as a strobe or continuous light. The key is to use a light modifier like a softbox or an umbrella to soften the light, reducing harsh shadows.
  2. Positioning the Light: Place the light at a 45-degree angle from the subject, slightly above the head level, so that the light points down towards the face. This angle is crucial as it determines the shape and presence of the characteristic triangle of light.
  3. Adjust the Subject: Have the subject turn their face away from the light until the shadow of the nose and cheek meets to form a small triangle of light on the cheek opposite the light source. This triangle should not be larger than the eye and no longer than the nose.
  4. Experiment with Modifiers: Utilizing different modifiers can alter the softness and spread of the light. Experiment with reflectors to fill in shadows mildly, which can be particularly useful in softening the contrast for female portraits or commercial shots.

Visual Examples and Their Analysis

When examining photographs that utilize Rembrandt lighting, you’ll notice the play of light and shadow creates a compelling visual narrative. For instance, a portrait with Rembrandt lighting can highlight the rugged features of a male subject or the gentle curves of a female subject’s face, adding layers of depth and emotion to the image.

Common Mistakes to Avoid

  • Overexposing the lit side of the face, which can lead to loss of detail.
  • Underexposing the shadow side, which might bury essential facial features in darkness.
  • Misplacing the light, which fails to form the triangular highlight and loses the effect.

Applications in Different Photography Genres

While traditionally used in portraits, Rembrandt lighting can also be adapted for use in various other genres like fashion photography, where it can add a dramatic flair, or in product photography, where it can enhance texture and contrast.

Rembrandt lighting is more than just a technical skill; it’s a creative tool that allows photographers to explore the interplay between light and shadow. By mastering this technique, photographers can elevate their portraits, capturing not just images, but stories and emotions. Whether you’re a budding photographer or a seasoned professional, incorporating Rembrandt lighting into your photographic repertoire can significantly impact your visual storytelling.

Direct vs. Diffused Light in Photography

In the world of photography, light plays a pivotal role in capturing the essence and mood of a subject. The interplay of light and shadow not only defines the structure and depth of the image but also evokes certain emotions, making understanding its nuances crucial for photographers. Among the many characteristics of light that photographers must consider, the distinction between direct and diffused light is fundamental.

Advantages of Direct Light:

  1. Enhances Texture and Detail: Direct light accentuates textures and details in the subject, making it ideal for highlighting physical features and creating a sense of depth.
  2. Creates Drama: The strong contrasts and pronounced shadows generated by direct light can add a dramatic effect to your photographs, ideal for certain types of portraiture or dramatic landscapes.
  3. Control and Direction: Photographers can manipulate the direction and intensity of direct light, allowing for creative control over the composition and mood of the image.

Challenges with Direct Light:

  • Harsh Shadows: The intense nature of direct light can create deep, distracting shadows, particularly in portraiture.
  • Limited Latitude for Exposure: Direct light can lead to overexposed highlights and underexposed shadows, making it challenging to capture detail across the image.

What is Diffused Light?

Diffused light, on the other hand, is soft and evenly spread. It occurs when the light source is either naturally soft (like on an overcast day) or has been diffused through materials like a softbox or a sheer curtain. This type of lighting reduces the intensity of the light source and scatters it across a wider area, softening shadows and decreasing contrast.

Advantages of Diffused Light:

  1. Softens Features: Diffused light is flattering for portraiture as it softens skin tones and reduces the appearance of imperfections.
  2. Even Illumination: It provides even lighting, reducing harsh shadows and helping to maintain details in both highlights and shadows.
  3. Enhances Color: By reducing contrast, diffused light can help in capturing vibrant, saturated colors, ideal for nature photography or where color rendition is critical.

Challenges with Diffused Light:

  • Lack of Drama: While it’s excellent for even, soft illumination, diffused light can sometimes result in flat images lacking in depth and drama.
  • Reduced Texture and Detail: The very nature of diffused light that softens features can also diminish texture and fine detail in certain subjects.

Making the Choice

The choice between direct and diffused light should be dictated by the photographer’s artistic intent and the mood they wish to convey. For dramatic, high-contrast images, direct light can be incredibly effective. For softer, more evenly lit scenes, diffused light is preferable.

Understanding and mastering the use of both direct and diffused light can dramatically improve a photographer’s repertoire, allowing for greater creative flexibility and expression. By recognizing the impact of light quality on their subjects, photographers can choose the most appropriate lighting to complement their vision, enhancing the emotional impact and aesthetic appeal of their work.

In essence, both types of lighting have their place in photography, and the best choice depends on the context and the desired outcome of the photograph. Experimentation and experience are key in learning how to use light creatively and effectively to produce compelling images.

Key Aspects of Composition in Flower Photography

Flower photography is an art form that allows us to capture the delicate and ephemeral beauty of flowers. Whether you’re a professional photographer or an enthusiast capturing blooms in your garden, understanding the principles of composition can significantly enhance the impact of your photographs. In this blog post, we’ll explore the most crucial aspects of composition in flower photography to help you create stunning, evocative images.

1. Focus and Clarity

The focal point in flower photography is paramount. It’s essential to decide what part of the flower or scene you want to highlight. This could be the vibrant petals, the intricate patterns of the stamen, or even droplets of dew on the flower’s surface. A clear focus point draws the viewer’s eye and establishes the subject of your photograph. Employing a shallow depth of field can help isolate the subject, ensuring it stands out against a softly blurred background.

2. Lighting

Lighting can make or break a flower photograph. The best flower photos often utilize natural light, which can highlight the translucence of petals or cast fascinating shadows, adding depth and texture. The golden hours—shortly after sunrise or before sunset—offer soft, warm light that can enhance the colors and mood of your floral subjects. Conversely, overcast days provide diffused light that evenly illuminates a flower, minimizing harsh shadows and highlights.

3. Composition Rules

Understanding and applying composition rules can significantly improve your flower photography. The rule of thirds, for instance, involves dividing your image into nine equal segments with two horizontal and two vertical lines. Placing the flower or an interesting part of it at the intersections or along the lines can create a more engaging photo. Meanwhile, the use of leading lines or patterns can guide the viewer’s eye through the image, adding interest and movement.

4. Color and Contrast

Color plays a vital role in conveying the mood of your flower photographs. Warm colors can evoke feelings of passion and energy, while cool colors can impart a sense of calm and tranquility. Utilizing contrasting colors can make your subject pop and add vibrancy to your image. However, it’s essential to balance color contrast to ensure it enhances rather than overwhelms the subject.

5. Background and Context

The background can either complement your flower or distract from it. A cluttered or busy background can detract from the subject, while a simple, unobtrusive backdrop can make it stand out. Sometimes, including contextual elements like other flowers, leaves, or even the environment can add depth and tell a more compelling story. The key is to maintain a balance that supports the subject of your photograph.

6. Perspective and Angle

Changing your perspective or shooting angle can unveil a flower’s character in unique and unexpected ways. Don’t hesitate to experiment with different viewpoints, such as shooting from a low angle to capture the grandeur of a flower reaching towards the sky or getting close to reveal the intricate details of its texture and patterns. Each angle tells a different story and can evoke distinct emotions.

7. Simplicity

Sometimes, less is more in flower photography. A simple composition that emphasizes the flower without unnecessary distractions can be powerful. Simplicity often encourages the viewer to pause and appreciate the beauty and details that might otherwise go unnoticed.

In conclusion, mastering the aspects of composition in flower photography allows you to not only capture the beauty of your floral subject but also convey emotion and story. By focusing on these key elements, you can elevate your flower photographs from mere snapshots to compelling images that resonate with viewers. Remember, the best way to improve is to practice consistently, so don’t hesitate to explore, experiment, and let your creative vision flourish through your lens.