The Most Popular Focal Length for Landscape Photography

When it comes to landscape photography, choosing the right focal length is crucial for capturing breathtaking and expansive scenes. The most popular focal lengths for landscape photography typically fall within the wide-angle range, as they allow photographers to include as much of the scene as possible within the frame. Here’s a look at why certain focal lengths are favored and how they impact landscape photography.

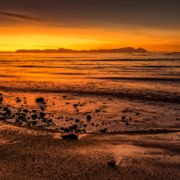
The 24mm focal length has become the gold standard in landscape photography for several reasons, contributing to its popularity among enthusiasts and professionals alike. This preference stems from its ability to provide a wide field of view, capturing vast landscapes in a single frame without the extreme distortion often found with wider lenses. It offers a natural perspective that closely mirrors the human eye, making scenes appear expansive yet true to life.

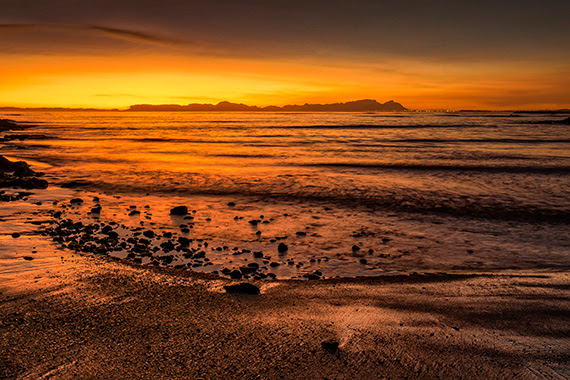
Photographers favor 24mm because it excellently balances foreground interest with the depth of the background, creating dynamic and engaging compositions. Its versatility in various settings, from mountain ranges to urban landscapes, further cements its status as a preferred choice. The 24mm lens, by offering this unique blend of wide-angle perspective and minimal distortion, has become an indispensable tool for capturing the beauty and grandeur of the natural world, making it a clear favorite in the landscape photography community.

Wide-Angle Lenses (24mm to 35mm)

Within the wide-angle category, lenses ranging from 24mm to 35mm are particularly beloved for their versatility. These focal lengths capture a broad field of view, making them ideal for including sweeping vistas and dramatic skies in the composition. A 24mm lens is especially favored for its balance, as highlighted above, but even moving towards 35mm can offer a slightly tighter composition while still retaining a wide perspective.

Ultra-Wide Lenses (14mm to 24mm)

For photographers aiming to capture an even wider perspective, ultra-wide lenses ranging from 14mm to 24mm are the go-to choice. These lenses excel at emphasizing foreground elements and creating a profound sense of depth and scale. However, they may introduce noticeable distortion, which can either be used creatively or need to be corrected in post-processing.

Standard to Short Telephoto Lenses (50mm to 100mm)

Beyond the realm of wide and ultra-wide lenses, standard to short telephoto lenses (50mm to 100mm) offer a unique perspective in landscape photography. A 50mm lens provides a view close to that of the human eye, offering compositions with minimal distortion and a natural feel. Lenses in the 70mm to 100mm range are excellent for isolating subjects, compressing scenes, and highlighting specific features of the landscape, offering a different approach to capturing nature’s beauty.

Summary:

The choice of focal length for landscape photography depends greatly on the photographer’s vision, the landscape being captured, and the desired outcome. While wide and ultra-wide lenses are popular for their capacity to envelop expansive scenes, longer focal lengths provide unique perspectives and compositional opportunities. The 24mm lens, in particular, stands out for its unparalleled ability to balance the vastness of landscapes with realistic perspectives, making it a favorite among landscape photographers. Experimentation with different focal lengths can unlock new and exciting ways to depict the natural world, continually enriching the art form of landscape photography.

Using Symmetry or Asymmetry in Photography Composition

Photography, at its core, is an art form that thrives on composition – the way elements are arranged in a frame. Two powerful tools in a photographer’s arsenal are symmetry and asymmetry. Mastering the use of these can dramatically alter the feel, balance, and appeal of a photo. In this blog post, we’ll explore how to effectively use symmetry and asymmetry to enhance your photography.

Understanding Symmetry in Photography

Symmetry is all about balance. When a photograph is symmetrical, it means that one side of the frame mirrors or closely resembles the other. This can be vertical symmetry (top to bottom), horizontal symmetry (left to right), or even radial symmetry (centered around a central point).

How to Use Symmetry:

  1. Look for Natural Symmetry: Nature is full of symmetrical patterns. Reflections in water, the wings of a butterfly, or the structure of a leaf are all great examples.
  2. Architectural Symmetry: Buildings and urban landscapes often have symmetrical designs. Capturing the essence of these structures can create visually striking images.
  3. Center Your Subject: In symmetrical photography, placing your subject in the center can enhance the impact of the symmetry. This works exceptionally well in portrait photography.
  4. Use Symmetry to Create Harmony: Symmetrical compositions often feel harmonious and pleasing to the eye, creating a sense of calm and balance.
  5. Reflections Are Your Friend: Water bodies, glass, and other reflective surfaces can be used to create natural symmetry.

Embracing Asymmetry in Photography

Asymmetry involves an imbalance in the composition, where one part of the frame does not mirror the other. It’s a powerful way to create dynamic, interesting, and thought-provoking images.

How to Use Asymmetry:

  1. Rule of Thirds: Imagine your image is divided into nine equal segments by two vertical and two horizontal lines. Place your subject along these lines or at their intersections for a more engaging composition.
  2. Leading Lines: Use lines within your frame to lead the eye to your subject. These can be natural, like a row of trees, or man-made, like a winding road.
  3. Play with Angles: Sometimes, just changing your angle can introduce asymmetry in an image. Look for unique perspectives or viewpoints.
  4. Contrast and Color: Use contrasting elements or colors to create a focal point in your image. This can draw the viewer’s eye to a specific part of the photo.
  5. Fill the Frame Differently: Instead of centering your subject, place it off to the side and let the rest of the frame ‘breathe’. This can create a sense of movement or action.

Tips for Both Symmetry and Asymmetry

  • Understand Your Message: The choice between symmetry and asymmetry should depend on the story you want to tell. Symmetry often conveys peace, stability, and balance, while asymmetry can convey excitement, movement, or unease.
  • Experiment: Try both symmetrical and asymmetrical compositions in the same setting to see how they change the mood of the photo.
  • Post-Processing: Sometimes, symmetry can be enhanced or created during the editing process, while asymmetry can be emphasized by cropping or adjusting angles.
  • Keep Practicing: The more you practice, the better you will become at seeing and utilizing these compositional elements in your photography.

In conclusion, both symmetry and asymmetry have their unique appeals and can greatly impact the composition and storytelling of your photographs. By understanding and applying these principles, you can add depth and interest to your photography, regardless of your subject. So, grab your camera and start experimenting with these composition techniques today!

How to Set Up the Ultimate Travel Photography Backpack

Embarking on a photography adventure? Whether you’re scaling the misty mountains of Scotland or navigating the bustling streets of Tokyo, having a well-prepared travel photography backpack is essential. In this post, we’ll guide you through setting up your ultimate travel photography kit, ensuring you’re equipped and ready to capture those once-in-a-lifetime shots.

. Choosing the Right Backpack:

The foundation of your travel photography gear is the backpack. Look for something durable, weather-resistant, and comfortable to carry. Size matters too; it should be spacious enough to fit your gear but compact enough to meet airline carry-on requirements. Consider backpacks with customizable compartments to securely fit your camera equipment.

2. Camera and Lenses:

Your camera is your most important tool. Whether you prefer a DSLR, mirrorless, or a compact camera, ensure it’s up to the task. Pack lenses that cover a range of focal lengths; a wide-angle lens for landscapes, a standard zoom for general purposes, and maybe even a telephoto lens for distant subjects. Don’t forget lens cleaning kits to keep your shots spotless.

3. Tripod:

A lightweight compact tripod is a game-changer for travel photography. It’s essential for long exposure shots, night photography, and self-portraits. Look for one that’s sturdy yet folds down small enough to easily fit in your backpack.

4. Extra Batteries and Memory Cards:

You don’t want to miss a shot because you ran out of battery or memory. Pack extra batteries and memory cards, and consider a portable charger for emergencies.

5. Filters:

Filters can be useful in certain situations. A polarizing filter is great for reducing reflections and enhancing colors, while neutral density filters allow for longer exposure times in bright light.

6. Laptop or Tablet:

For longer trips, consider bringing a laptop or tablet for editing and backing up photos. Ensure it’s lightweight and has a good battery life. Don’t forget the external hard drive for extra storage.

7. Personal Comfort and Safety:

Pack for personal comfort and safety. This includes weather-appropriate clothing, a water bottle, sunscreen, and snacks. If you’re venturing into remote areas, a first-aid kit and a multi-tool can be lifesavers.

8. Miscellaneous Essentials:

Don’t forget the small stuff – lens cloths, a notebook and pen for jotting down details, and plastic bags to protect your gear in unexpected rain.

9. Customizing Your Pack:

Customize your pack based on your destination and the type of photography you plan to do. For wildlife photography, more telephoto lenses might be necessary. For urban landscapes, perhaps a few fast prime lenses.

Packing the ultimate travel photography backpack is about balancing the need for equipment with the need for mobility. Every item in your backpack should serve a purpose. With careful planning and the right gear, you’ll be well-equipped to capture stunning images that tell the story of your travels. Happy shooting!

The Importance of a Focal Point

A focal point is the part of an image that draws the eye of a viewer to the most important part of the image or the area that you want to highlight. How you do this will make or break the final image. If you don’t know how to create this point then you will not achieve much in your photography.

The professionals have all worked this one out and if you are attempting to create similar images then learn this point well. It frustrates the eye of a viewer if there is no focal point, as the eye is not drawn to any one particular part of the photo. The focal point only occupies a small part of the scene but will make or break the whole image. The simplest form of this is an isolated object seen from a distance on a plain background.

So how is this achieved successfully? Let’s take a look at a few pointers.

1. Placing the Focal Point

Fundamental to photography this rule needs to be learnt well and executed to perfection. If you know where to place your focal point then you will shoot great images every time. A focal point needs to be off centred and never in the middle of an image. The rule of thirds places it at a point that is very pleasing to the eye as discovered by the ancient Greeks. This golden rule will bring you success every time. Imagine a noughts and crosses or tic-tac-toe grid. Two lines across the image and two lines down the image—vertically and horizontally placed. Equally spaced, they cut the image up into thirds. Where these lines intersect are your focal points. The horizontal lines are where you place your horizons. The human eye loves to view subjects placed at these intersections. Take a magazine or travel book and take a look at how many times this rule is used effectively and see how your eye is drawn to them.

2. Selective Focus

This is an incredibly effective way to focus attention on your subject of focal point. You need to know how aperture and depth of field works in order to use it properly. But, basically it’s very simple. Your settings (e.g. f/2.8, f/4, f/5.6 and so on) change the size of your aperture all the way up to f/32. You only need to be concerned with the lower apertures for this effect. If your lens goes to f/1.2, brilliant, but most lenses won’t take you below f/4 or f/2.8, as they get more expensive the wider the aperture. Depth of field is the area of focus in front of and behind your subject. With the aperture wide open at f/2.8 you will have very little in focus which makes it so effective with selective focusing. Everything not on the same focal plane as the subject will be out of focus and thereby excluded from the viewer’s attention. The longer your lens, the less depth of field you will have and the more you will be able to selectively focus.

It’s a great way of drawing attention when used in conjunction with the rule of thirds.

3. Exposure

By underexposing parts of the image (i.e. making them darker), the areas that are light will stand out. If you are able to able to use this effectively the light parts will stand out as focal points and whatever you place here will become the point of focus in the photo. This really works well if you have a subject that is lighter than the underexposed, darker areas. Key to the process is knowing what the final image will look like in mind’s eye.

4. Light Source

This really pushes your photographic eye to the limits and if you see the opportunity and go for it, will result in a stunning photo. How this works is that when you see a shaft of light or a ray of sunlight entering a window or coming through the clouds, use it to place your subject. A patch of late afternoon sun in dimming light will create an area that is much lighter than the surroundings.

When you shoot an image and take the metering off this area, the surrounding environment will appear darker. The image now has a focal point that draws the eye in to the image. This will also work at night where a solitary window is lit and the surrounding area is dark. Experiment with this technique and you will soon be creating dramatically lit photos.

5. Eyes

By placing a person’s eyes on a two thirds intersection a viewers eyes are immediately drawn to that area. When the subject is looking down on something else like a child or an object your eye will be naturally drawn to the point where the subjects eyes are focused. Whenever you shoot a person eyes they will automatically become the focal point so if they are the focal point then you have a problem and they will compete for attention.

6. Two Focal Points

Sometimes you will have two focal points and there will be competition, but, you can offset this by using size. One of the focal points must be considerably larger which will draw the eye but immediately your focus will move to the smaller focal point. If they are the same size the viewer’s eyes will dart between them. So be very careful when using a double focal point.

A focal point is essential to any great image and you need to be able to create this in every image. An image lacking this will appear flat and without impact. As you learn digital photography it will become easier and easier to place it in the right position. Happy shooting!

Photo Composition: How to Tell a More Compelling Story

They say that a picture is worth a thousand words. That means that your photographs should be a great way for you to communicate. The question is, do your photographs communicate the right thousand words to tell your story?

Have you ever had the experience of photographing in a wonderful location, feeling eager to rush home and look at your pictures, only to be disappointed in the results? It’s quite a challenge to convert a three-dimensional, full sensory experience into a two-dimensional photograph.

I would like to share a few tips on composition that I think can boost your success rate in capturing your experience while photographing. Instead of just raising your camera for a quick snapshot, take the time to make a careful composition that will guide your viewer to understand what you think is important in the scene, and even how you feel about it.

Tip #1: Choose colors and tones that reinforce your story

Light is the fundamental building block of any image. Light produces two kinds of contrast: color contrast and tonal contrast. Color is the hue that you see, like red, or green, or purple. Tone is another word for brightness, or how light or dark something is. Our brains are good at forming associations, and we associate colors and tones with particular feelings. These same associations appear in our spoken language. You’ve heard the expressions, “He was in a dark mood,” and “She was feeling blue.”

Blue connotes melancholy or tranquility. It’s also a color associated with stability and reliability. (What color are the logos of IBM, Microsoft, and Ford?) Red is the color of passion. Photographing an orange beach umbrella gives a stronger impression of a hot day than a purple one. Using dark tones creates a sense of gloom and foreboding. Light-toned images make us feel light-hearted and uplifted. Consider carefully whether the tones and colors in your image strengthen the story you want to tell or contradict it.

Tip #2: Use lines to guide your viewer’s eye

Color and tone also reveal lines in your image. Lines are the boundaries created where two contrasting colors or tones meet. A thin shape, like a road, the stem of a plant, or a tree branch, may also be perceived as a line in your photograph. The brain’s visual cortex is programmed at a fundamental level to follow lines.

This is a powerful tool for you as a photographer. You can guide your viewer’s eye toward what you consider important in the image by using something in the environment to point to it. Conversely, be careful not to inadvertently place lines so that they lead your viewer out of the image.

Tip #3: Orient the lines in your image so that they convey the right emotion

Just as with colors, our brains also make emotional associations with line orientation. Vertical lines in an image give an impression of power, strength and pride. Horizontal lines are stable and calm. Diagonal lines, on the other hand, are dynamic, and signify motion or change. Curved lines may convey a sense of melancholy or of hope, depending on the direction in which they curve.

Think carefully when composing your image so that you include colors, tones, and lines that reinforce the story you’re trying to tell. You’ll be much more likely to create a photograph that captures and communicates how you felt when you were observing the original scene.